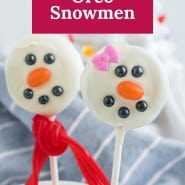
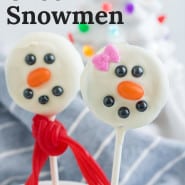
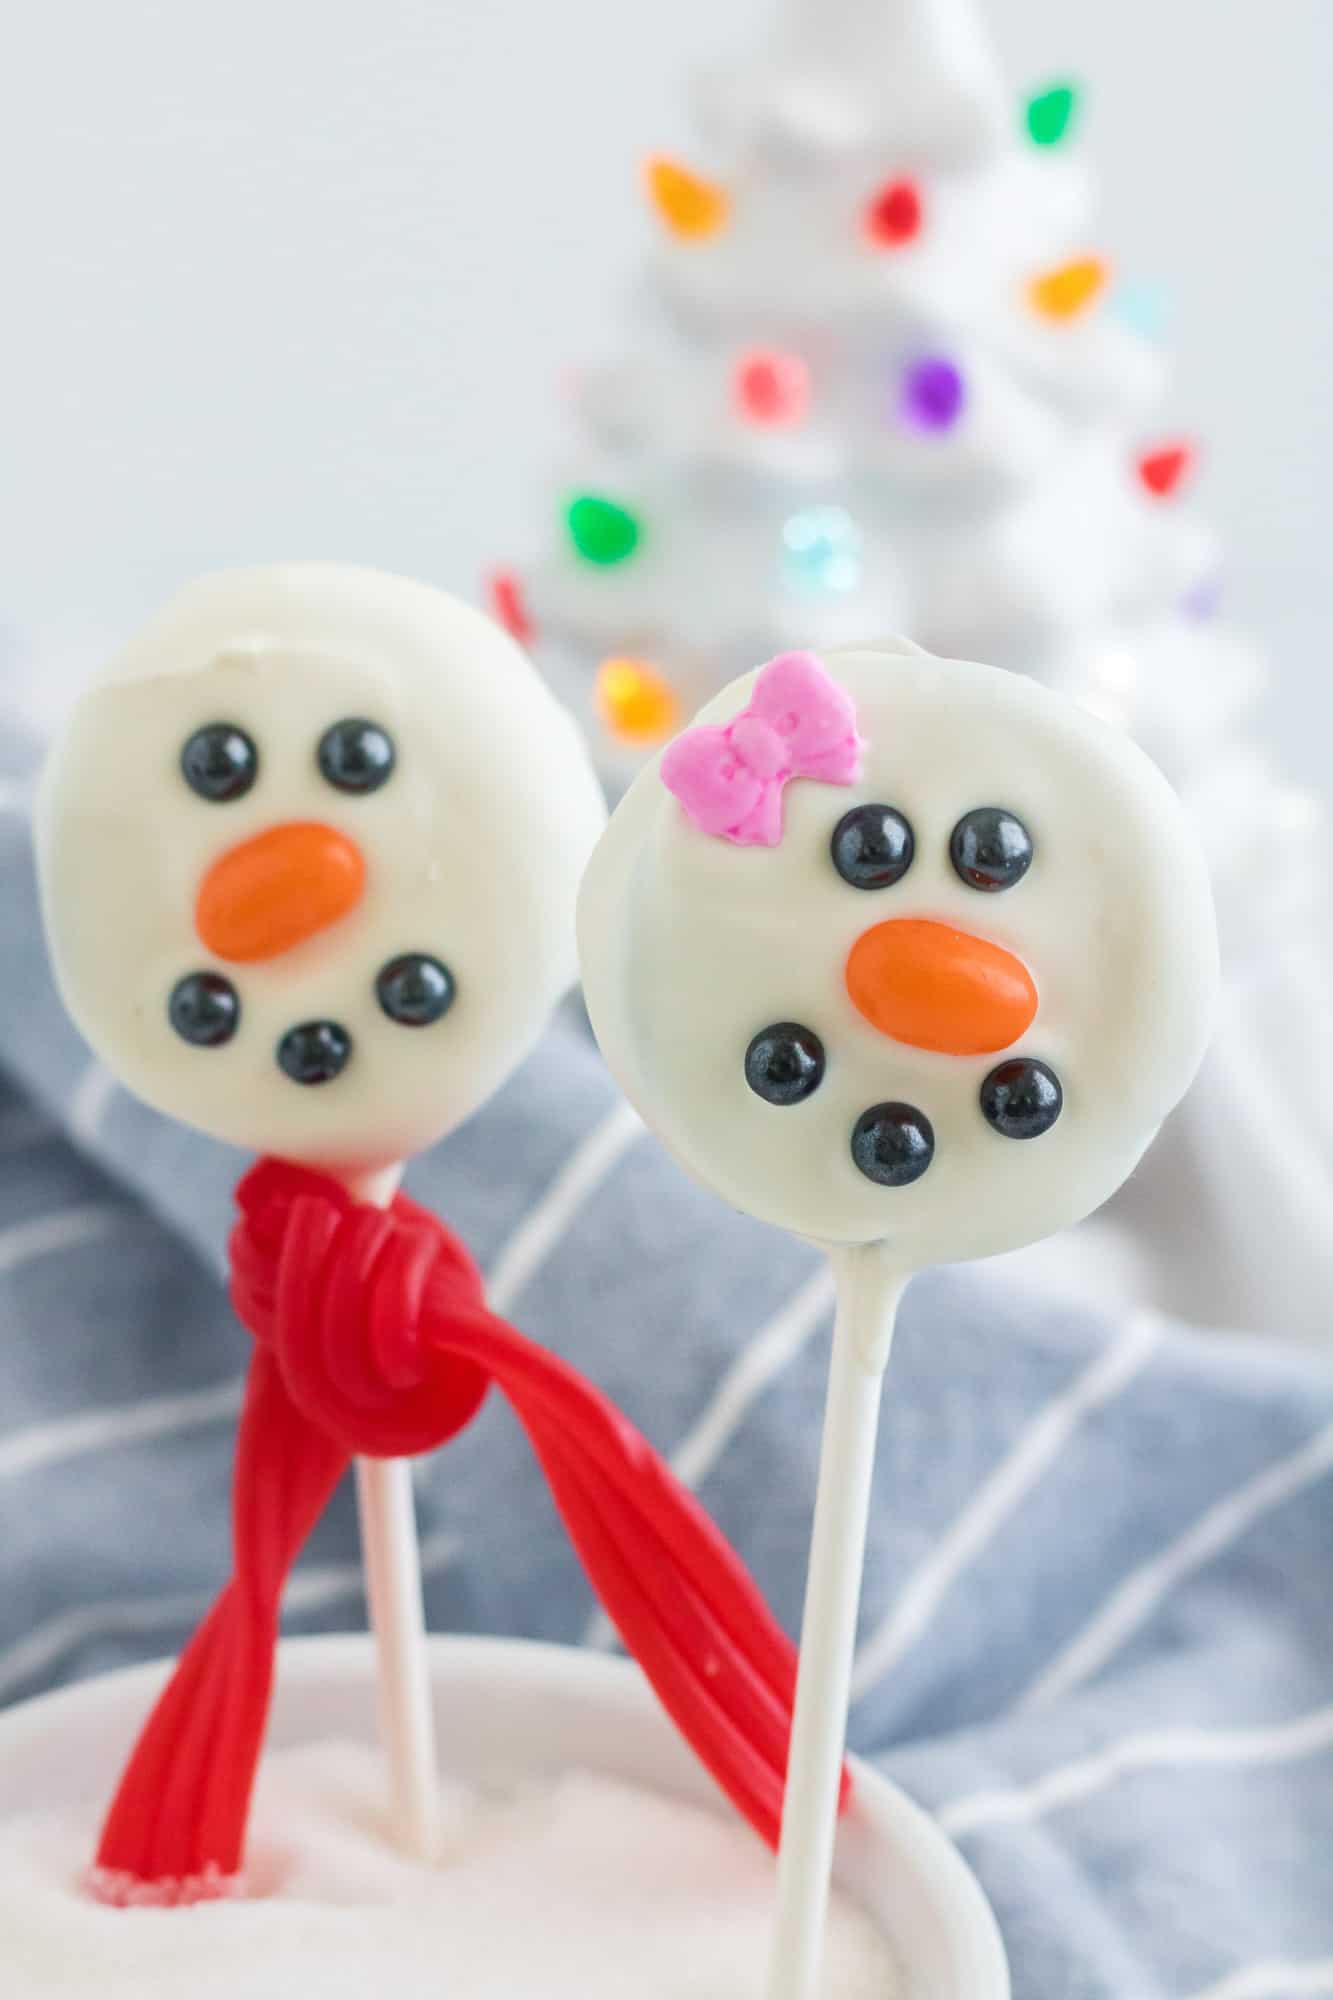
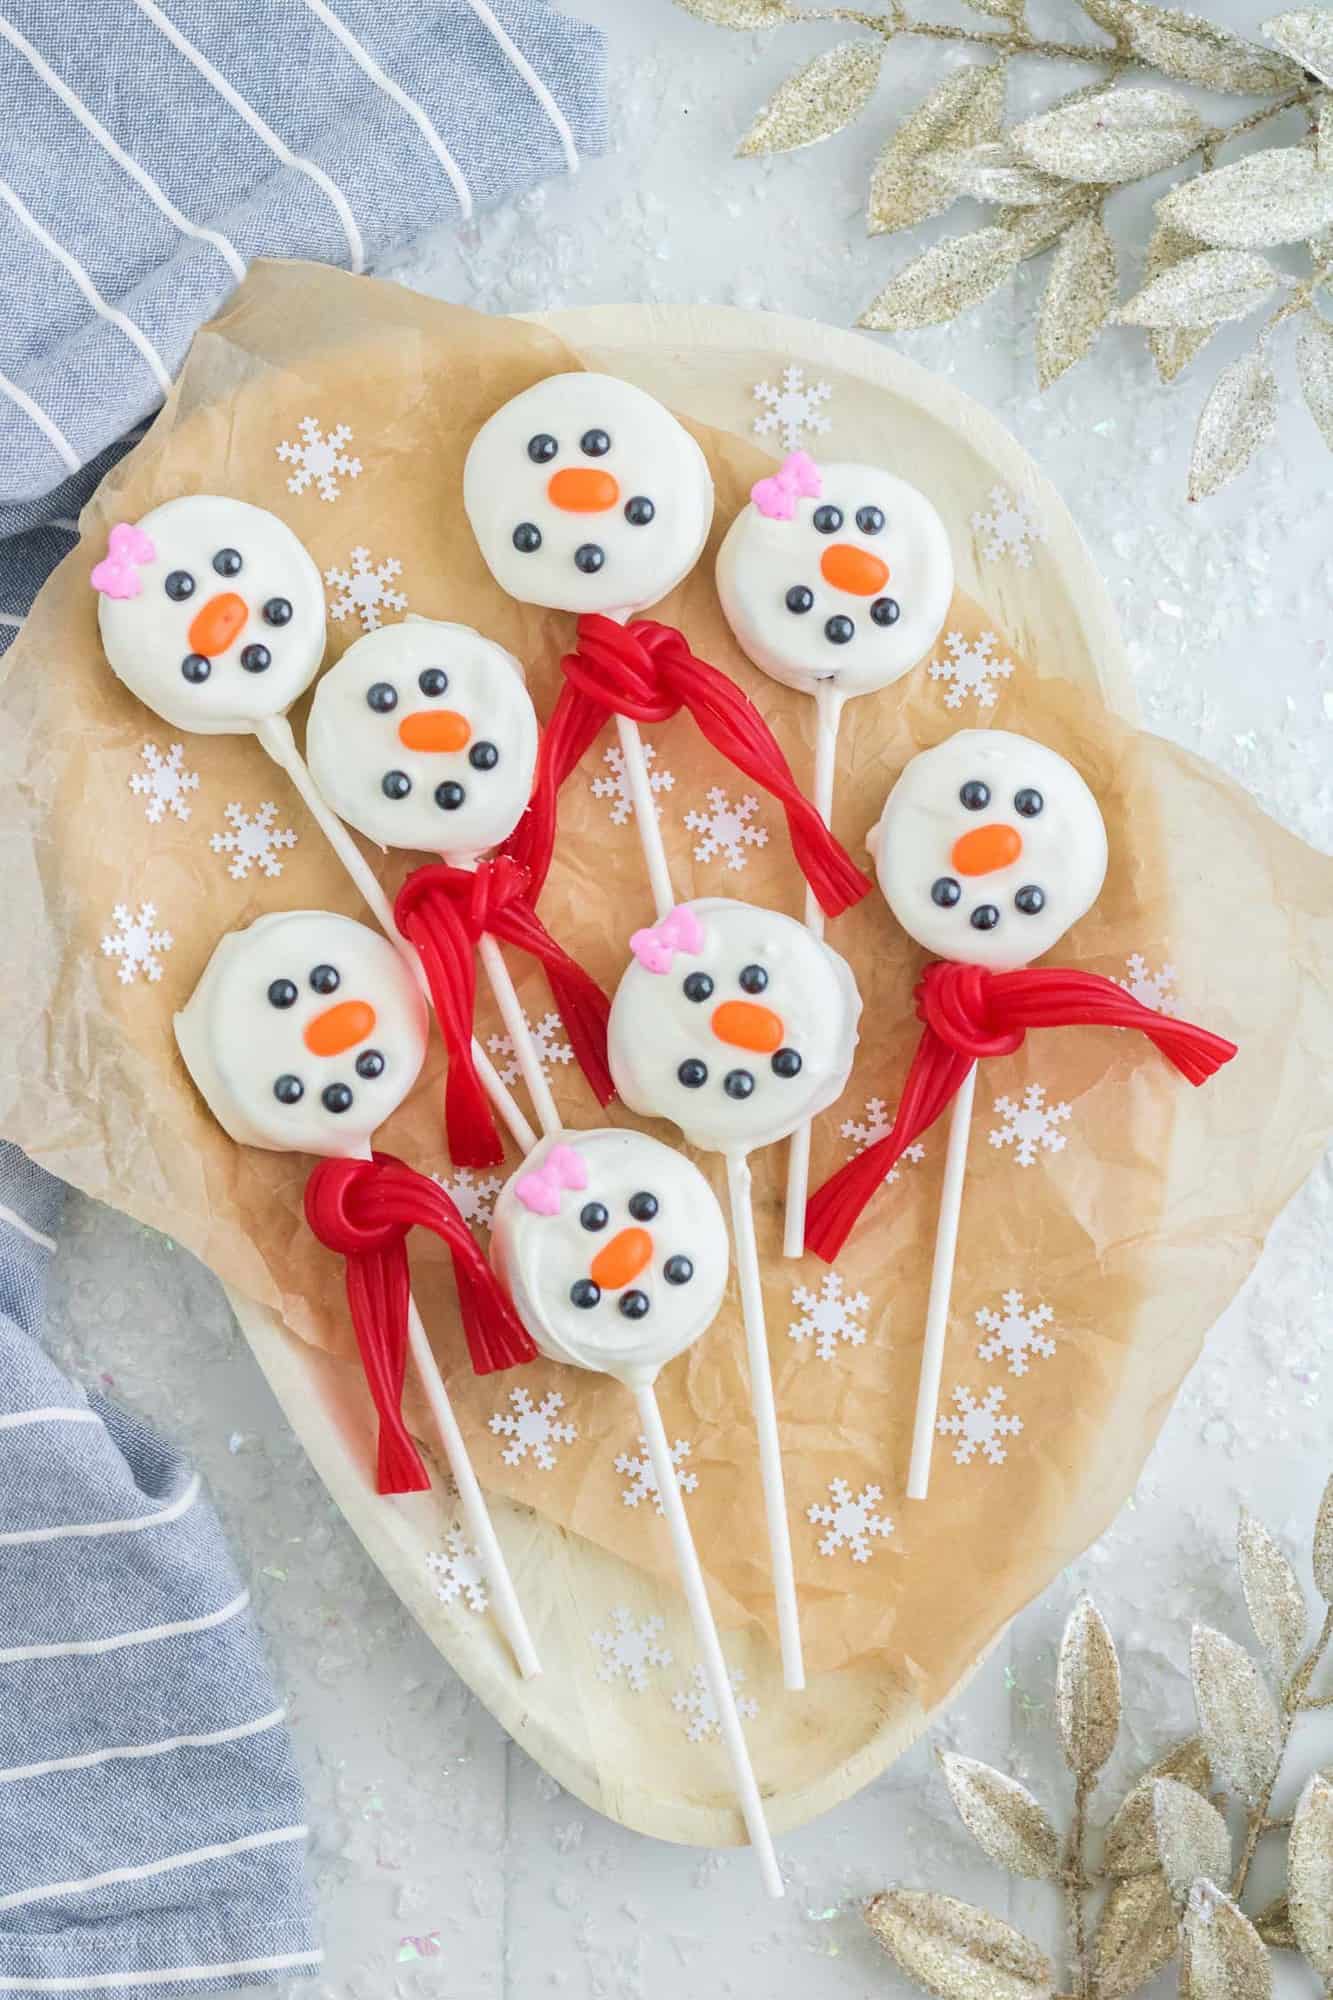
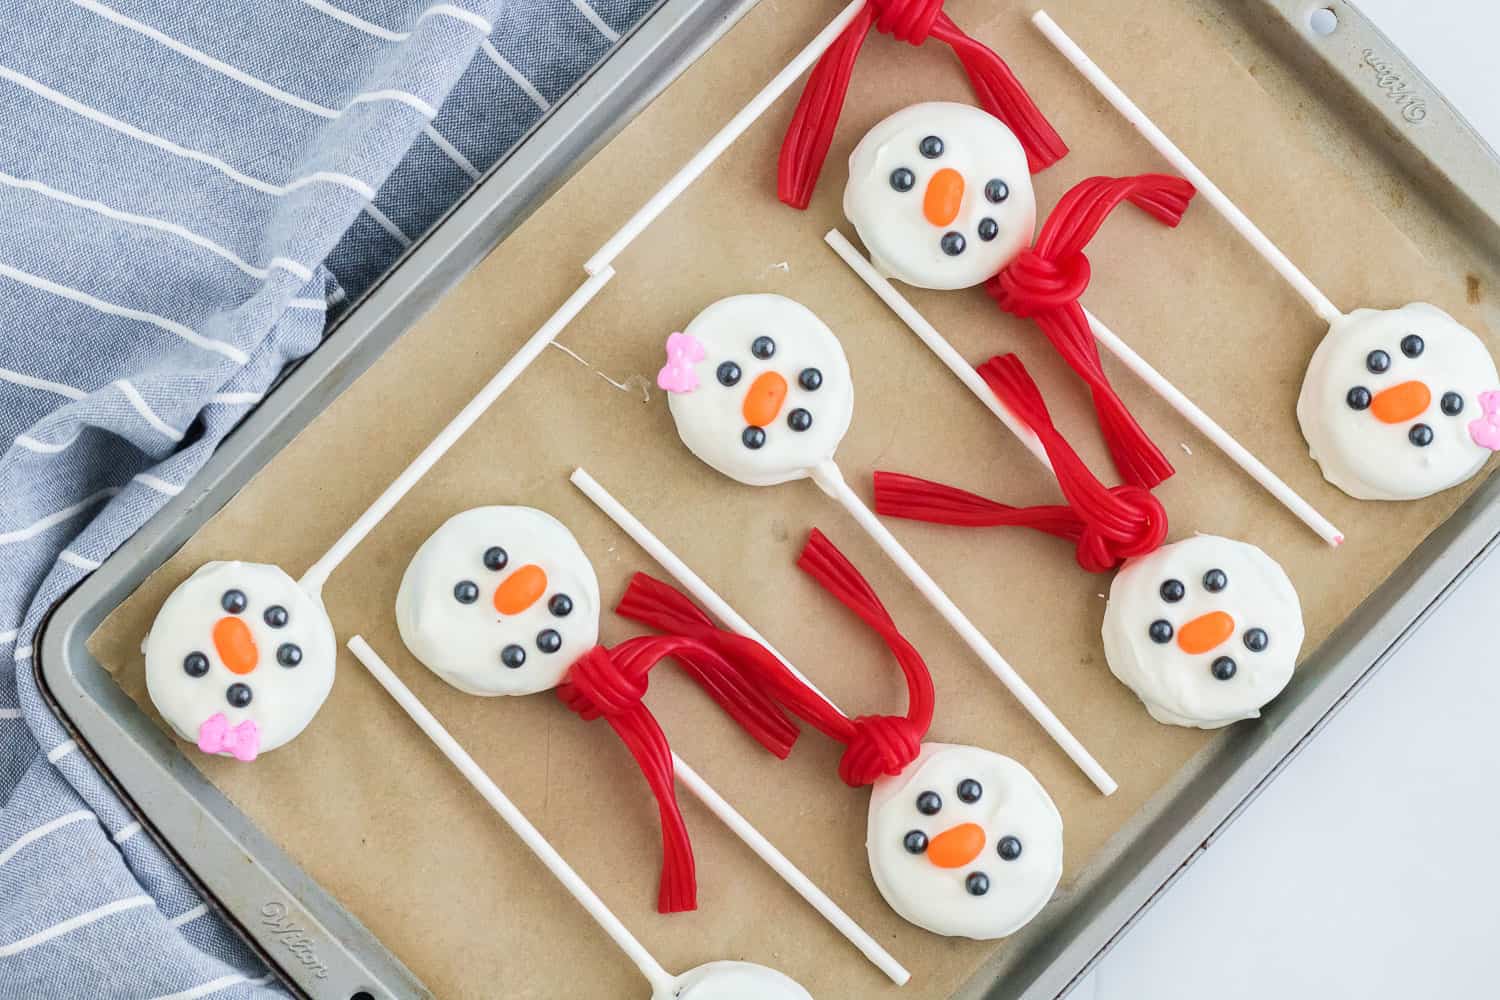
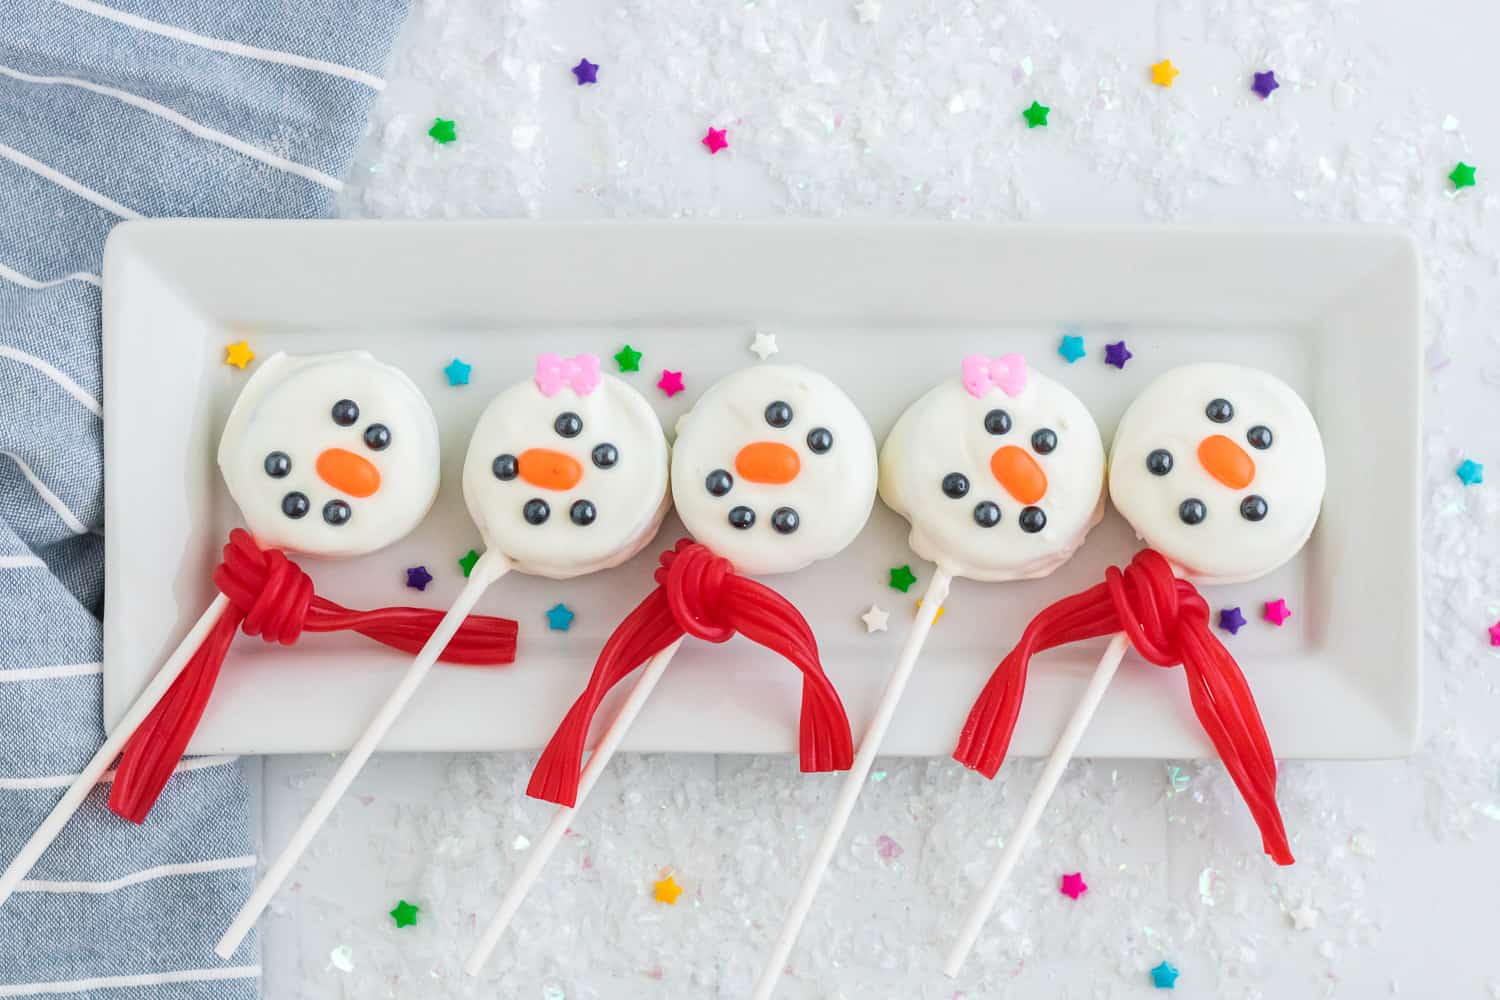
Watch out, Frosty! There’s a whole gang of snowmen (and snow ladies, too!) coming your way! These chilly snowman pops are a blast to make and are darling on a plate of Christmas cookies, especially when they’re arranged with festive Christmas tree Rice Krispie cookies or Christmas tree brownie bites. Watch the little ones’ eyes pop when they see these cuties. How long it takes: 30-45 minutes, depending on who is helping! Equipment you’ll need: microwave-safe bowl, microwave, tray, refrigerator Servings: 20 snowmen Snowy white chocolate covered Oreo cookies are decorated with black pearl candy “buttons” and and an orange jelly bean nose, along with a sporty red licorice scarf. The snow girls sport a pretty pink bow! Pretty much everyone loves Oreo cookies, right? How about Oreo cookies covered in white chocolate and perched prettily on a lollipop stick? Irresistible, I’d say.
About Snowman Oreo Pops
The perfect craft/treat for kids or adults. These snowman Oreo pops are sure to please. They are uncomplicated, easy and fun to make, and fun to eat!
So much easier than cake pops. Perhaps you’ve tried to make cake pops. So have I, and let me tell you, they can be somewhat tricky, certainly not the easiest treat to make. Then there’s the “no-bake” cake pops which are really mushed up cookies squished together with frosting or cream cheese.
No special equipment needed. You’ll be glad to hear that you won’t need mixing bowls, food processors, cake baking, or anything at all like that for these Oreo pops. They are simply whole Oreos dipped in chocolate. You still get the nice crunch of the wafer cookie which is one of the reasons we all love Oreos. The white chocolate is just a bonus.
I bet you can’t wait to sample these cuties. Let the party begin! I’ll get you started here with lots of helpful tips.
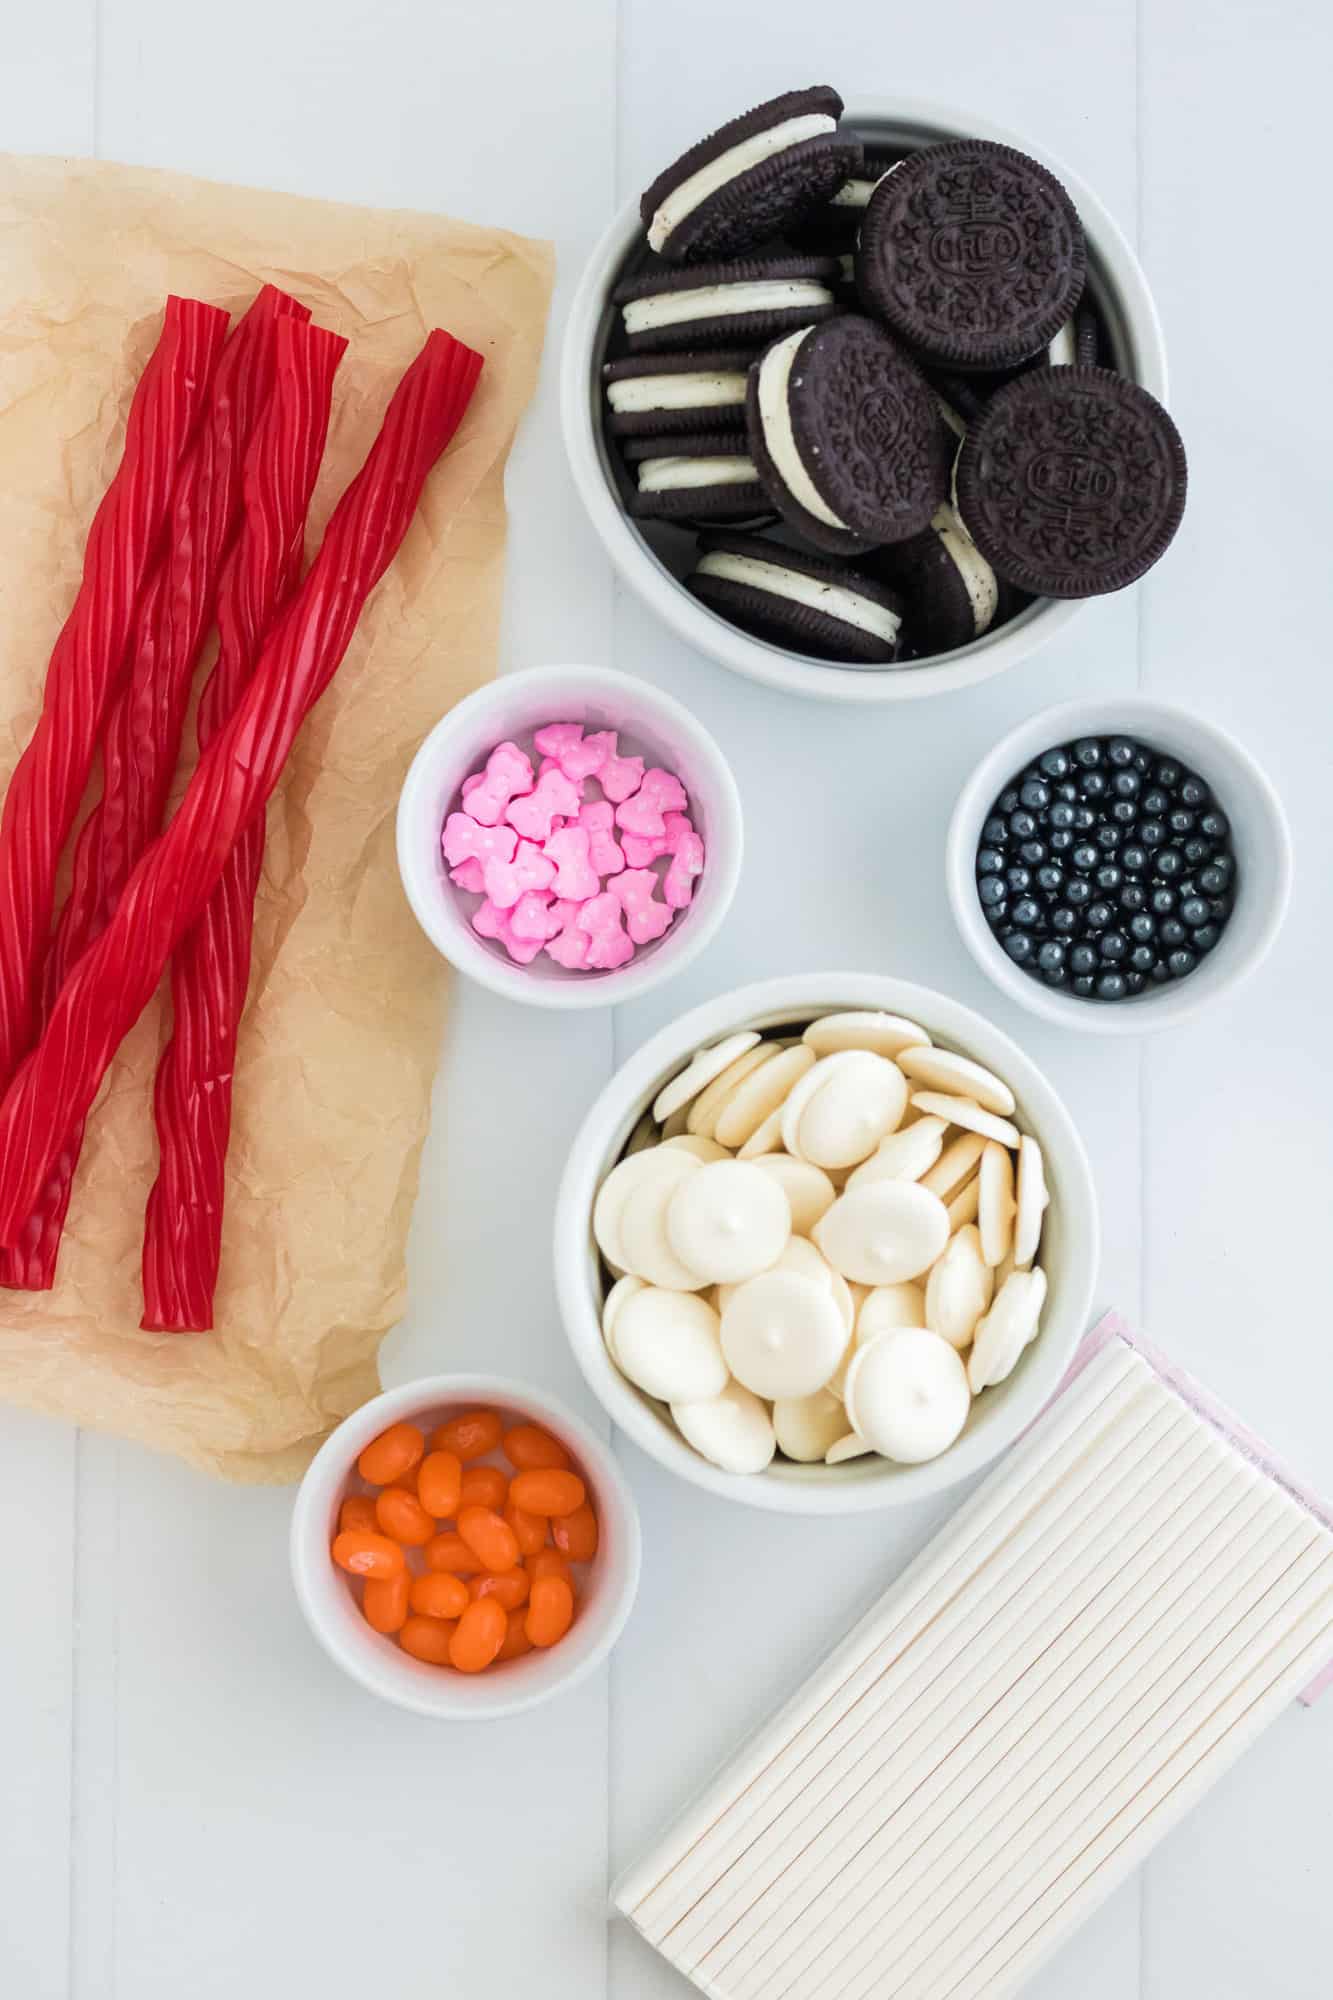
What You’ll Need
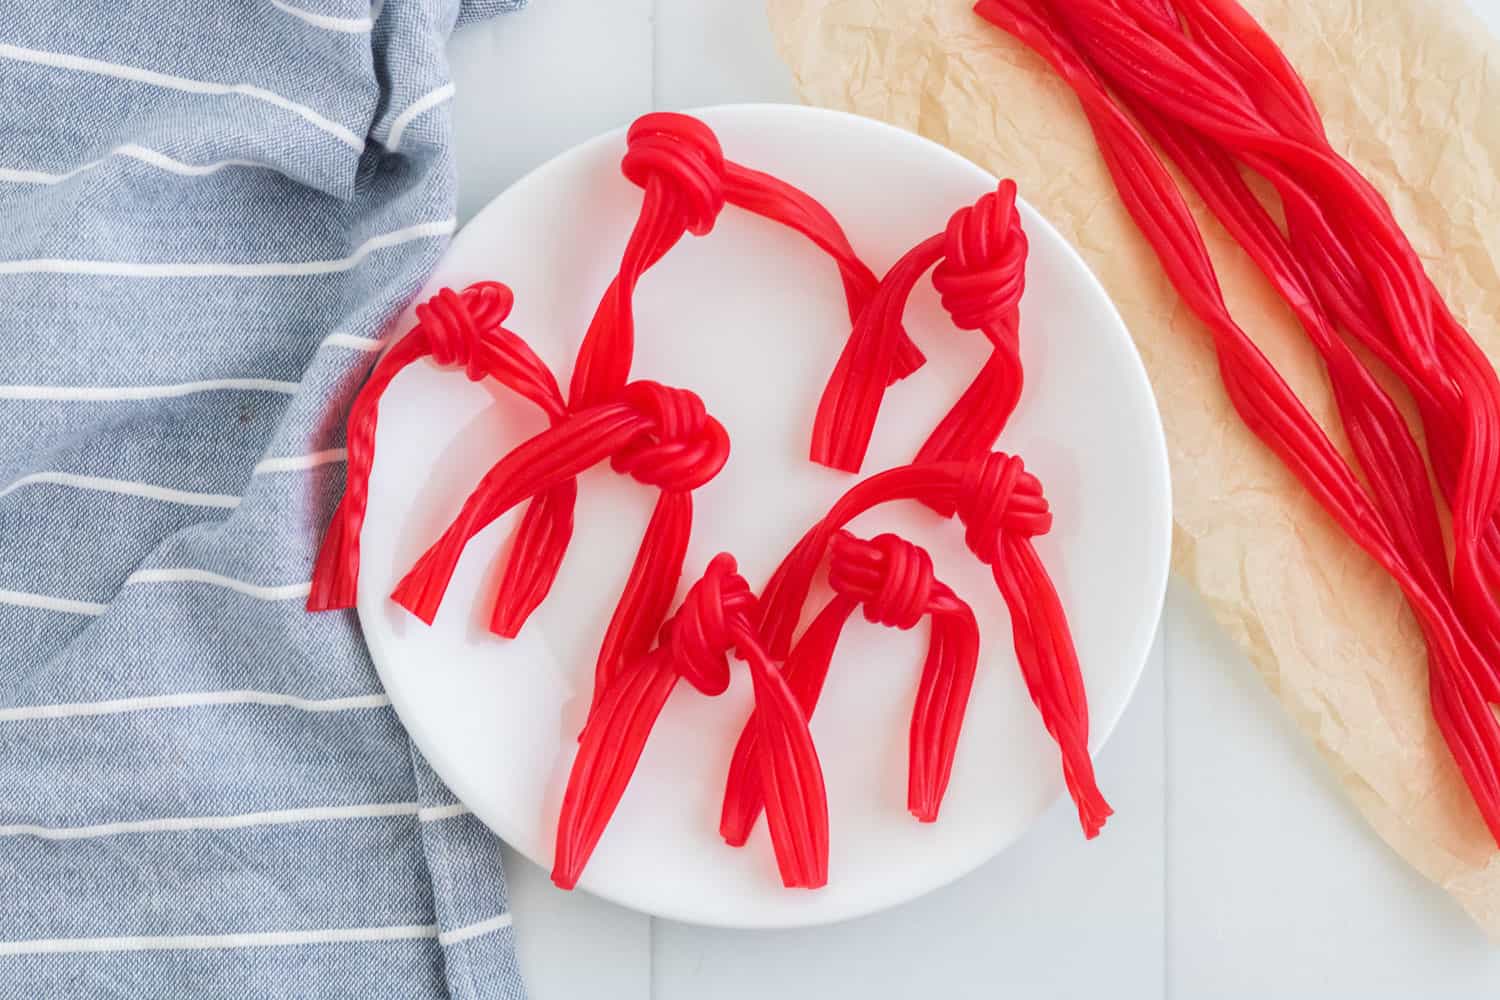
Mega Stuf Oreos: You’ll need one cookie per snowman so yield depends on what size package you purchased and whether any of the cookies have “disappeared” already. By the way, that isn’t a typo. “Stuf” is how it’s spelled on the package. (Stuf like that drives me crazy!) Meltable White Chocolate: Regular white chocolate is fine but if you would like your snow people to be extra white, look for bright white vanilla candy wafers which can be found in craft stores. Wilton makes Candy Melts in bright white, too. Twizzlers Pull ‘n’ Peel Licorice Candy: This candy comes in a variety of colors, including rainbow, so choose what color you like. Lollipop Sticks: These white sticks are pretty widely available and are usually found in the cake decorating section of the store or online. You can substitute wooden popsicle sticks but they are a little harder to insert. Black Candy Pearls, Orange Jelly Beans, Bow Shaped Candy: Used to decorate the snow people; however, you can really do whatever you like.
How To Make Snowman Pops
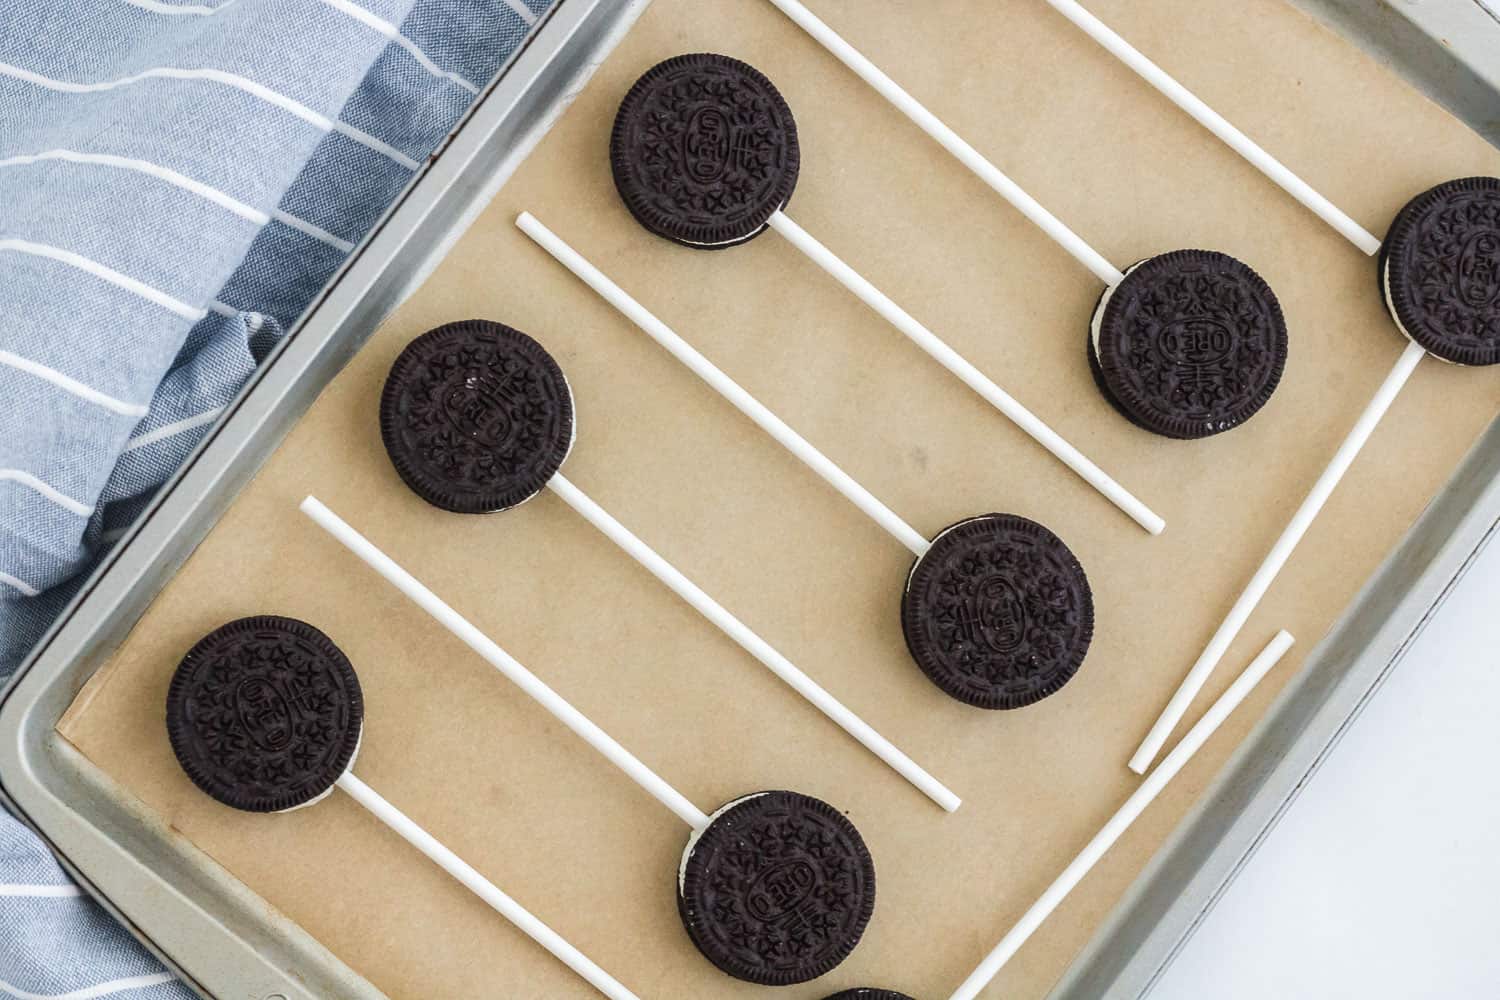
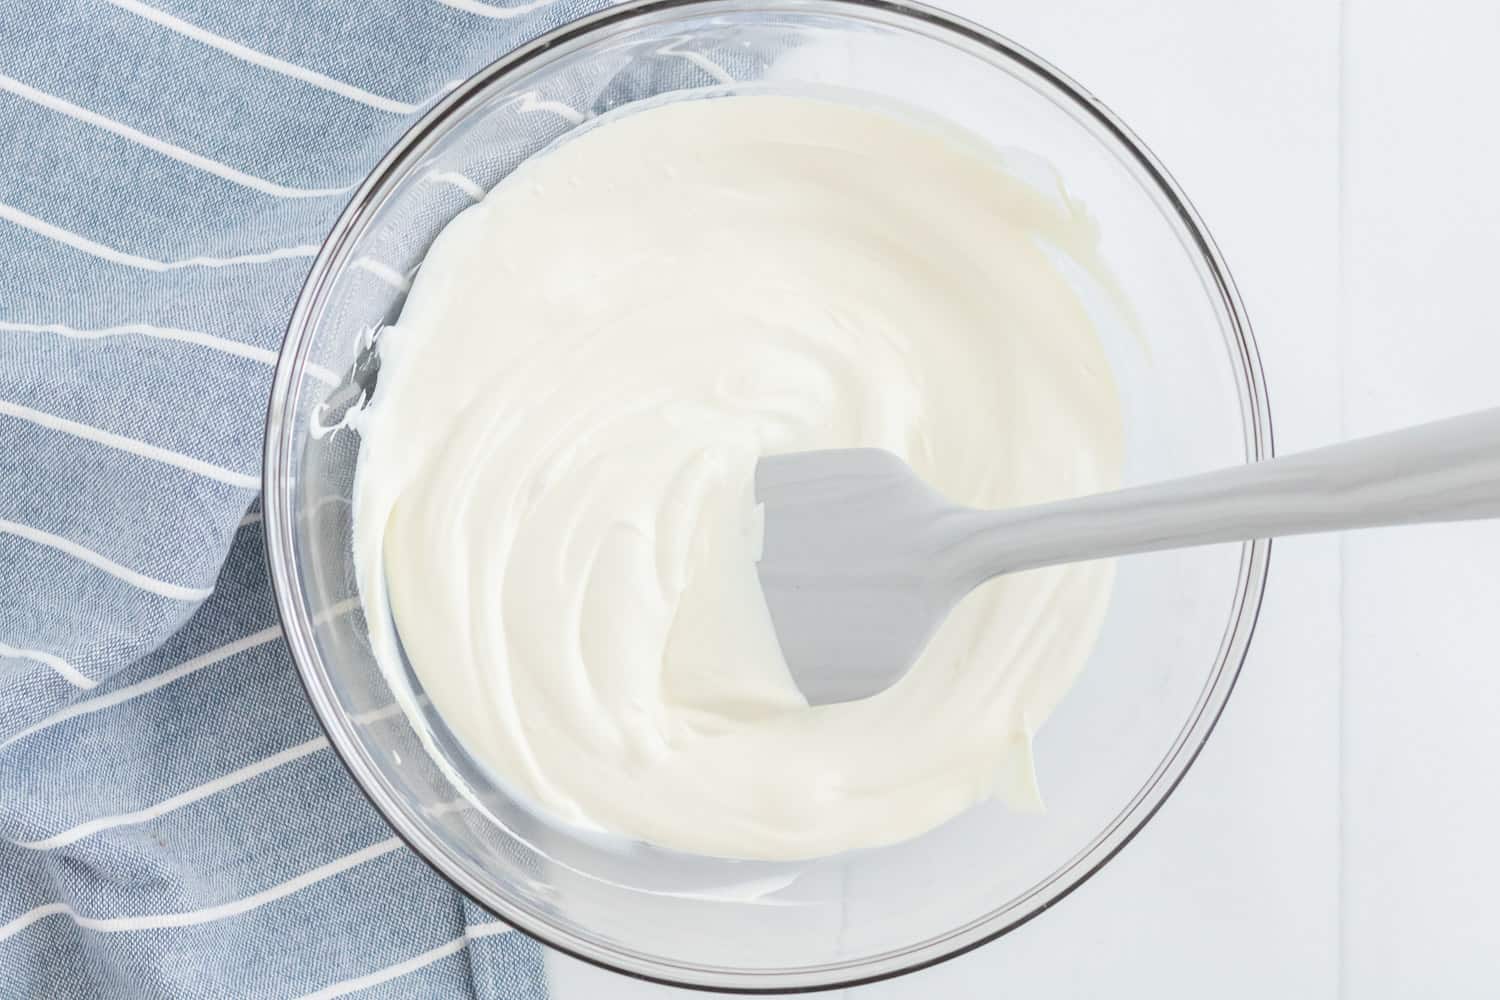
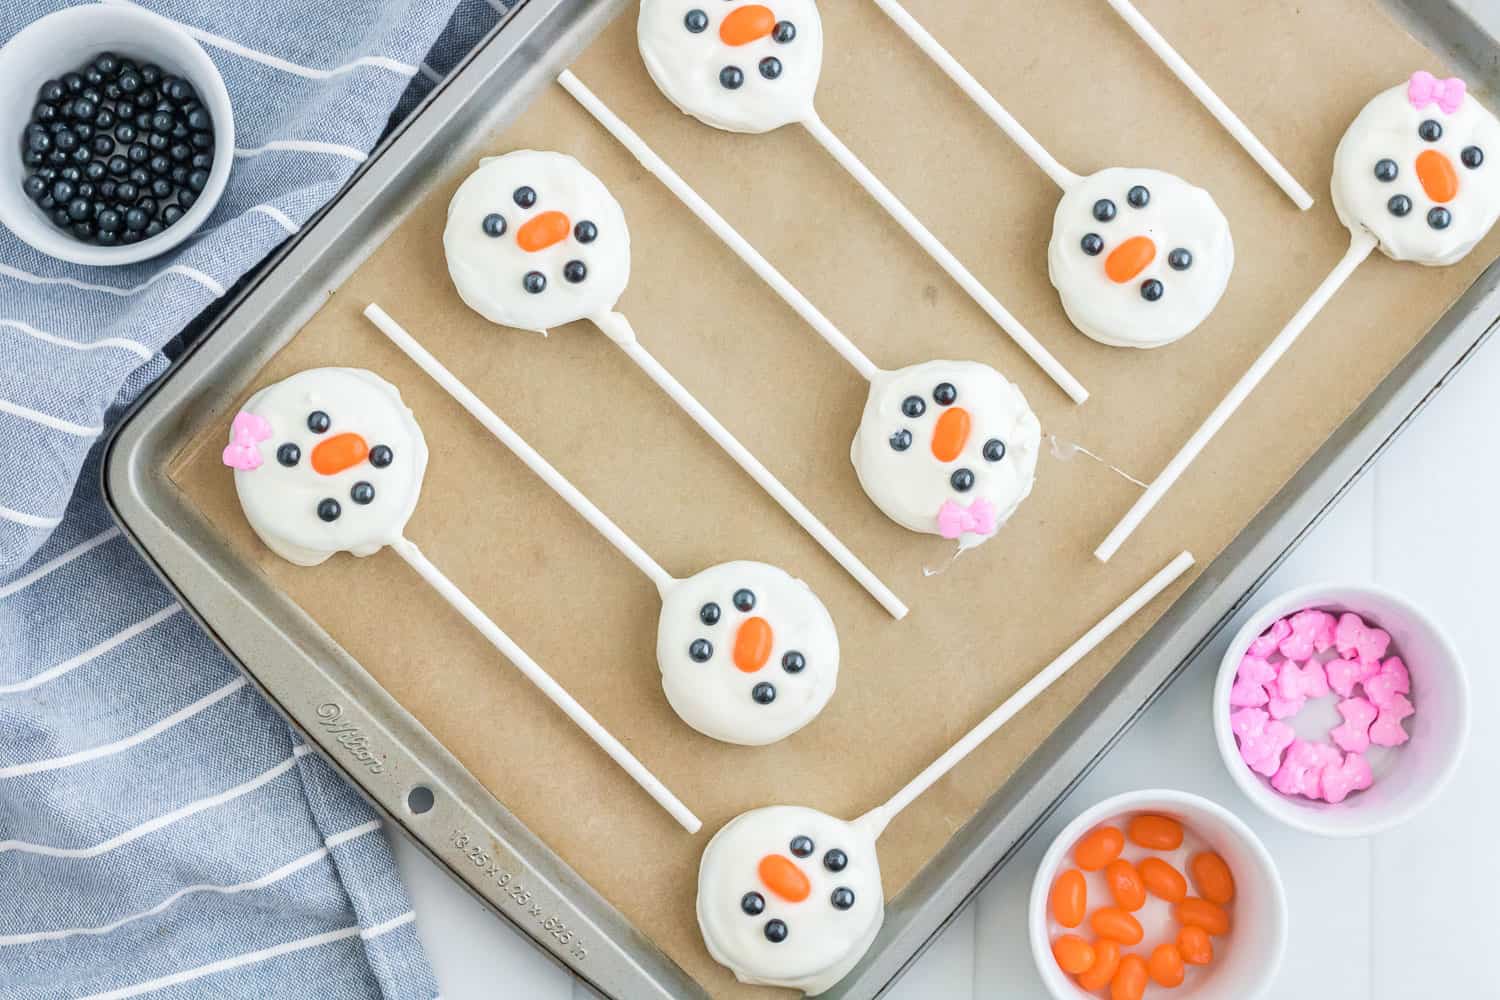
Make sure you have all the supplies you need ready and waiting. If you have a few little elves helping out, let them know that you’ll be dipping the cookies in the warm chocolate and they’ll be decorating the snowmen. It’s a little tricky to get the white chocolate coating on evenly and it can be quite warm. Begin by inserting the lollipop sticks into the thick frosting of the Oreos. It should go at least halfway through or even more. You want the Oreo to be pretty steady on the stick and not fall off halfway through the decorating process. Spread them out on a parchment paper-lined cookie sheet. Next, warm the candy melts or meltable white chocolate in the microwave. Use a deep microwave safe bowl. Zap the chocolate in 15 to 30 second intervals, stirring well each time. It may not look melted right away but often stirring it in the warm bowl is enough to melt it completely. Don’t overheat the chocolate. If you find that it’s getting too stiff to work with once you start dipping, then briefly microwave it again. For best results, follow the package directions. Decorate the Oreos one by one, immediately after you dip them. You want to get those eyes and nose on before the white chocolate hardens or they may not stick. Use the black pearls for the eyes and mouth, an orange jelly bean for the nose and a pink bow for the snow girls. Once all the frosty little heads are decorated, put the tray into the fridge so the coating hardens a bit, about fifteen minutes. While the snow people are in there “chilling”, make the scarves, using the licorice. Each pull ‘n’ peel has 9 strands. Separate them by 3’s, so that you get 3 scarves per piece. Tie them in a single knot and make them fairly tight. It takes a bit of handling but it’s doable. Once they’re ready, you can slide the scarves on the snowman sticks. If you find that they don’t want to stay on, use a dab of melted chocolate and press the scarf onto the stick. Aren’t they just too cute? Arrange them on a plate or stick them into a container full of “snow”. White granulated sugar or coconut makes pretty good snow, or even a block of white styrofoam. Wrap them individually in clear cellophane bags with a bow tied around it for party treats.
Make These Oreo Pops Your Own
Ideas for every holiday: Just take a quick look at Pinterest or simply google “Oreo Pops” for inspiration. Try Valentine’s Day Oreo Pops dipped in red-tinted chocolate and fancied up with hearts and “lace”; orange Halloween Oreo pops with Jack o’lantern faces, Christmas Oreo pops with Rudolph’s red nose, and monsters, farm animals, rainbows, you name it. Not a holiday? Oreo pops look pretty with just chocolate and colored sprinkles. Substitute marshmallows. If you’re not a fan of Oreo cookies or would like to try something different. chocolate covered marshmallows are fun, and can be decorated to look like a snowman or pretty much anything you like.
Storage Tips
Store Oreo pops in a tightly covered container, either on the counter or in the fridge for chilly pops. They’ll keep for a couple of weeks. I haven’t tried freezing them yet but I’m pretty sure they would freeze well, too. It’s a snowman’s natural environment, right? Quick-Start Guide!