Recipe includes a how-to video at the bottom of the post!
My sister, Casey, has a pretty important job. She makes scones. I guess that’s not her official job (though I’d love to see a business card that says “pumpkin scone maker”), officially she works on film sets. She’s currently working on Mindhunter after finishing up some work on the new Wonder Woman 1984 (seriously is that not the coolest?), but, in my parents’ house, she is the official designated scone maker. And here’s the thing about my sister the scone maker. While she’s a pretty enthusiastic baker when she’s home, she’s not at all very interested in trying my recipes. She’d much rather try something “new”, but after trying lots of different scone recipes, my critical, professional scone-making sister finally tried mine and, guess what I heard.
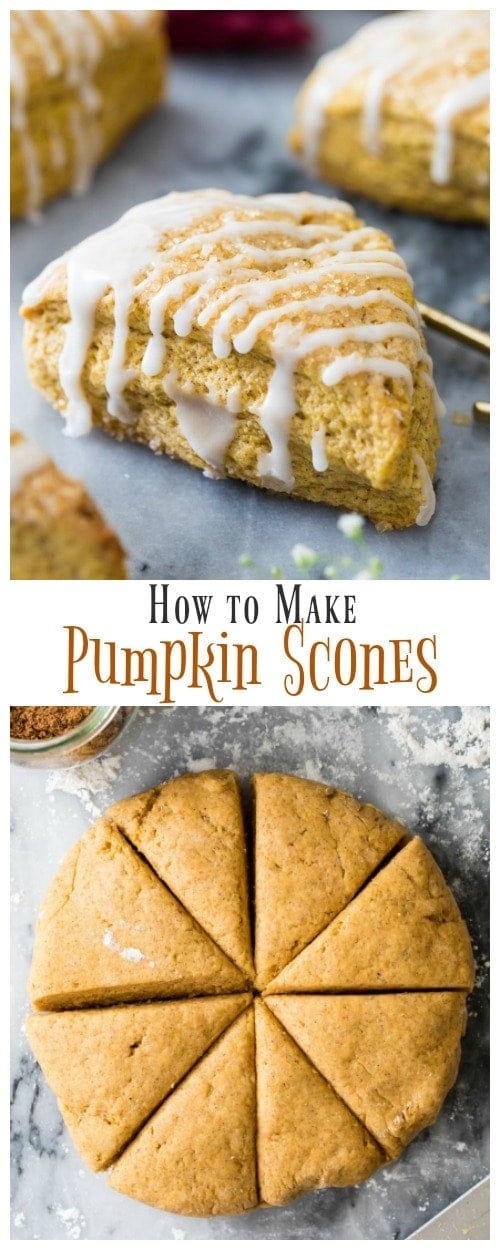
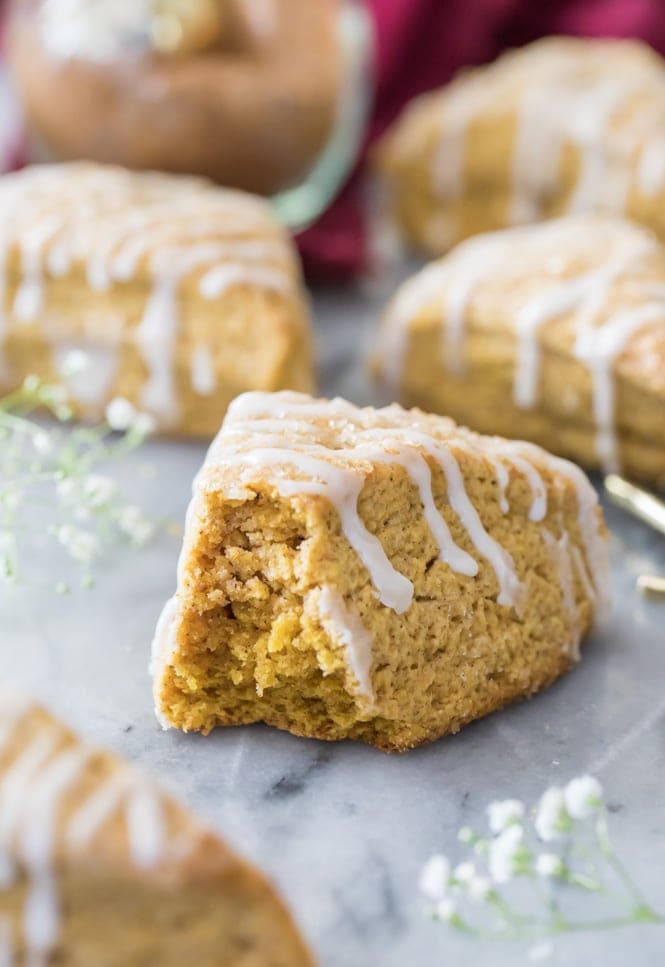
“Your scone recipes are the best”. I’m pretty sure that there’s no higher praise. Tender, buttery, flaky, and packed with flavor. I won’t argue with her because honestly I agree! My scones are never dry or crumbly, they’re simple to make, and have been tested hundreds of times. Today I have a new, seasonal, pumpkin scone recipe I’m sharing with you and this is every bit as good as the others. Let’s jump in to some tips.
Tips for Making Pumpkin Scones
Cold Ingredients are Key!
The best tender, flaky scones rely on cold butter (this is also key when making pie crust, if you recall!). It’s important that you don’t overwork this dough as you don’t want to melt the butter; cold butter pieces in our scone dough are key to flaky scones. Make sure your cream is also cold when you add it to help keep that butter as cold as possible.
Don’t Over-work Your Scone Dough!
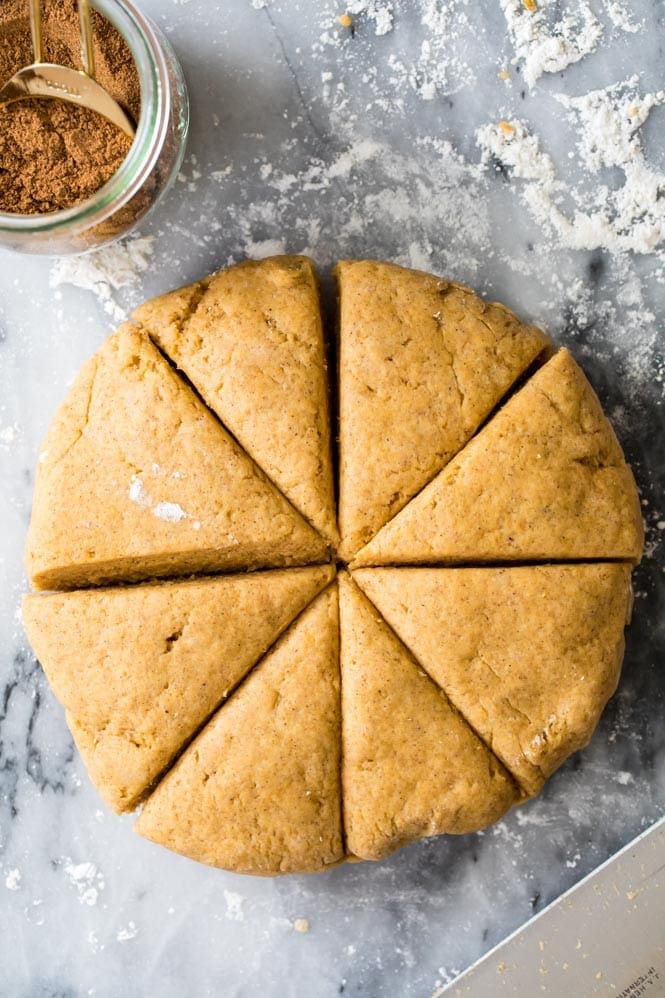
Unless you want scones that are tough and dense, do not over handle your dough! If you aren’t using a food processor, you might want to check out my biscuit recipe for tips on cutting butter and working liquid into dry dough without over-working it as these two doughs are very similar (I recommend using a cheese grater!). The more your handle it the warmer it will get and remember, we want our scone dough to be as cold as possible! If you feel that you’ve handled your pumpkin scone dough too much and made it too warm, after you’ve cut it into wedges and placed them on your baking sheet, pop that pan in the fridge or freezer for at least ten minutes before baking.
Can I Make Pumpkin Scones Without a Food Processor?
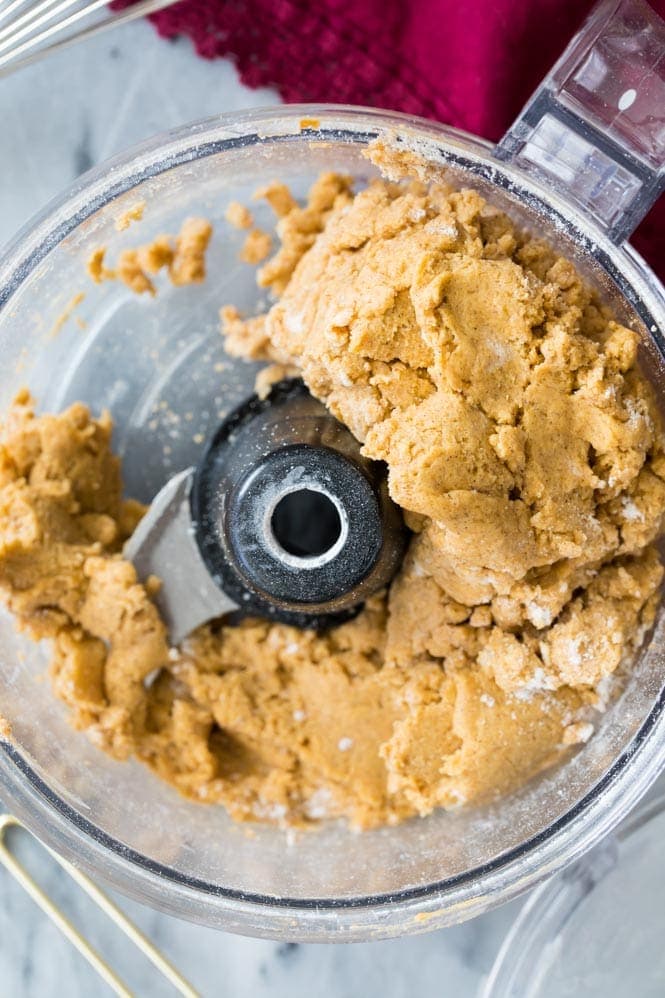
While I recommend using a food processor when making scones, you can make these pumpkin scones without one. Use a grater to grate very cold butter over your dry ingredients. Then, use a pastry cutter to cut the butter into your dry ingredients until your mixture resembles coarse crumbs. If you don’t have a box grater you can just use a pastry cutter, but the grater trick worked for me for a long time before I switched over to using my food processor. You’ll whisk together your heavy cream, pumpkin puree, and vanilla extract and work these liquid ingredients into your dough. Don’t forget that you do not want to over-work your dough, and this is another reason I recommend using a food processor; the blade makes quick work of incorporating the wet ingredients into the dry. Keep in mind that it’s going to require a fair bit more effort to do this by hand. You may even find yourself wondering if you need to add more liquid — you don’t!
Enjoy! Looking for more scone recipes? Check out my Chocolate Chip Scones, my Triple Berry Scones, or my Chocolate Scones!
How to Make Pumpkin Scones
This pumpkin scone recipe was originally published 09/16/2016. Photos have been updated and recipe slightly improved 10/06/2018