Instantly (And Easily!) Elevate Your Cake
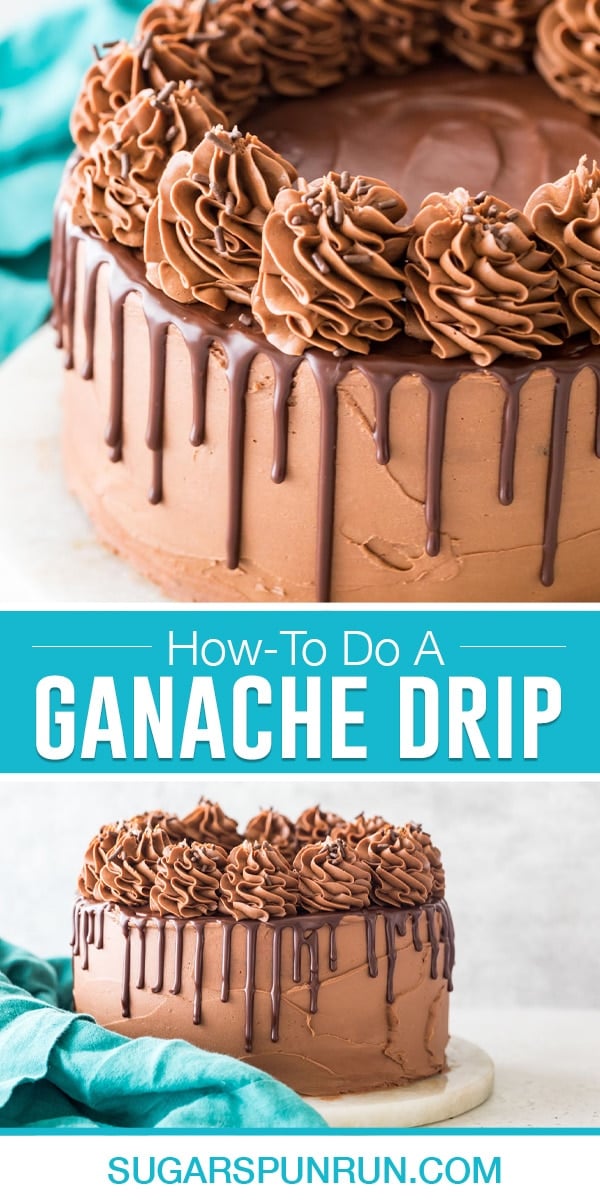
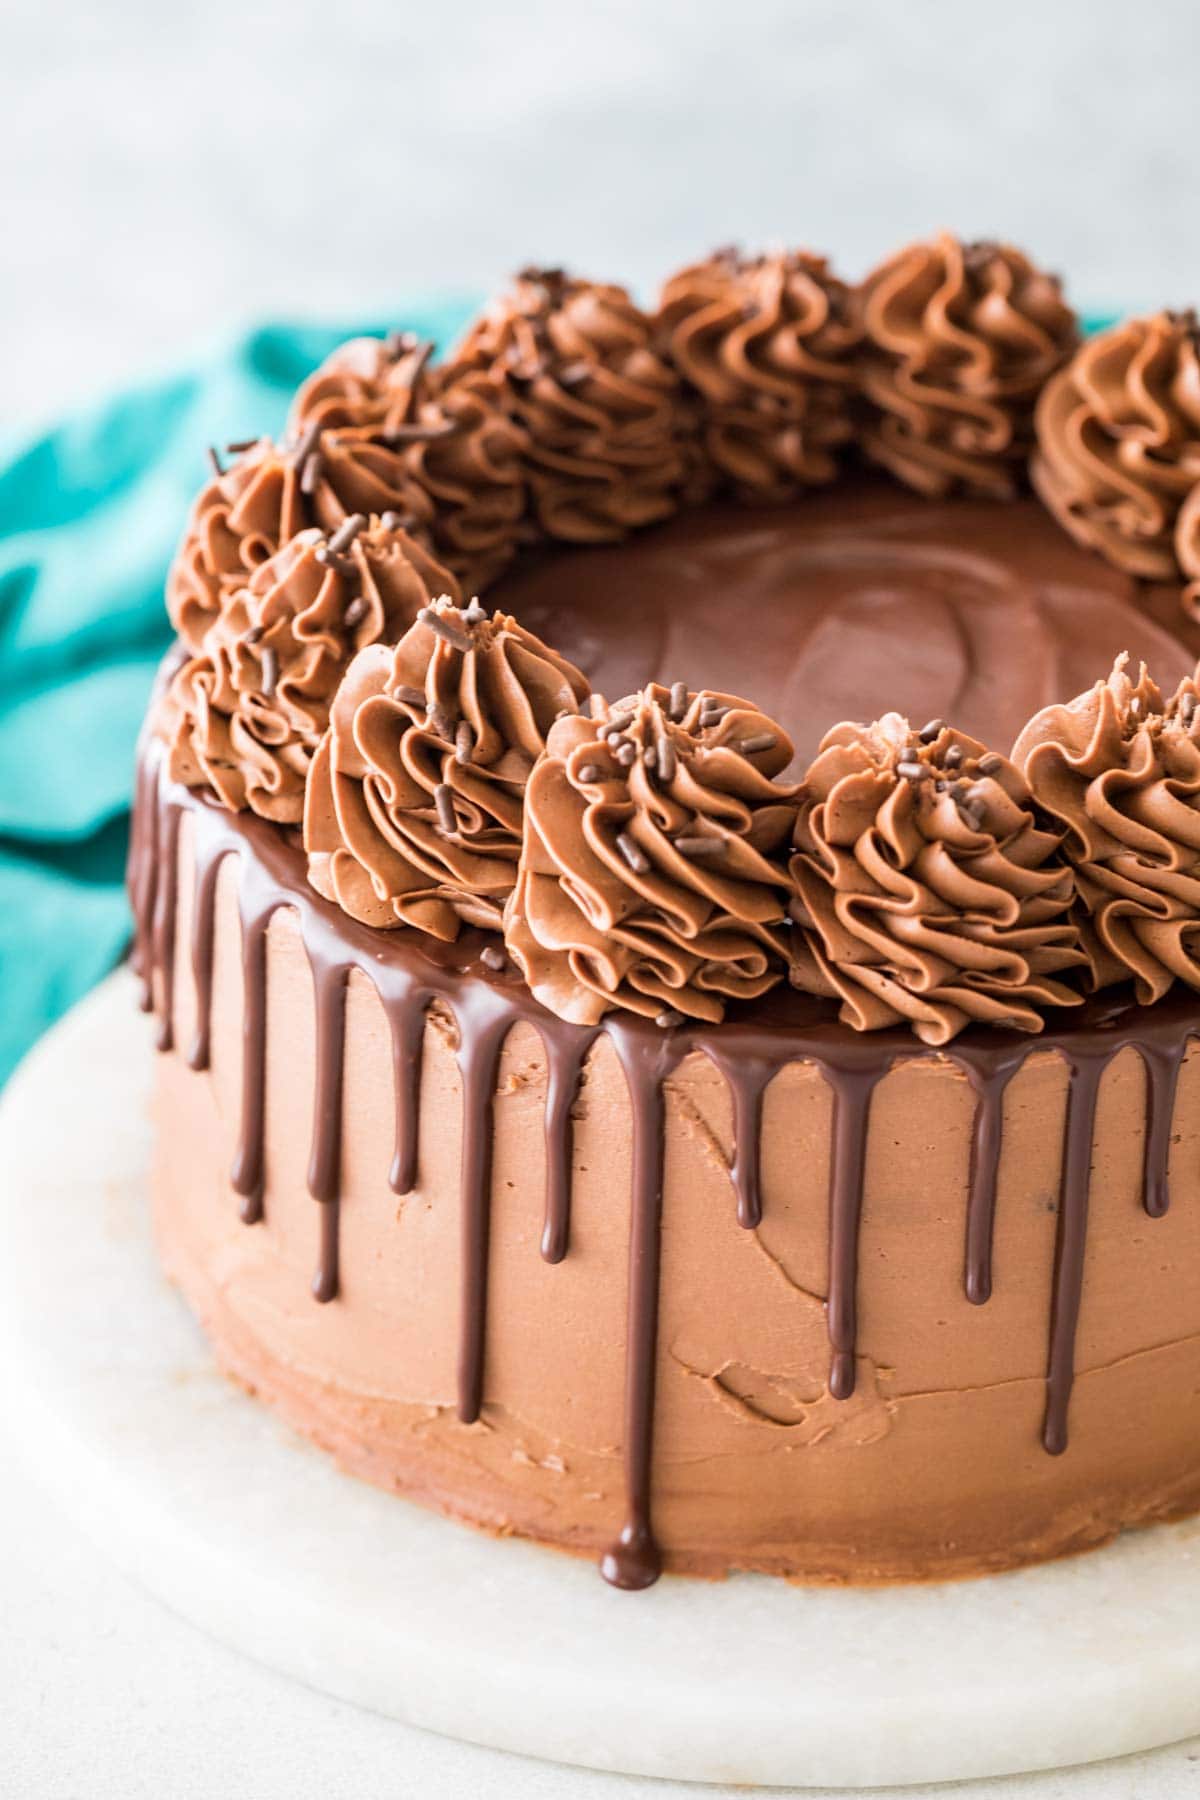
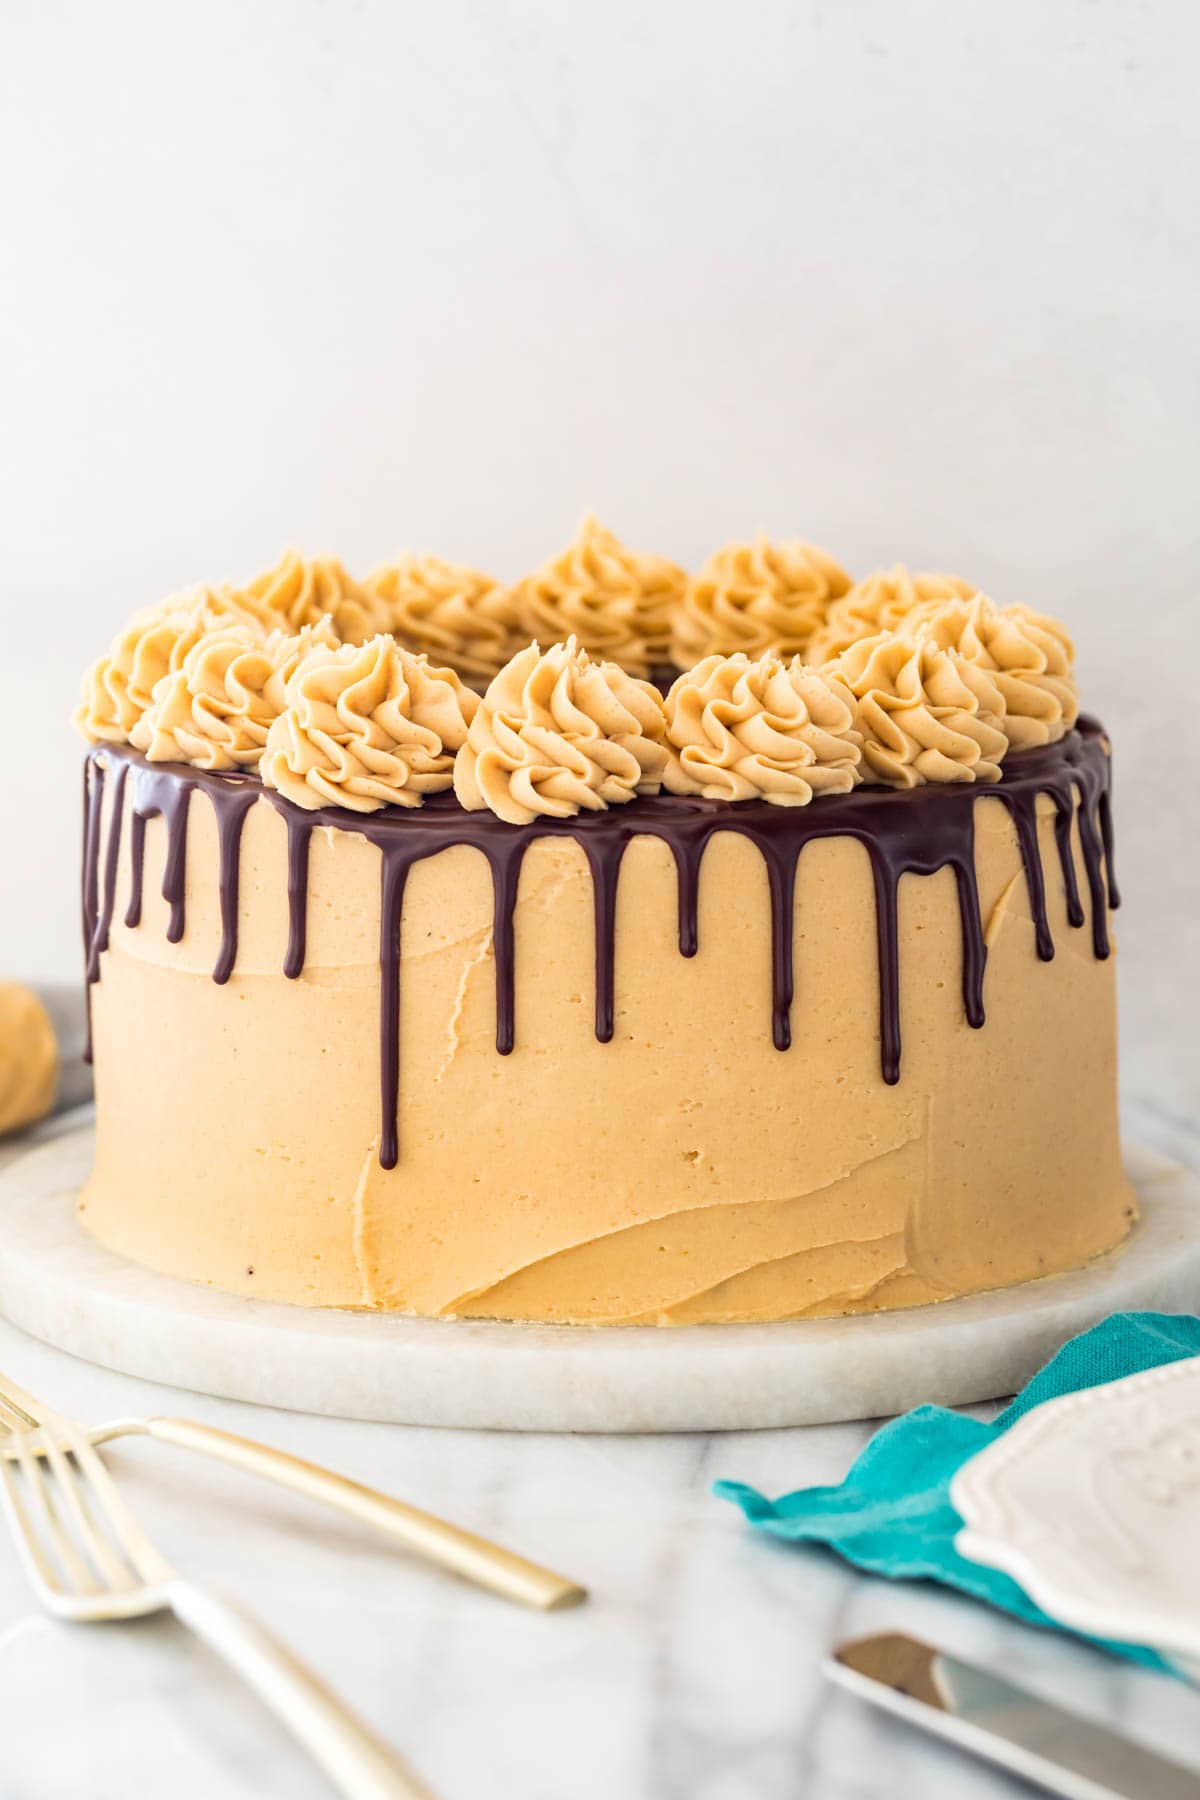
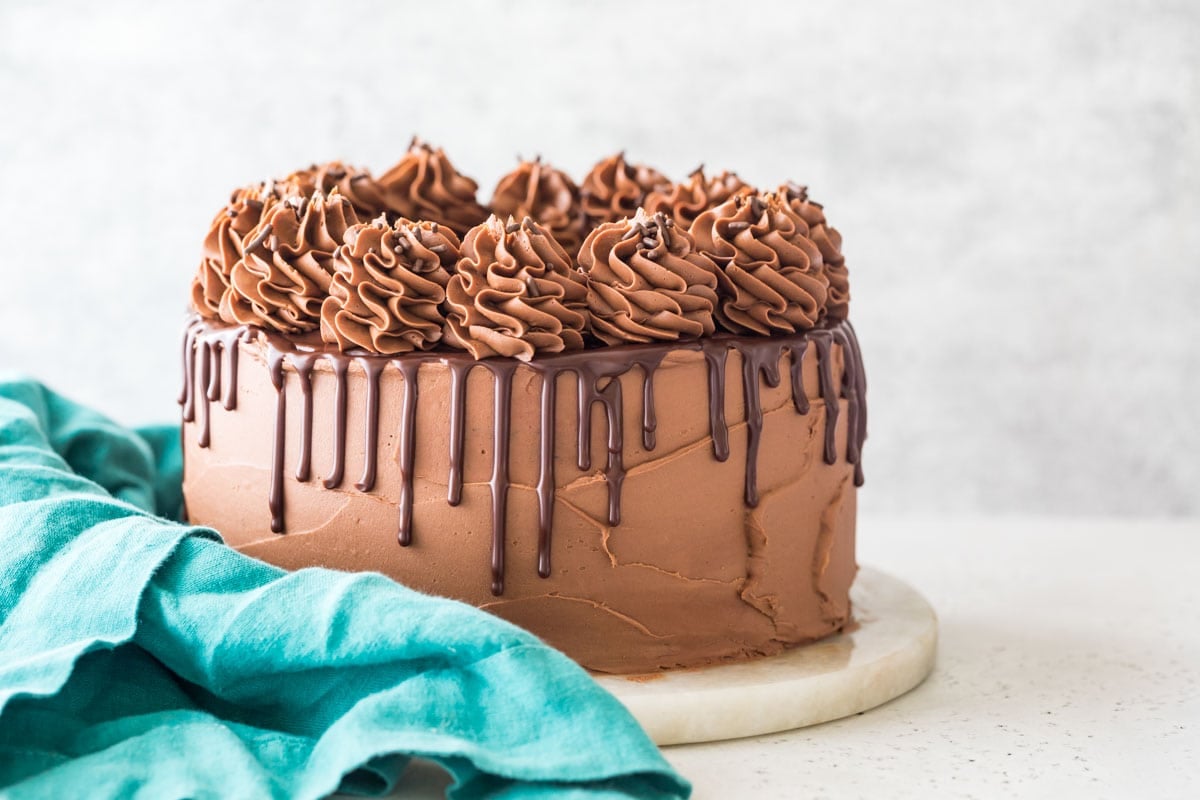
Have you ever admired the silky, tidy chocolate drip on a professional cake, but felt too intimidated to try it yourself? I’ll let you in on a little secret…it’s actually easy to do! Adding a ganache drip is an easy way to transform a simple cake into something special. It elevates the look of a cake and gives it a professional feel. I’ve added a chocolate drip to my peanut butter chocolate cake and my cheesecake stuffed chocolate cake, and I love how it makes the cakes look as decadent as they taste (to really take things to the next level, pipe thick swirls of frosting over the top after the ganache firms up!). We’ll be using a half a batch of my chocolate ganache recipe for the ganache drip. This recipe has always been more than enough for a 2-layer 8” or 9” cake, and it will make enough chocolate drip for a 3-4 layer cake or even a 10” round cake. If you do have extra ganache, save it and definitely don’t use all of it if you don’t need to. If I can do it, you can do it, so let’s get to it!
What You Need
Ganache drips require very few ingredients to make. Here’s what you need:
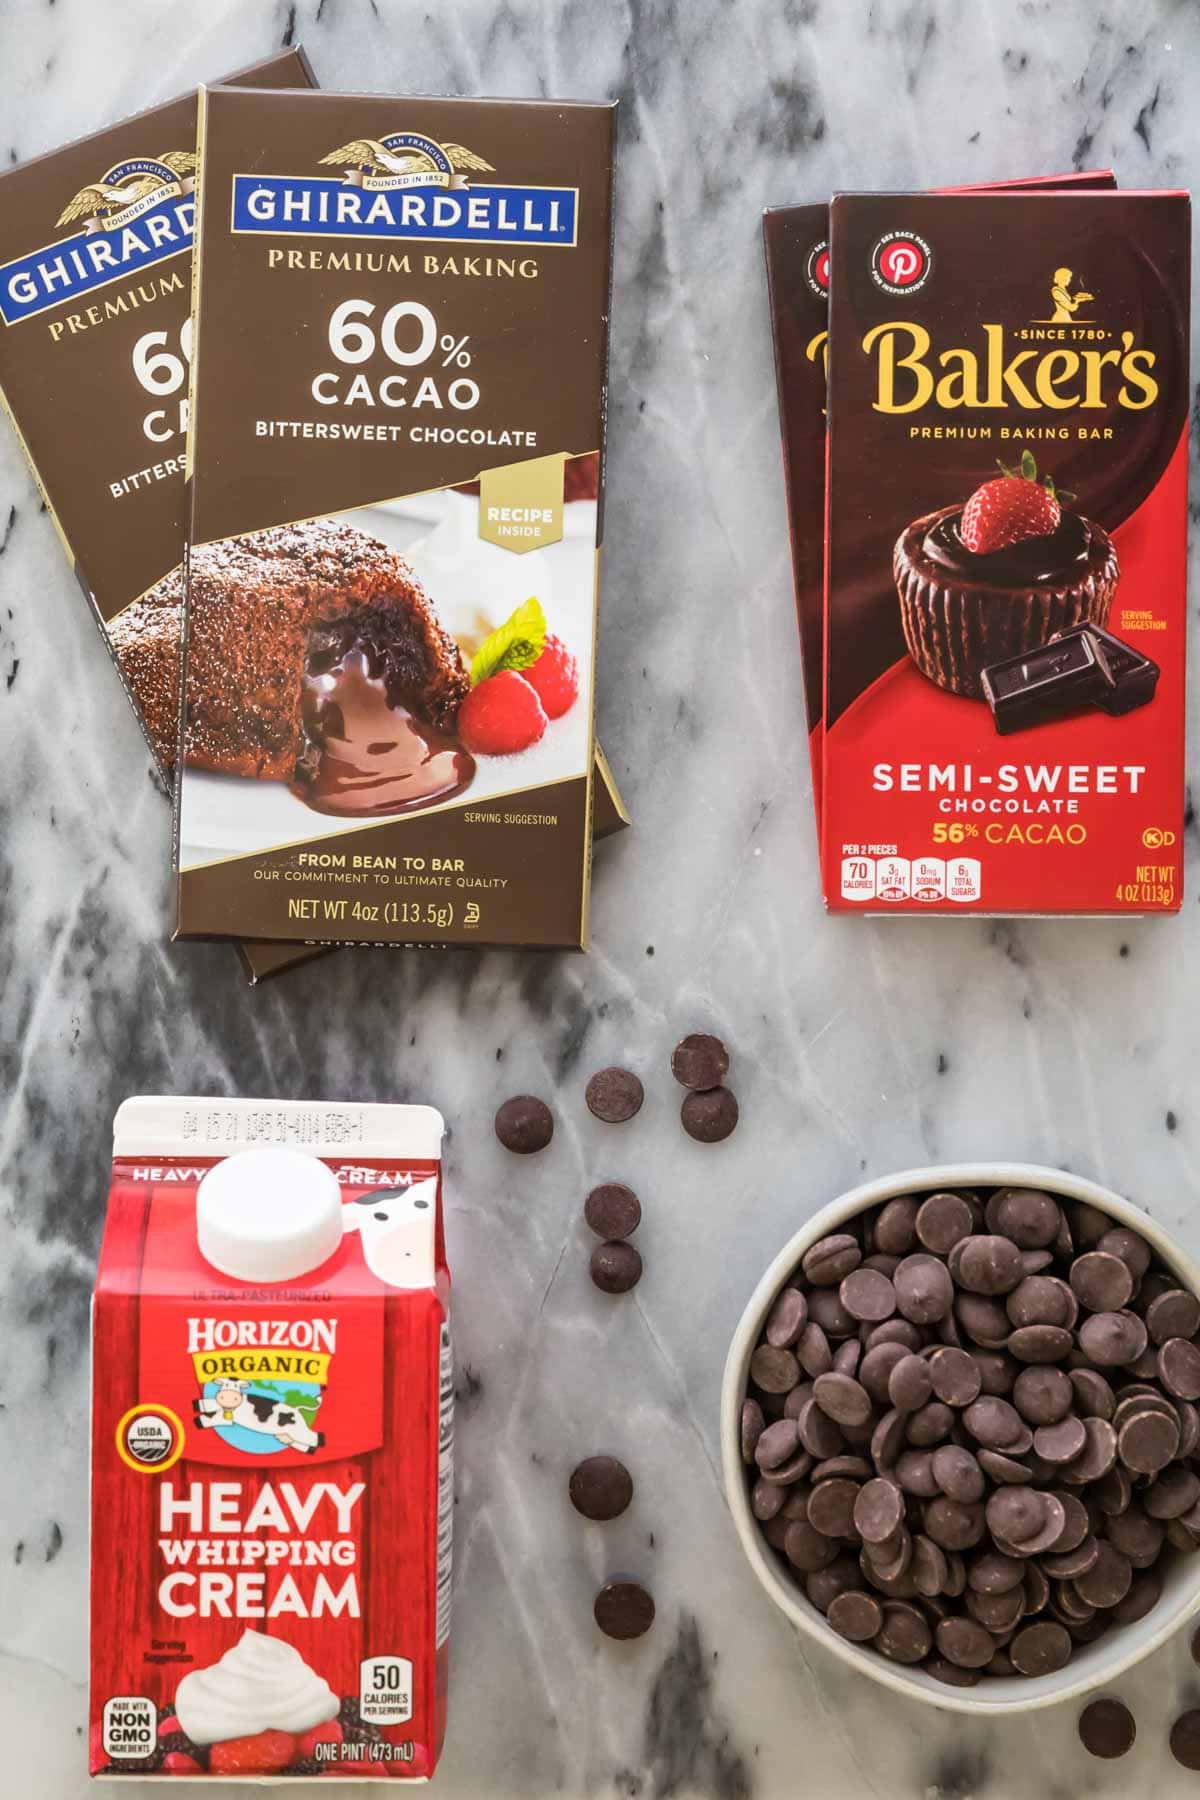
A leveled & frosted cake. A level cake looks much better with a chocolate drip than a rounded one, so it’s best to level your cake before frosting and assembling (here is the cake leveling tool I use for my cakes!). You’ll also want to get your icing as smooth as possible and chill the cake before beginning.Chocolate. Use semisweet, bittersweet, or dark chocolate. I prefer using a chopped chocolate bar for my chocolate drip, but chocolate chips can work too!Cream. Heavy cream, double cream, or whipping cream will work.
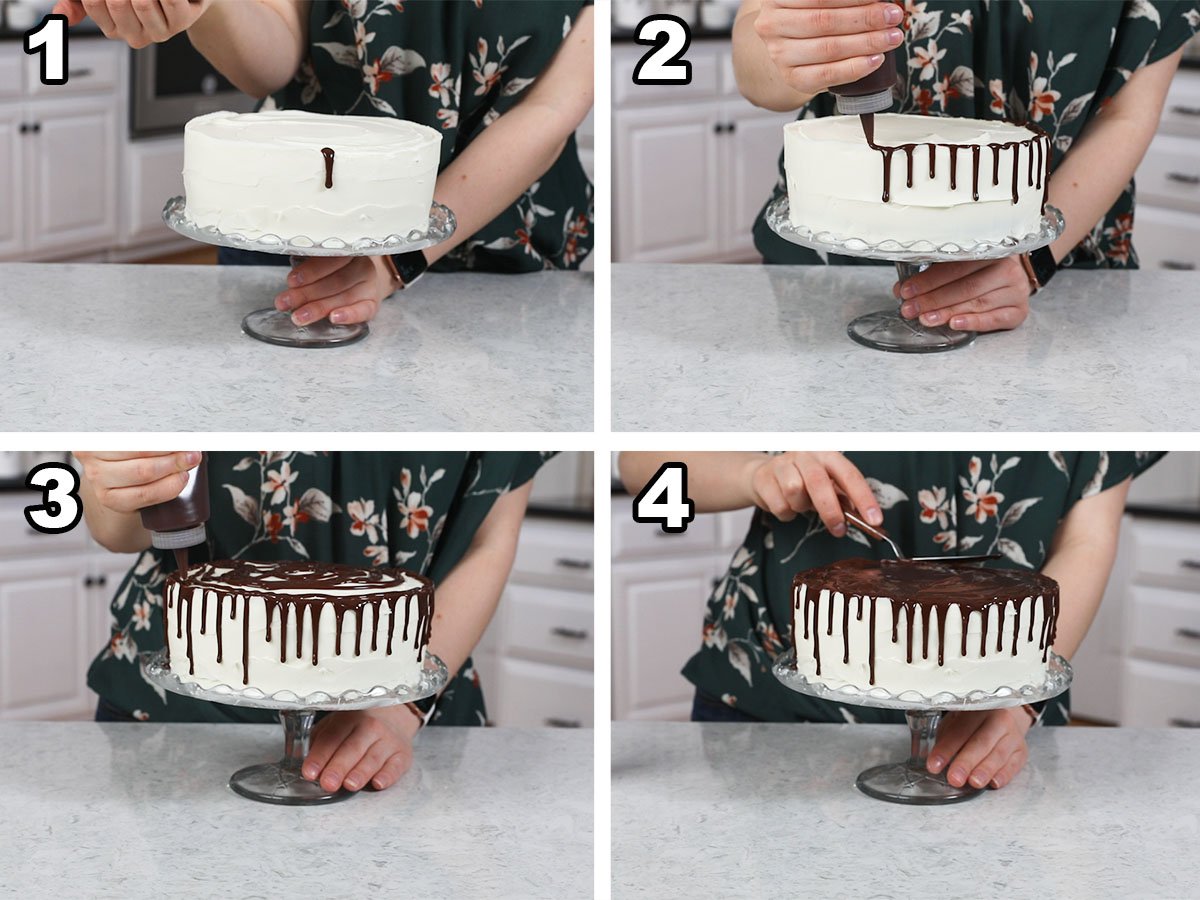
SAM’S TIP: Chill your cake for at least 15 minutes in the fridge or freezer before adding your chocolate drip! This will help the ganache firm up and set as it drips down. Remember, this is just an overview of the ingredients I used and why. For the full recipe please scroll down to the bottom of the post!
How to Do a Chocolate Drip on a Cake
SAM’S TIP: To test whether your ganache is ready to drip, squeeze a drop onto a paper plate and immediately hold the plate vertically to allow the chocolate to drip down. If the chocolate drip quickly runs down the plate, your ganache isn’t ready. If it runs slowly and then stops before reaching the bottom, you can begin adding your ganache drip! Did you enjoy today’s chocolate drip tutorial? Let me know in the comments if you’d like to see more posts like this one. Let’s bake together! I’ll be walking you through all the steps in my written recipe and video below! If you try this recipe, be sure to tag me on Instagram, and you can also find me on YouTube and Facebook
Related Recipes