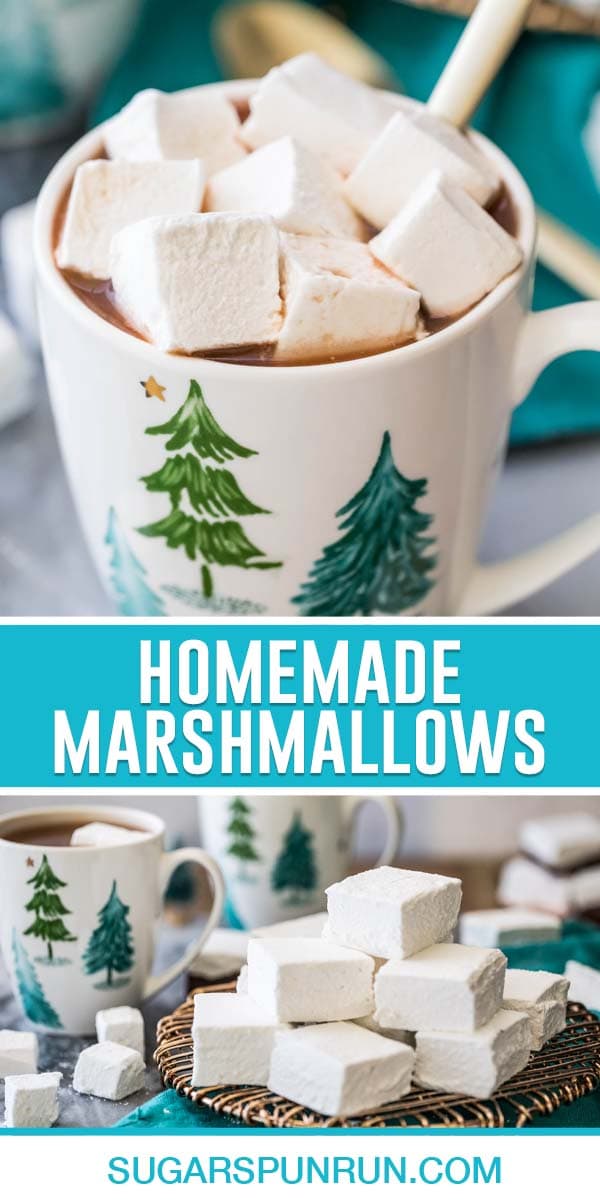
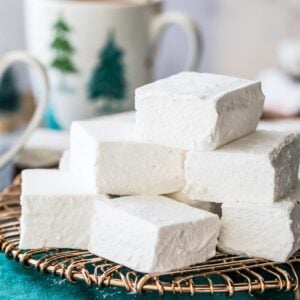
Are Homemade Marshmallows Worth It? 100% Yes!
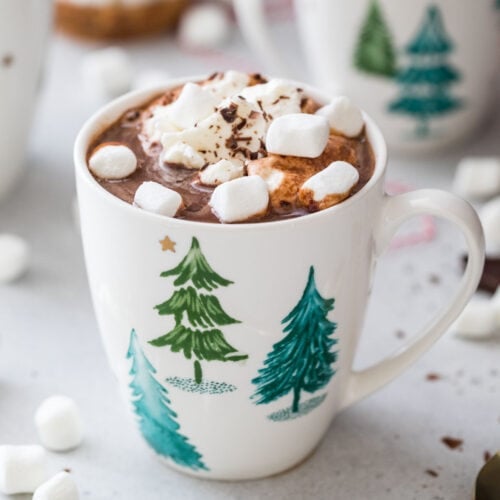
These springy-sticky-squishy, light and airy homemade marshmallows are going to be your new favorite treat. Yes, they do require a candy thermometer and a few hours to set up, but we forgive them for it because they’re just that good! These marshmallows have a gorgeous vanilla flavor that reminds me of my meringue cookies, and they are equally delicious in a s’more or mug of hot chocolate as they are by themselves. Sometimes I even like to cloak mine in chocolate before enjoying. While making homemade marshmallows is admittedly more time consuming than just buying a bag from the store, they truly put the store-bought version to shame. Far better in both texture and flavor, homemade marshmallows are 100% worth the effort and time it takes to make them–I promise! Plus, they’re not at all difficult to make (your mixer will do most of the work!) and the ingredients are super simple. Here’s what you need!
What You Need
With only eight ingredients (nine if you count water), my homemade marshmallows are so simple. Here are the stars of today’s recipe:
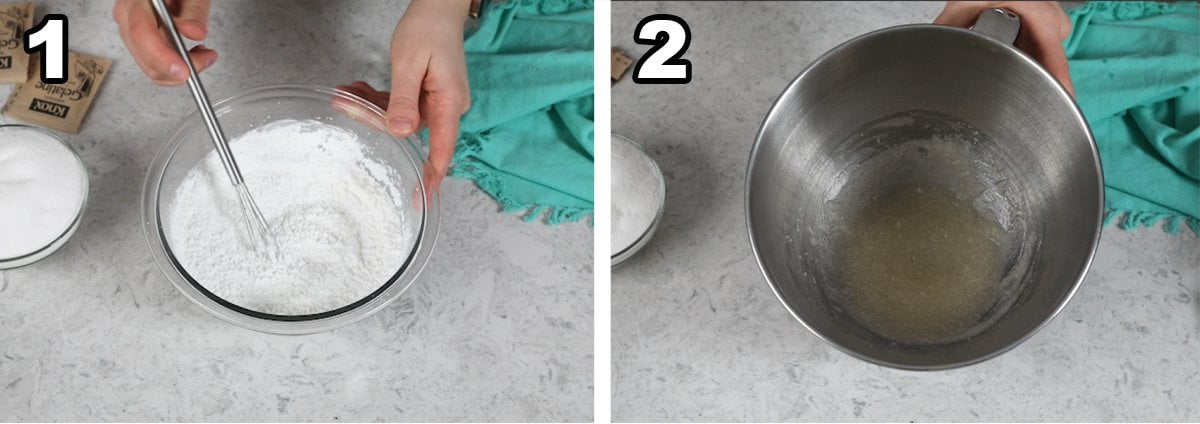
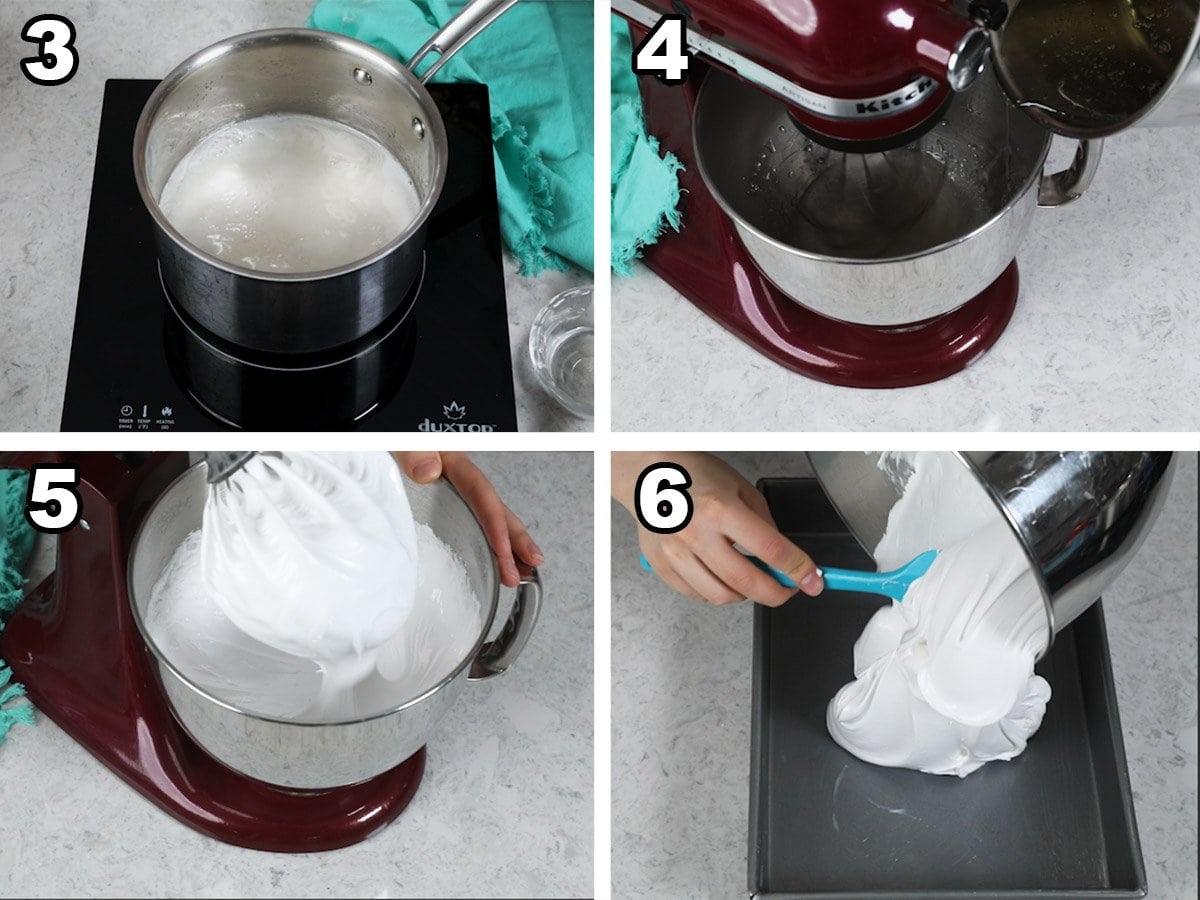
Gelatin. These homemade marshmallows use gelatin for stability and structure, much like my stabilized whipped cream frosting. You’ll need three packets for today’s recipe. As far as a substitute goes, while you can sometimes substitute cream of tartar to stabilize whipped cream, I unfortunately don’t have a substitute for the gelatin in this recipe.Light corn syrup. This is not the same as high fructose corn syrup! If you’re still concerned about using it, glucose syrup could be substituted, but an invert sugar like corn syrup is really necessary to give the marshmallows their proper texture and keep the sugars from crystalizing. Granulated sugar. We’ll be boiling this with the corn syrup until it reaches 242F, so you’ll be using your candy thermometer today.Water. You’ll need ice water for the gelatin mixture, but you can use any temperature water for the syrup.Vanilla extract. I use vanilla for a classic marshmallow taste, but you can always switch up the flavor. Coconut, strawberry, or peppermint (a very tiny amount) would all taste great! Let me know in the comments if you try any other flavors. Cornstarch and powdered sugar. This makes up the dusting mixture, which we’ll be sifting over the top of the marshmallows while they set and rolling them in after they’ve been cut.Vegetable shortening or oil. Since homemade marshmallows are mostly sugar and corn syrup, they’re very sticky! You can use either vegetable shortening or oil to grease your pan and spatula to prevent the mixture from sticking.
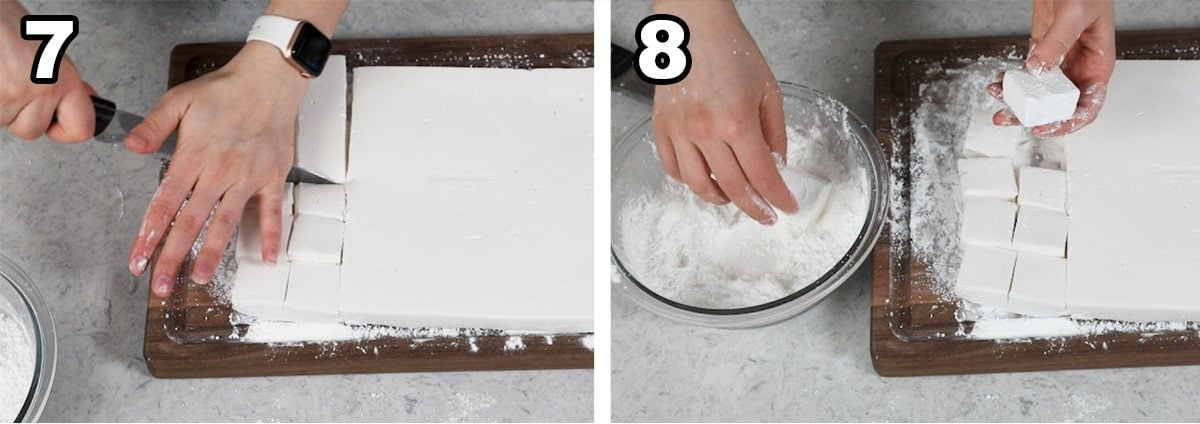
SAM’S TIP: While you could opt to use all powdered sugar for the dusting powder, it will make the marshmallows stickier, messier, and even sweeter than they already are. A blend of powdered sugar and cornstarch keeps the marshmallows from sticking to each other, gives them a manageable exterior (even where they’re sticky from being cut), and tastes similar to what you’ll find on a store-bought marshmallow. Remember, this is just an overview of the ingredients I used and why. For the full recipe please scroll down to the bottom of the post!
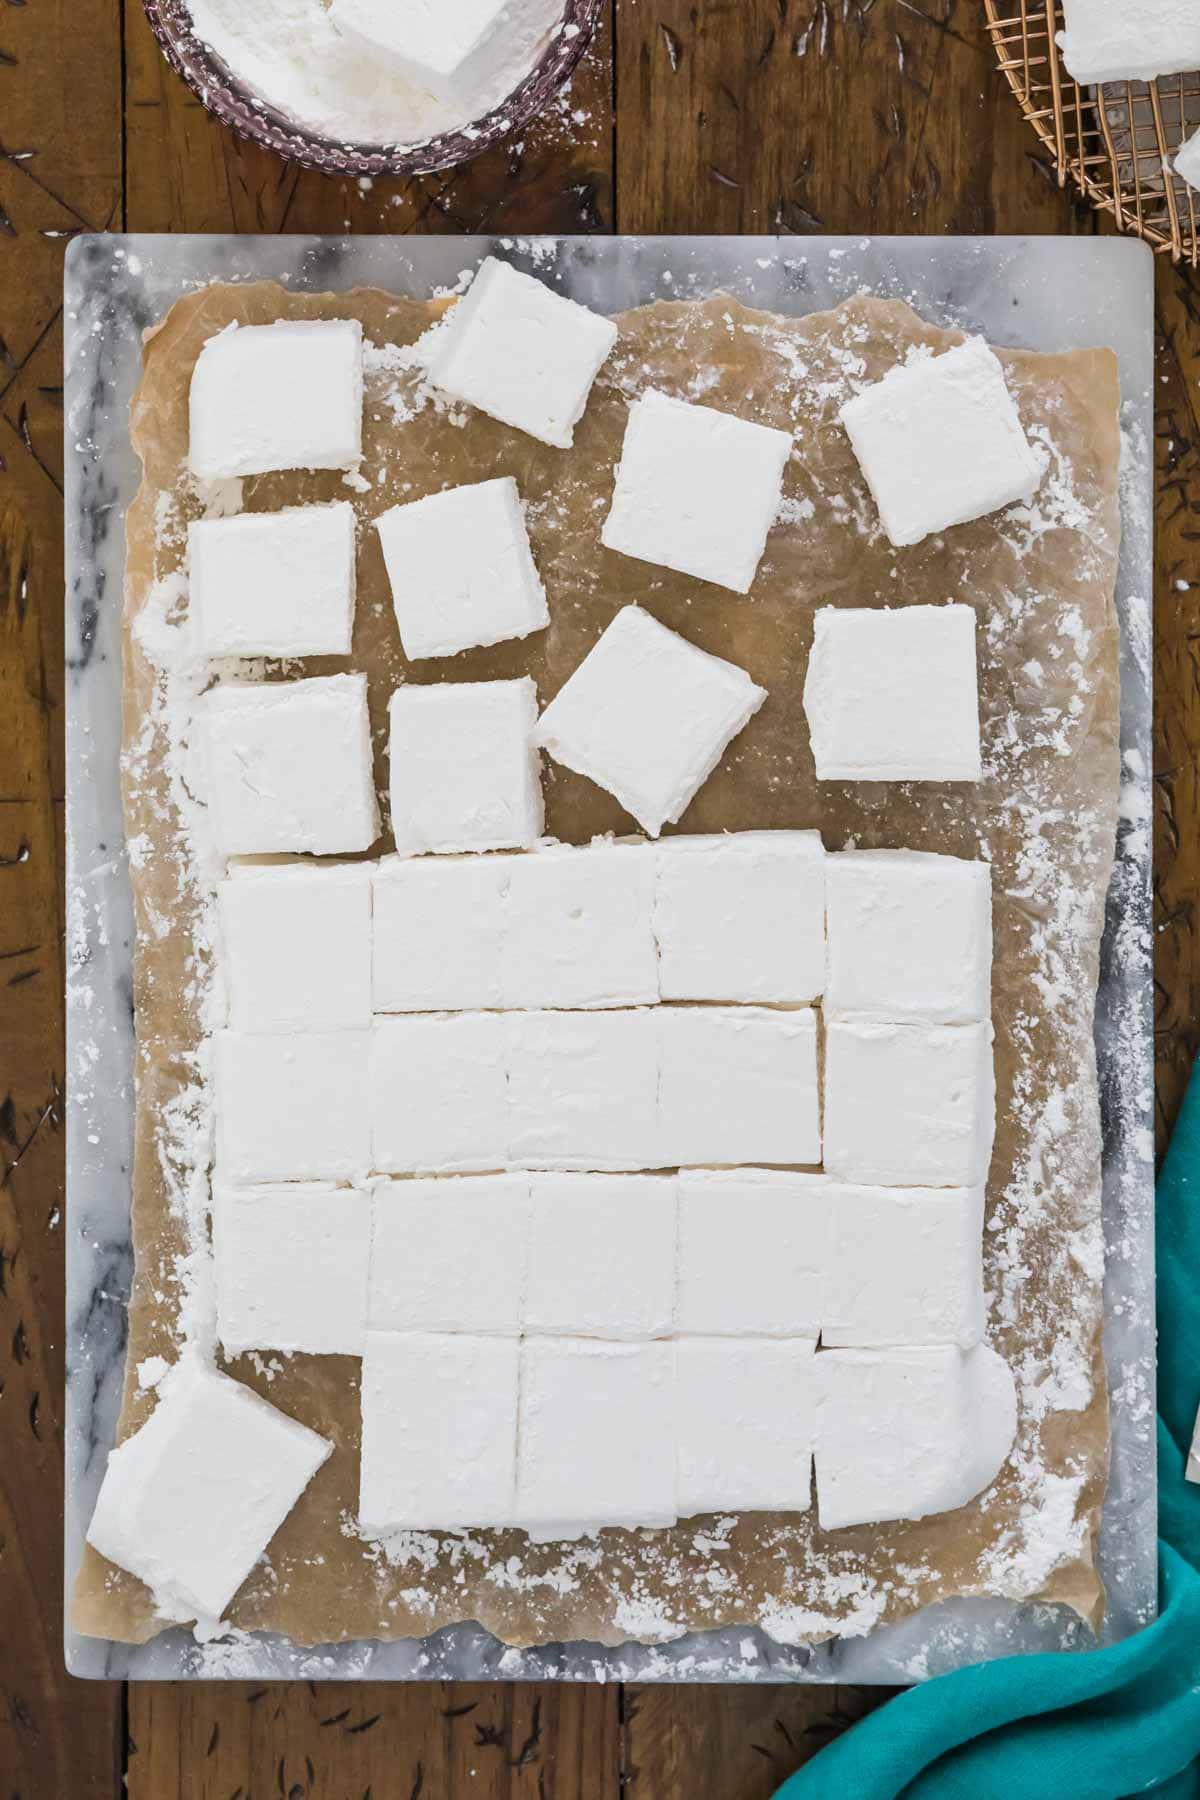
How to Make Homemade Marshmallows
SAM’S TIP: Be very careful when handling the hot syrup! Keep your mixer speed very low until it’s combined, because if it splashes on you, it will burn you. Enjoy!
More Recipes You Might Like
Homemade Peppermint MarshmallowsS’mores Cheesecake Dessert ShootersS’mores Cereal Bars
Let’s bake together! I’ll be walking you through all the steps in my written recipe and video below! If you try this recipe, be sure to tag me on Instagram, and you can also find me on YouTube and Facebook
Related Recipes