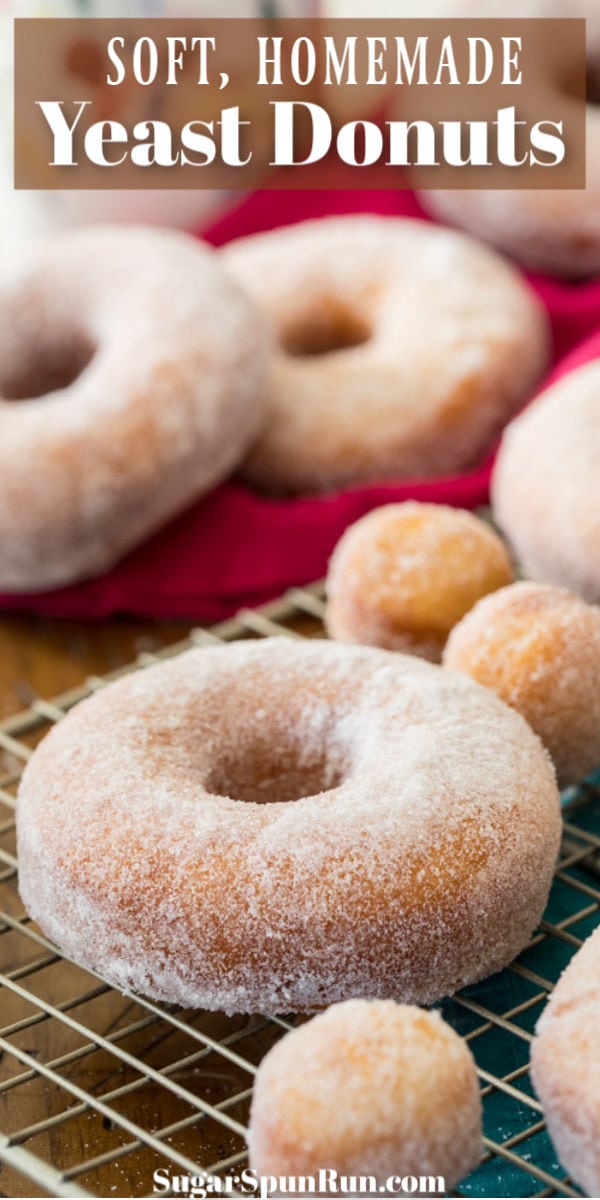
Raise your hand if you’ve ever been nervous about baking with yeast 🙋🏼♀️ I know not everyone has this fear, but for years I was terrified of any recipe that started with a sachet of yeast. I just couldn’t ever get the dough to cooperate. My baked goods came out too dense, too hard, just disappointingly below average in every way. I could make homemade cookies and cakes all day everyday, but if I wanted a donut, it came from the local grocery store’s bakery (or I made my no yeast donut holes!). Fast forward a few years and a few carefully tested yeasty recipes (my cinnamon rolls, pizza dough, dinner rolls…), and I’m no longer afraid to experiment with yeast recipes in the kitchen. A little bit of practice, and it’s really not that different from any other kind of baking. And if I can make these perfectly soft, melt-in-your-mouth, sugared homemade donuts, then trust me, you can too, no matter how intimidated you might have been in the past. I’ll walk you through all of the steps in detail in the recipe below and, in case you’re a visual learner, I’ve included a how-to video just below the recipe.
What You Need:
Chances are you already have everything you need in your pantry (/fridge)!
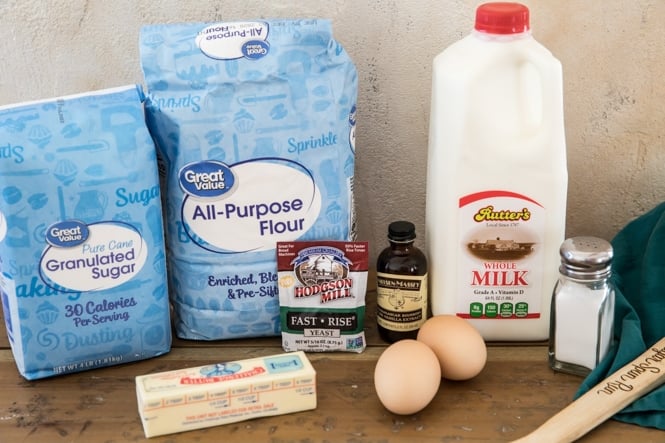
All purpose flour Granulated sugar. A surprisingly small amount of sugar goes into these donuts; a lot of the sweetness comes from the coating you add to the outside. Instant yeast Salt Whole milk Butter Eggs Vanilla extract. This is optional but adds a nice depth of flavor to the donuts. I based this recipe off of a favorite from a local bakery and after lots of taste testing I’m confident they used vanilla extract in their recipe, so I included it in mine.
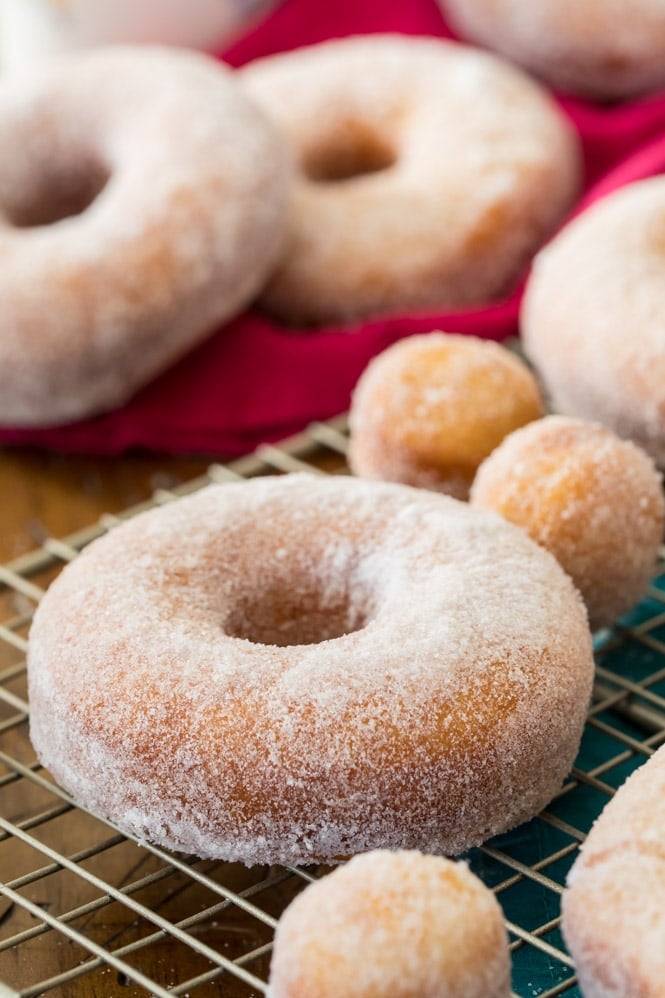
You’ll also need oil for frying your donuts as well as some sort of coating from the outside. I like to coat my donuts with granulated sugar, powdered sugar, a blend of cinnamon and (granulated) sugar, or a simple butter glaze (recipe for that included in the instructions!).
Do You Need a Deep Fryer To Make Donuts?
Nope! All you need is a deep pan (I like to use my heavy-bottomed, medium-sized saucepan and fry one donut at a time) and some oil. I do recommend using a thermometer, though, as it’s critical that you know your oil temperature.
What Kind of Oil Should I Use?
You will want to use a neutral oil for frying. This means an oil that doesn’t have a strong taste or fragrance of its own (so olive oil is out!). I recommend either vegetable oil or canola oil for frying donuts. Peanut oil would also work!
Can I Make These in Advance?
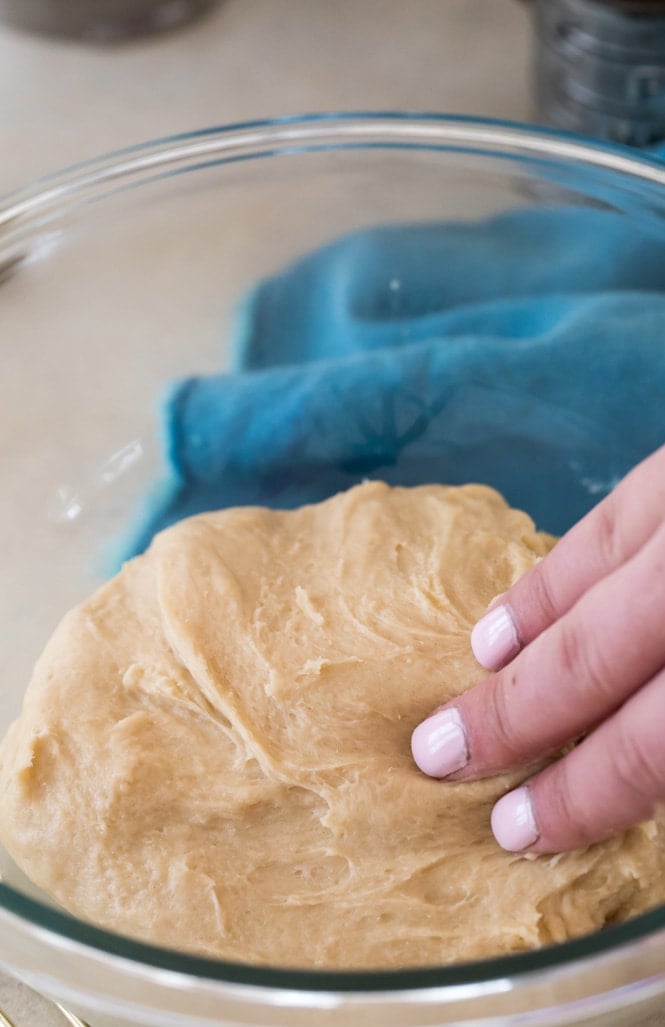
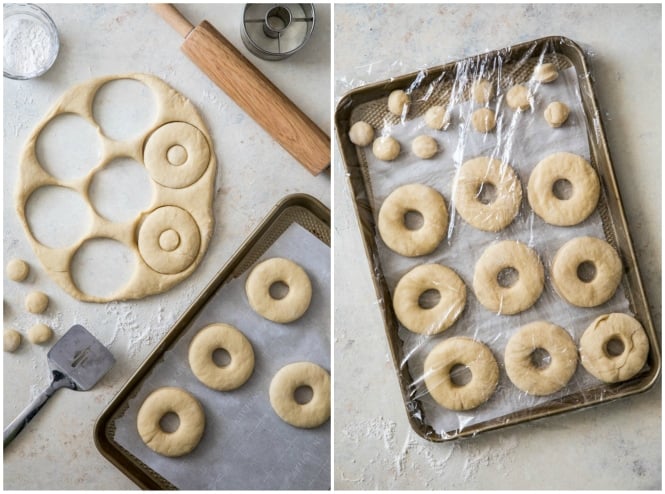
I generally believe that any donuts (especially homemade donuts) are best served fresh and warm. However, these can be stored after frying and glazing. After cooling, store them in an airtight container for up to two days. If you would like to make the dough in advance, you can make the dough the night before. Make the dough and then place in a large bowl. Cover tightly with plastic wrap and store in the refrigerator until the next morning before proceeding with the recipe.
Can I Fill These Donuts?
Yes! To make filled donuts, simply cut out the dough without the hole in the center. Fry donuts until a light golden brown (it will take a bit longer than your donuts with the hole in the center, unsurprisingly). Let them cool completely, then fill by fitting a large piping bag with a round pointed tip, inserting that tip halfway into your donut, and squeezing the filling inside. I recommend my homemade pastry cream as a great filling.
MORE TIPS!
Watch your donuts carefully
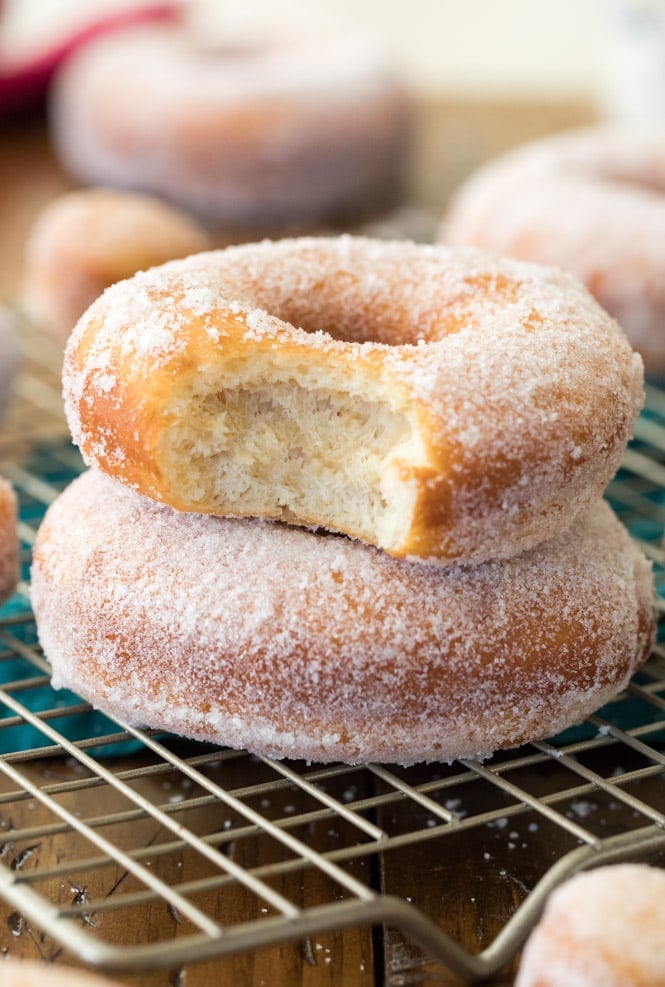
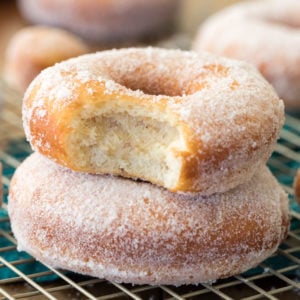
You’ll fry your donuts in oil that’s between 350-355F. For me, this took about 60 seconds on either side. However, if your donuts are slightly larger or smaller than mine you may need more or less time. I recommend doing a test donut and watching for the donut to just be beginning to turn a light golden brown. Fry it, let it cool, and then bite in. Your donut should be fully cooked (not gooey) in the center, but pillowy-soft and almost melt in your mouth. If it’s at all dry, you cooked it for too long, so shave some time off for your subsequent donuts.
Fry one at a time
When you add your donut to the oil, the temperature will drop. If you add too many donuts at once, the temperature could drop so much that the donuts take much longer to cook, and the reduced oil temperature can make the end result greasy. Fry one at a time, allowing the oil to come back to temperature between donuts. Also, if you accidentally cook for too long, at least you’ve only burned one donut, and not half of your batch!
A thermometer is a necessity
Without one there’s no way to tell that your oil temperature is accurate. See my notes above for troubleshooting donuts that came out too greasy/underdone/etc.; it usually comes down to your oil temperature.
Enjoy!
More Recipes You Might Like:
Cream Puffs Homemade Soft Pretzels Palmiers Sour Cream Donuts (no yeast)
Let’s bake together! Head on over to my YouTube channel where I’ve already uploaded over 200 recipe videos that you can watch for free!