Sweet & Soft Lofthouse Cookies
Well, this recipe sure was an adventure. I spent the past few weeks exhausting my ovens and mixer while working to capture the true essence and texture of real Lofthouse cookies, only without any of the artificial flavors/mass-produced taste. I tried uncommon ingredients, cumbersome techniques, and spent about 10lbs of butter tweaking the recipe to perfection, only to land on a version that is surprisingly unfussy (thank goodness!) and that uses very basic ingredients. They have a classic, soft and cakey, not-too-sweet base that’s paired with a much sweeter frosting. Exactly like the real thing. The Lofthouse cookie frosting is a slightly modified American buttercream; it’s sweet and will develop a crust as it sits (though it’s still not great for stacking — you’ll get smudged icing). I chose to color mine with pretty shades of pink (which my sister insisted was the classic and only choice), but you could use any color or leave them white. They make cute fall cookies decorated with orange icing and halloween sprinkles, too!
What You Need
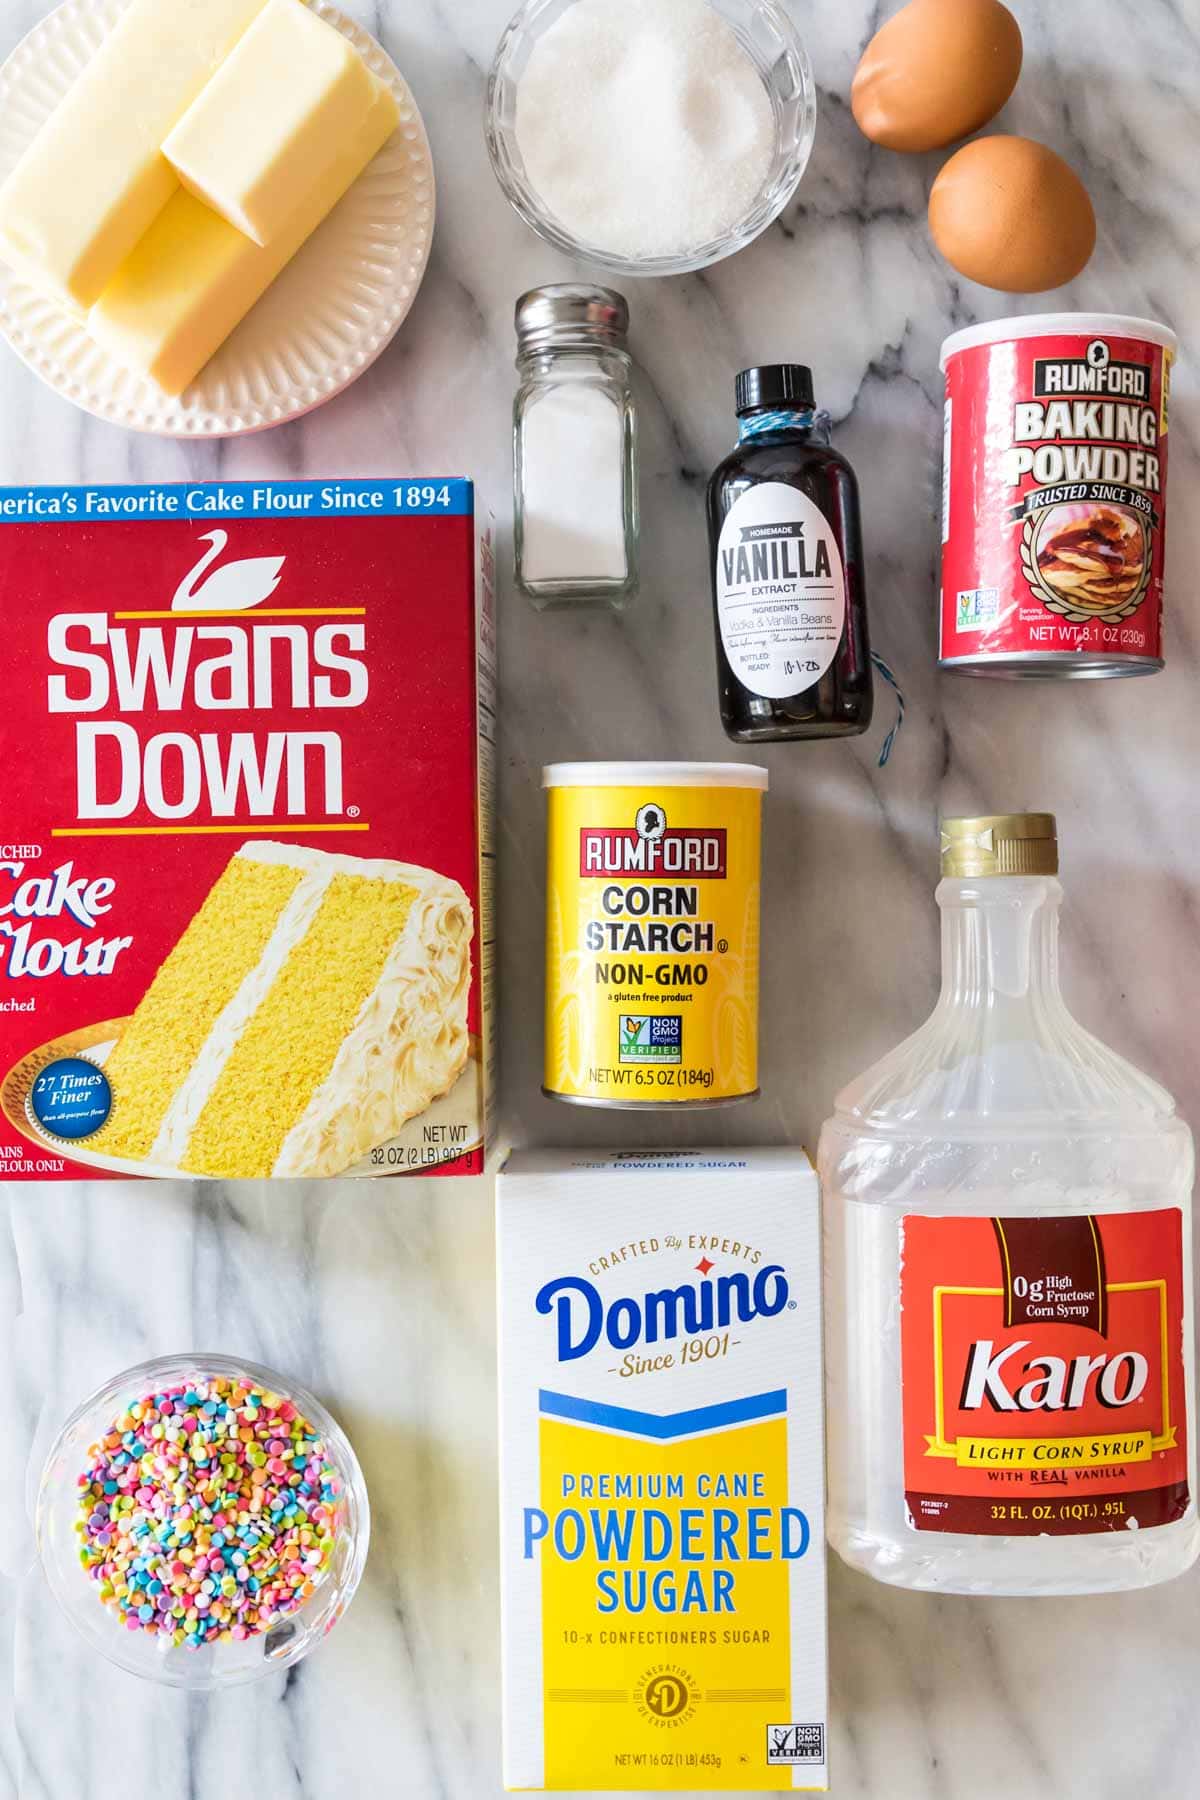
Here’s what you need to make your copycat Lofthouse cookies taste just like the real thing:
Cake flour. Cake flour is one of the key ingredients that makes these cookies a true copycat. It gives them that light, melt-in-your-mouth texture. I tried so many methods to make the cookies taste authentic and found that cake flour made the biggest difference. While you can substitute an equal-weight amount of all-purpose flour, you simply won’t get the same texture. Corn starch. This makes our Lofthouse cookies soft and tender, and it helps them keep their shape too! Don’t skip it!Vanilla extract. I use pure vanilla extract here, but you can substitute imitation vanilla extract for a flavor that’s slightly closer to the store-bought version. Egg + egg white. The extra egg white adds structure to the dough and contributes to that light, slightly more cakey texture that you’re familiar with (such a switch from the chewy cookies I usually aim for!).Corn syrup. This is for the Lofthouse cookie icing. While you could leave this out (expect a softer frosting), just a tablespoon gives the frosting the perfect texture and makes it taste like the real deal!
Here’s what you won’t find: Sour cream! While many recipes use it, I found it was not necessary and did not yield a true taste or texture. While I use it in my (similar) frosted sugar cookies, it just didn’t belong in a Lofthouse cookie recipe (though I went through several tubs of sour cream during my testing, trying to make it work!)! SAM’S TIP: For the frosting, I prefer using gel food coloring because it’s more potent and yields a much brighter, more vibrant color than liquid food coloring. A single drop of gel works for this icing! Remember, this is just an overview of the ingredients I used and why. For the full recipe please scroll down to the bottom of the post!
Texture & Technique
Before we go any further, let’s talk texture and technique for a moment. You’ll notice that if you break a store-bought Lofthouse cookie in half, the cookie is sort of made up of delicate layers, almost like a scone or biscuit. To achieve this effect, I tried using a food processor to make this dough (cutting butter into the dry ingredients) and was able to recreate that same, flaky/layered appearance in my cookies… but it did nothing for the taste and in a blind-taste-test was indiscernible from the cookies made in a more traditional manner. Because of this, I decided it wasn’t worth a more complicated method (or the extra dirty dish), and opted for the simpler, more traditional creaming method instead (detailed below!).
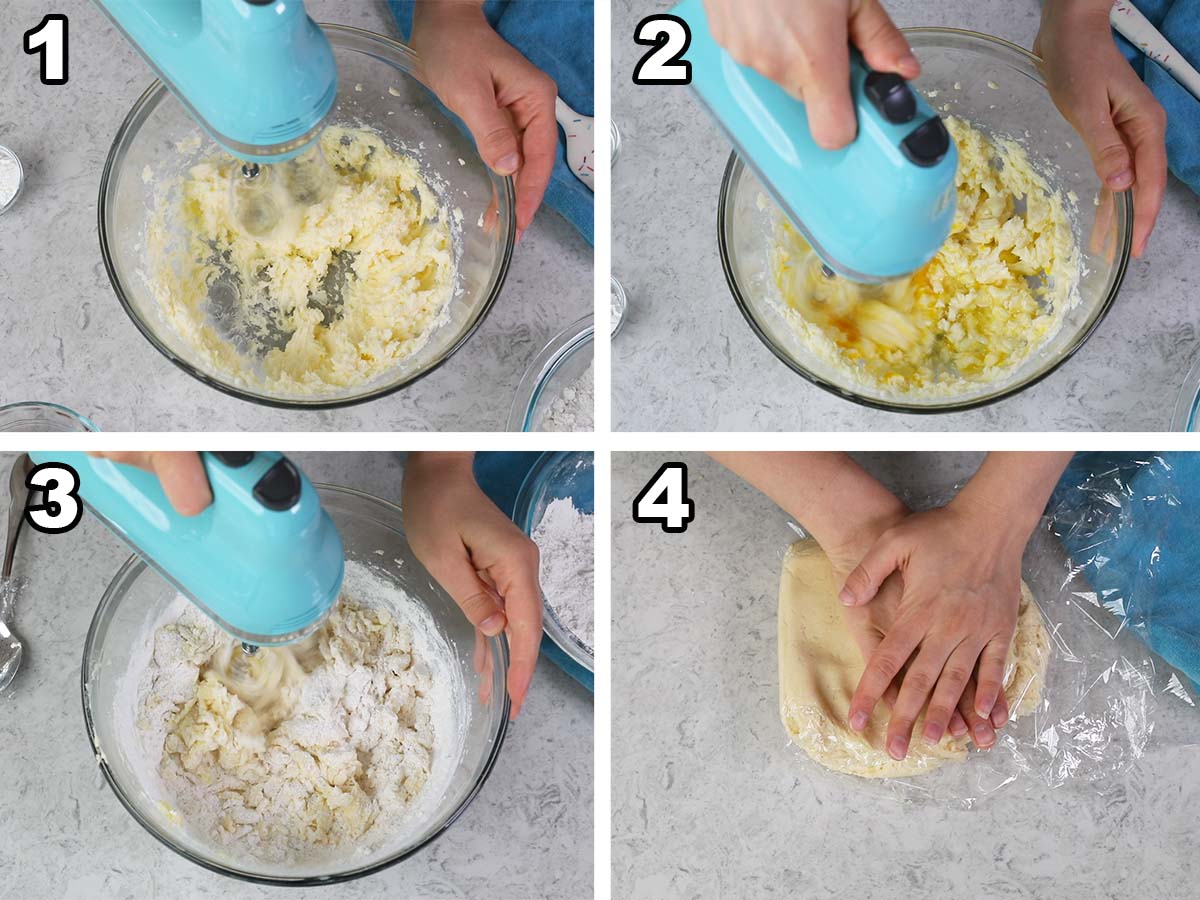
How to Make Lofthouse Cookies (The Dough)
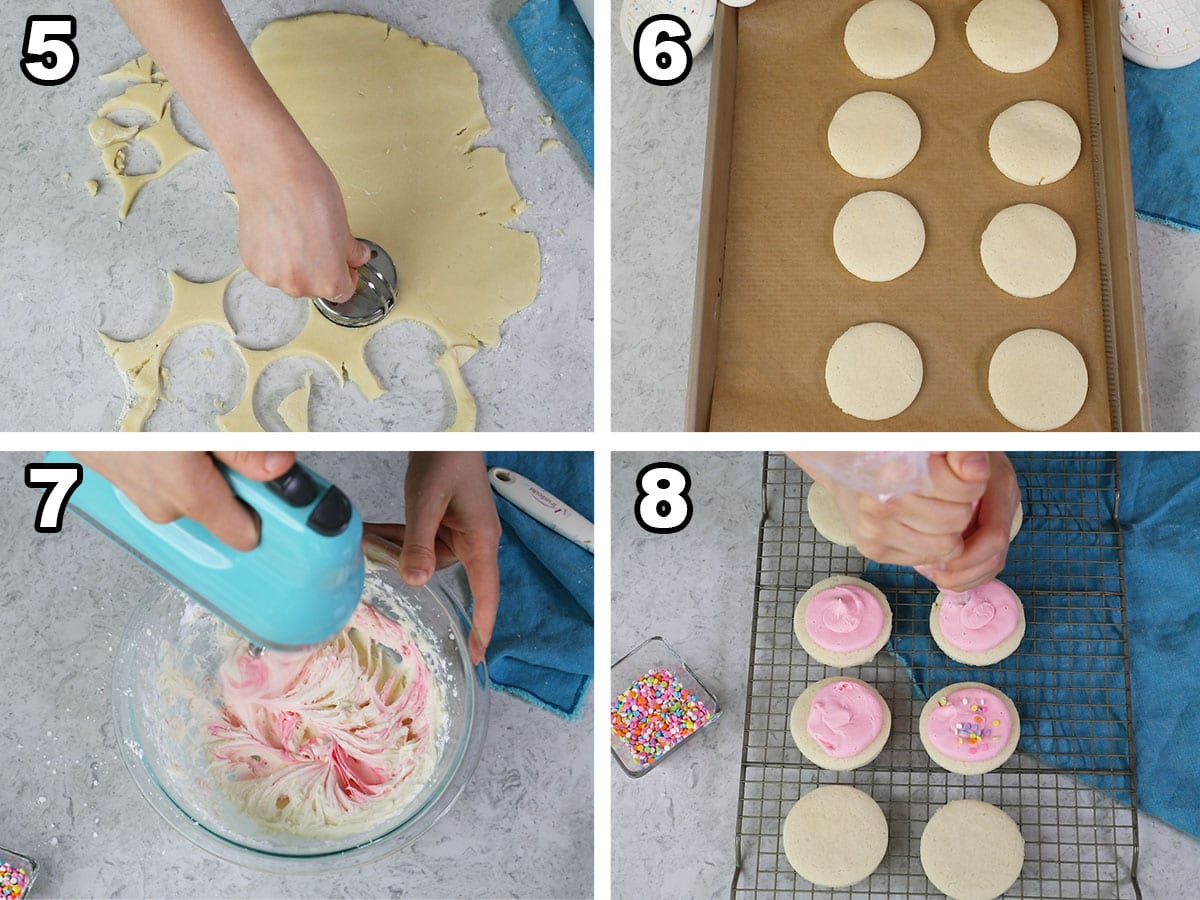
Cutting, Cooking & Frosting
SAM’S TIP: Plan your cuts carefully to get as many cookies as you can out of your first roll, but don’t forget to regroup your scraps from cutting out your cookies! We want to get as many cookies as possible from our dough. These copycat Lofthouse cookies were quite a project for me to develop and get just right (took months!) but ultimately they were so much fun to make. I hope you enjoy making them just as much! Enjoy! Let’s bake together! I’ll be walking you through all the steps in my written recipe and video below! If you try this recipe, be sure to tag me on Instagram, and you can also find me on YouTube and Facebook
Related Recipes