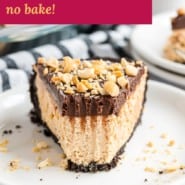
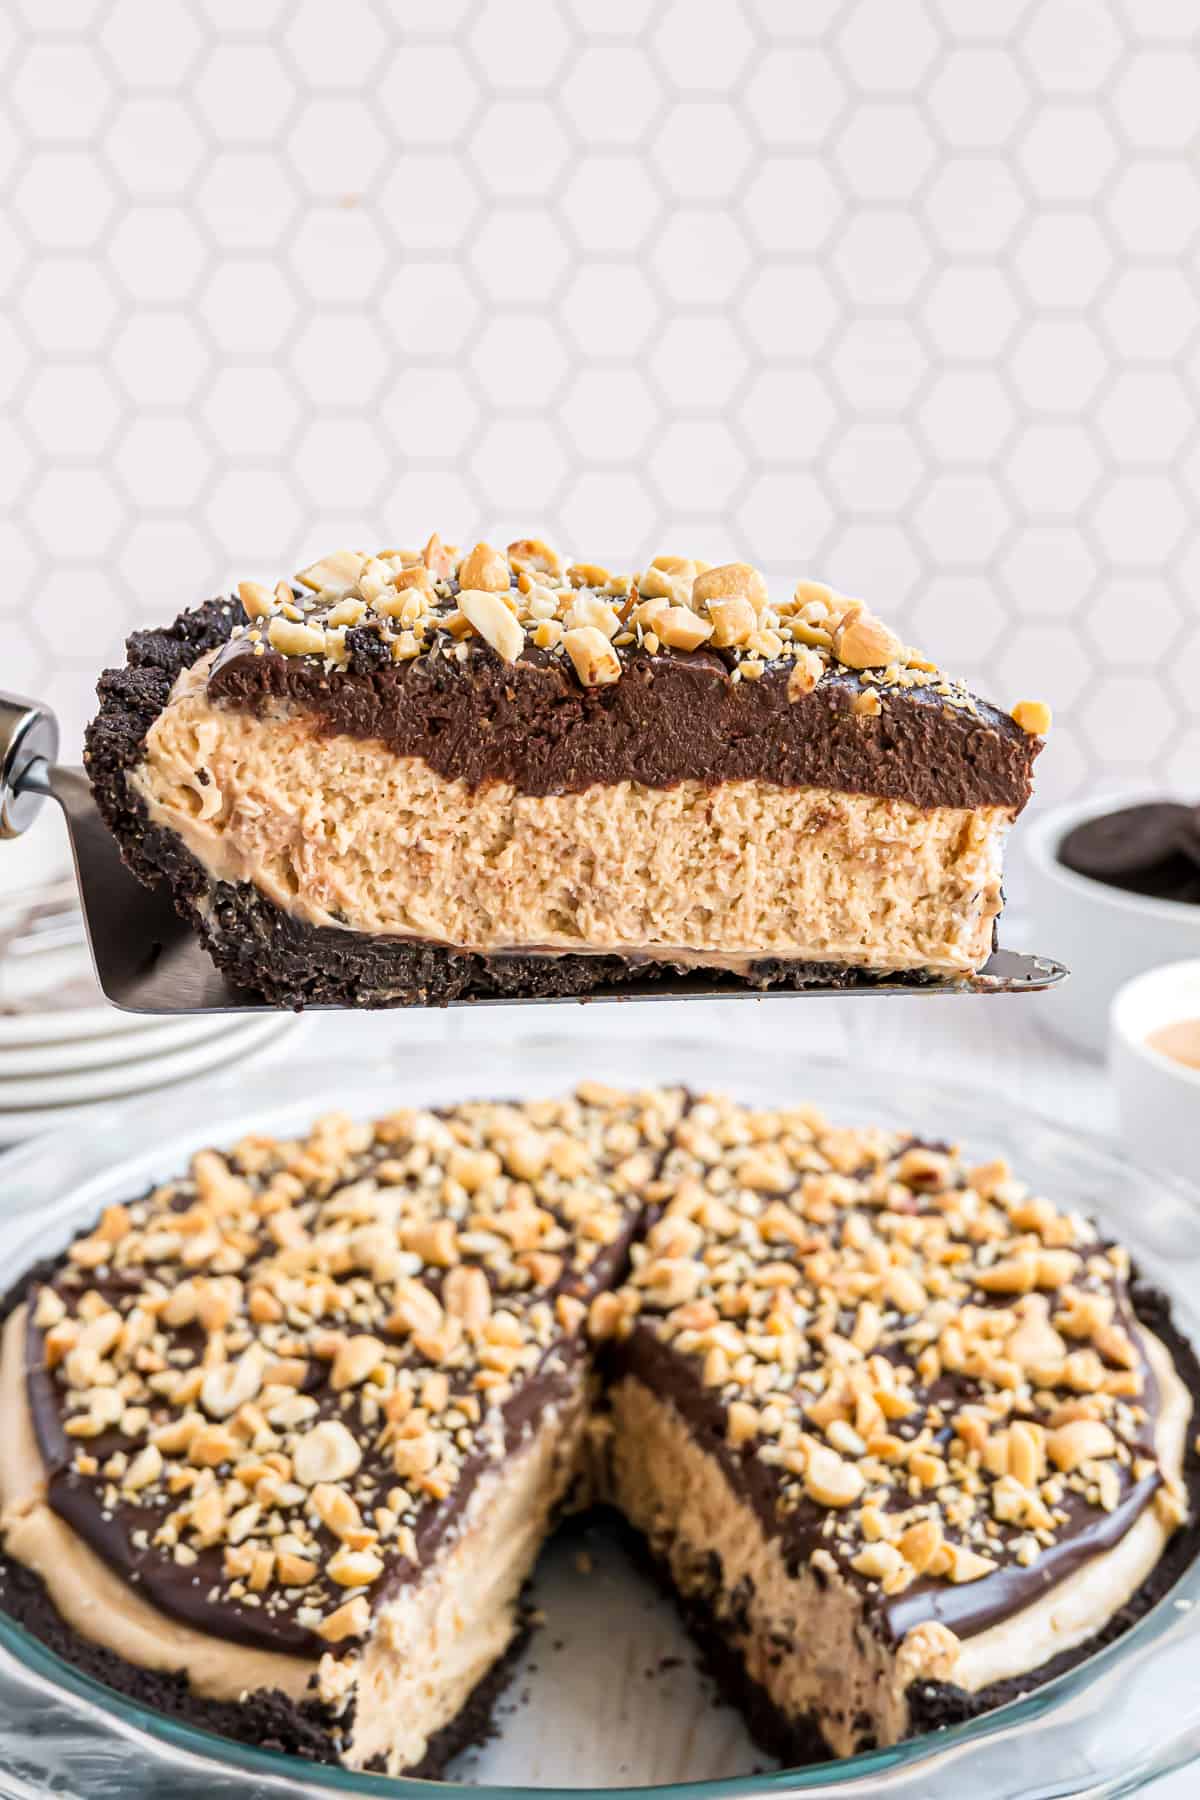
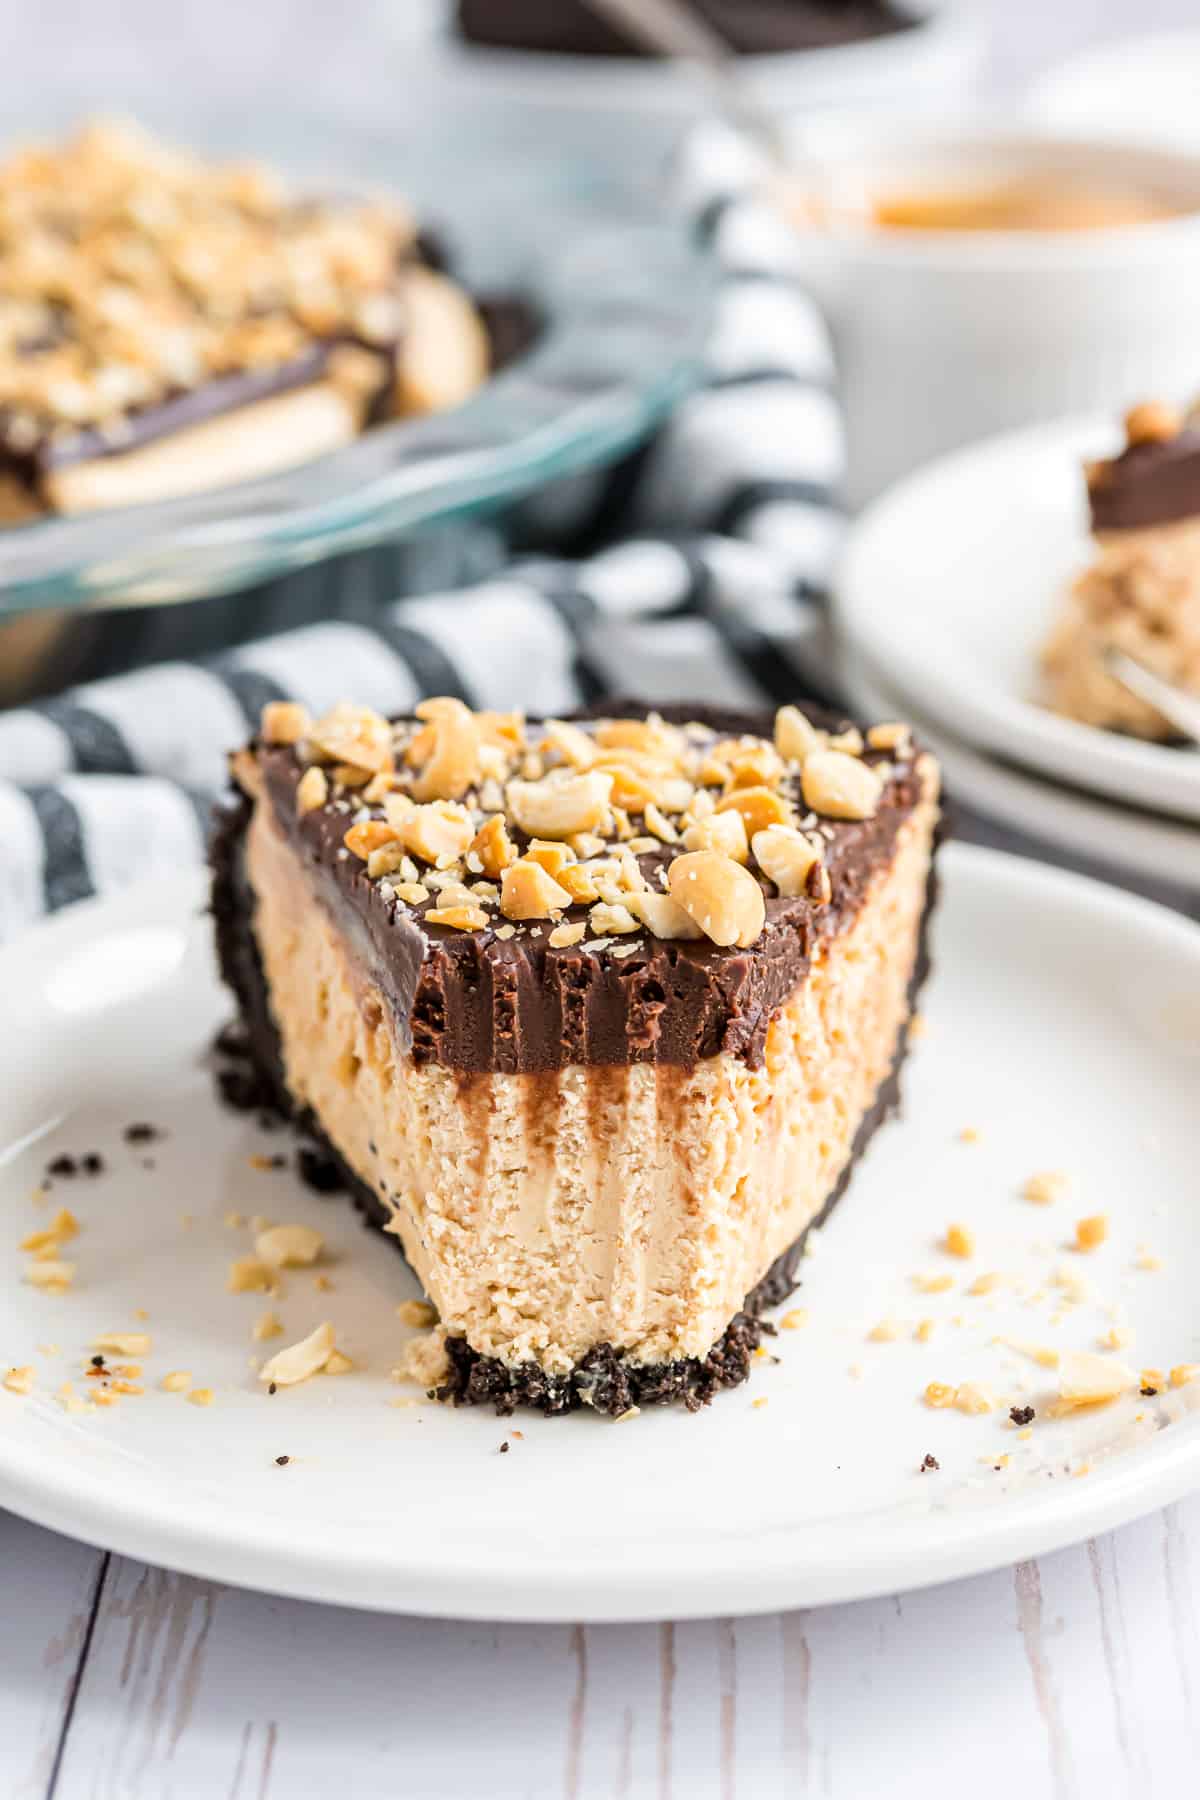
How long it takes: 25 minutes to prep, plus 4 hours to chill Equipment you’ll need: Food processor, pie plate, electric hand mixer Servings: Because this pie is so rich, it will easily serve 10 to 12 people. Instead of a standard sweetened peanut butter filling, I kick it up a notch by blending smooth peanut butter with cream cheese, powdered sugar, and dreamy whipped cream. The result is tangy like a peanut butter cheesecake, but also light, fluffy, and supremely creamy. The airy filling is poured right into an Oreo crust—no baking needed, not even for the crust!—and then a layer of ganache is spread over the top. Here again, we’re straying from a traditional peanut butter cup, but I think we can all agree that rich, melt-in-your-mouth ganache is way better than regular chocolate. This is a recipe that’s certain to be a hit!
Reasons to Love Chocolate Peanut Butter Pie
A no-bake recipe. I love a creamy chilled pie but most recipes have a baked crust. This chocolate peanut butter pie is a true no-bake recipe because the Oreo crust doesn’t need to be baked. Everyone’s favorite duo. There’s a reason why peanut butter cups are everyone’s favorite candy, right?! That combination of peanut butter and chocolate is quite possibly (probably!) the best thing since sliced bread. (You’ll also love it in my buckeyes recipe, easy-to-make buckeye brownies, and no bake peanut butter bars.) Serves a crowd. Because this pie is so rich and decadent, you can easily get 10 to 12 servings out of it. Needless to say, it’s also a crowd-pleaser! (Be sure to try another popular dessert, chocolate delight!) Make-and-freeze option. Chocolate peanut butter pie is fantastic for making ahead of time and freezing until you need it. It’s just as delicious frozen and thawed as it is freshly made.
Ingredient Notes
Ganache Topping
Heavy Whipping Cream: Accept no substitutes! A lighter dairy product like half-and-half or whole milk won’t give you the best ganache. You’ll use this in the filling too. Semi-Sweet Chocolate: I recommend using a high quality chocolate bar (at least 70% cocoa) because it has less sugar and will melt more smoothly than semi-sweet chocolate chips.
Crust
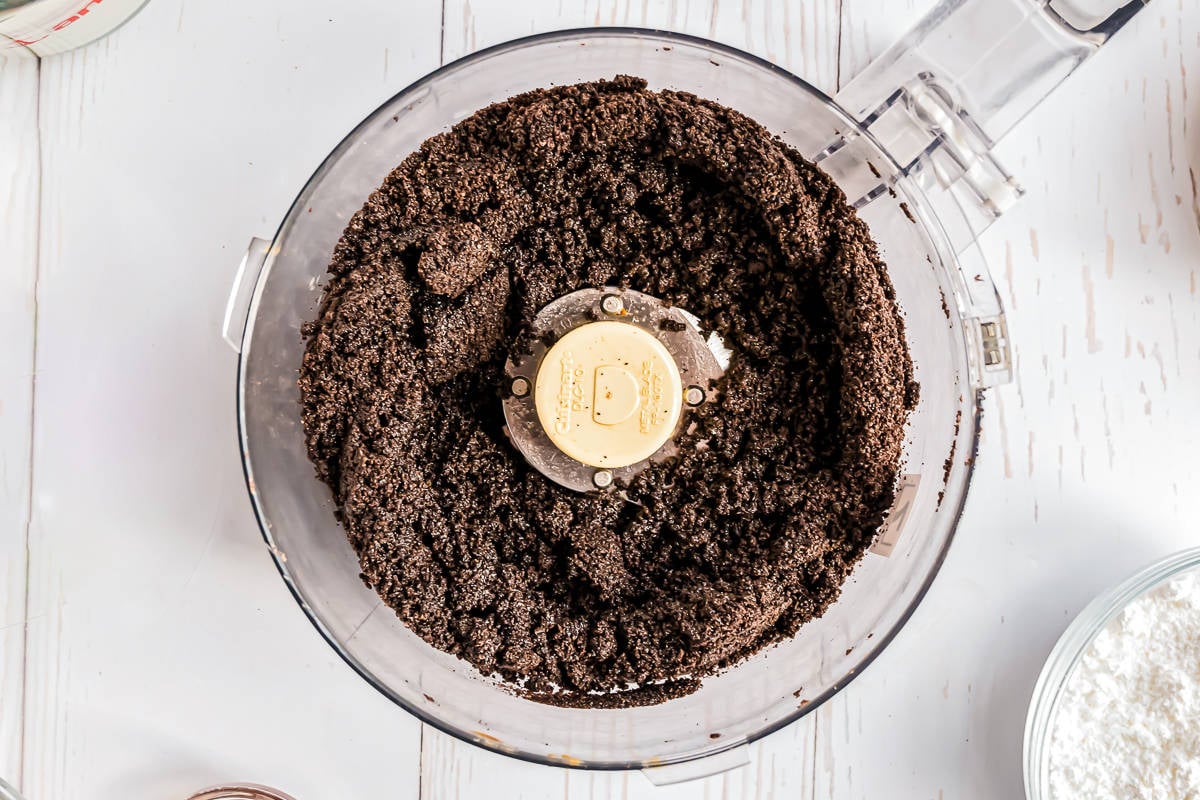
Oreos: Use regular Oreo cookies and avoid the Double Stuf variety, which will throw off the proportions of the crust due to the extra cream filling. Unsalted Butter: Melt the butter in a small saucepan or the microwave. Although it takes a bit longer, I usually prefer the stovetop method because it melts more evenly, without the risk of spattering.
Filling
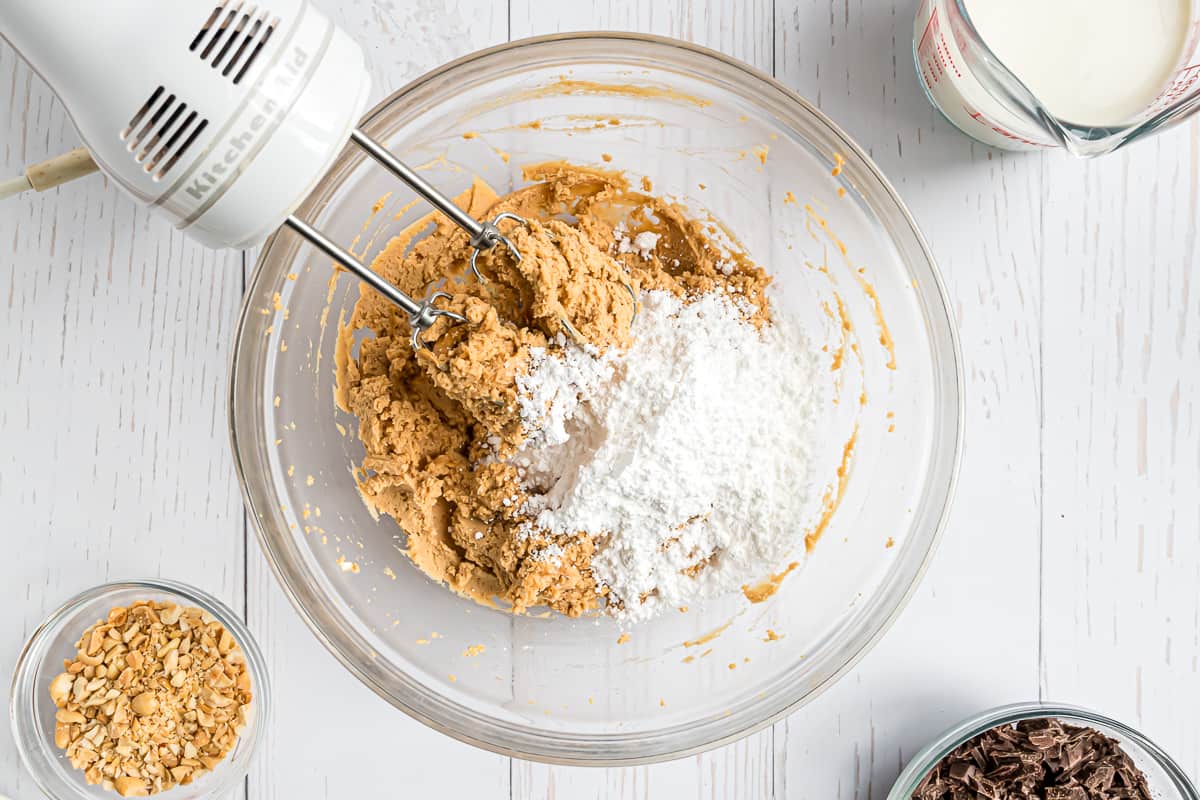
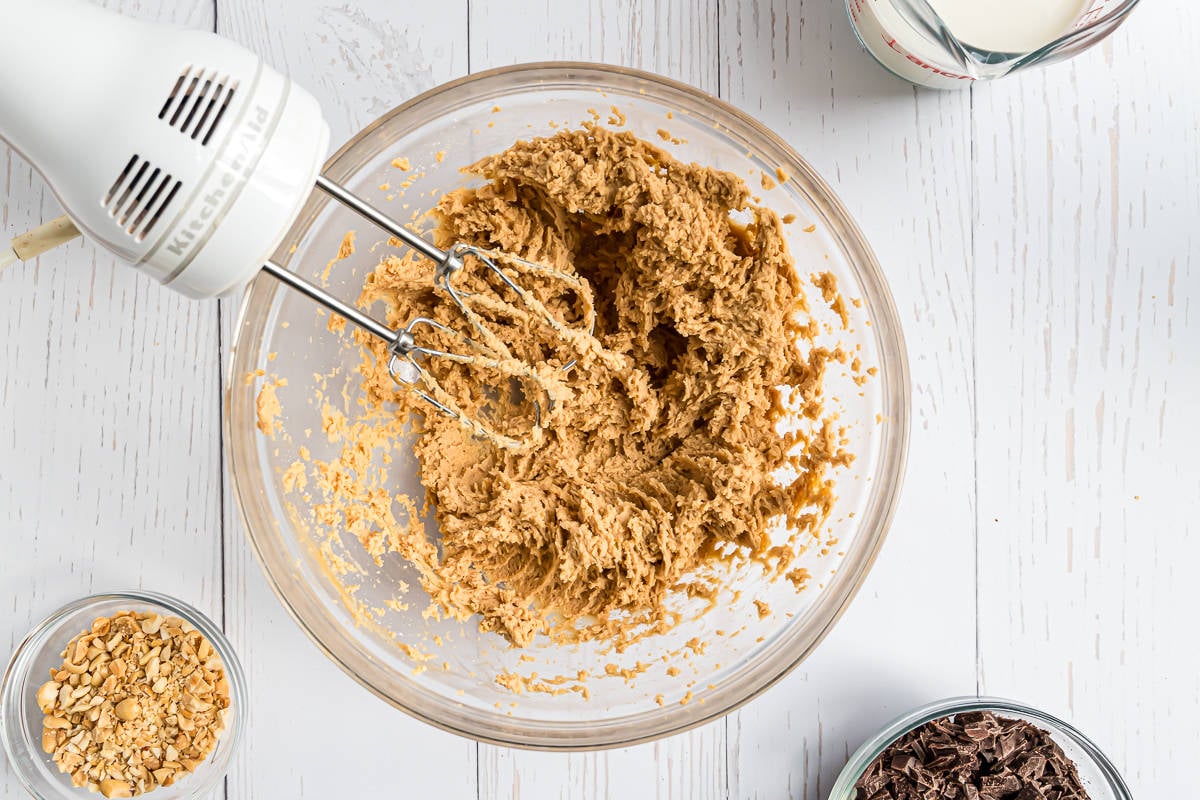
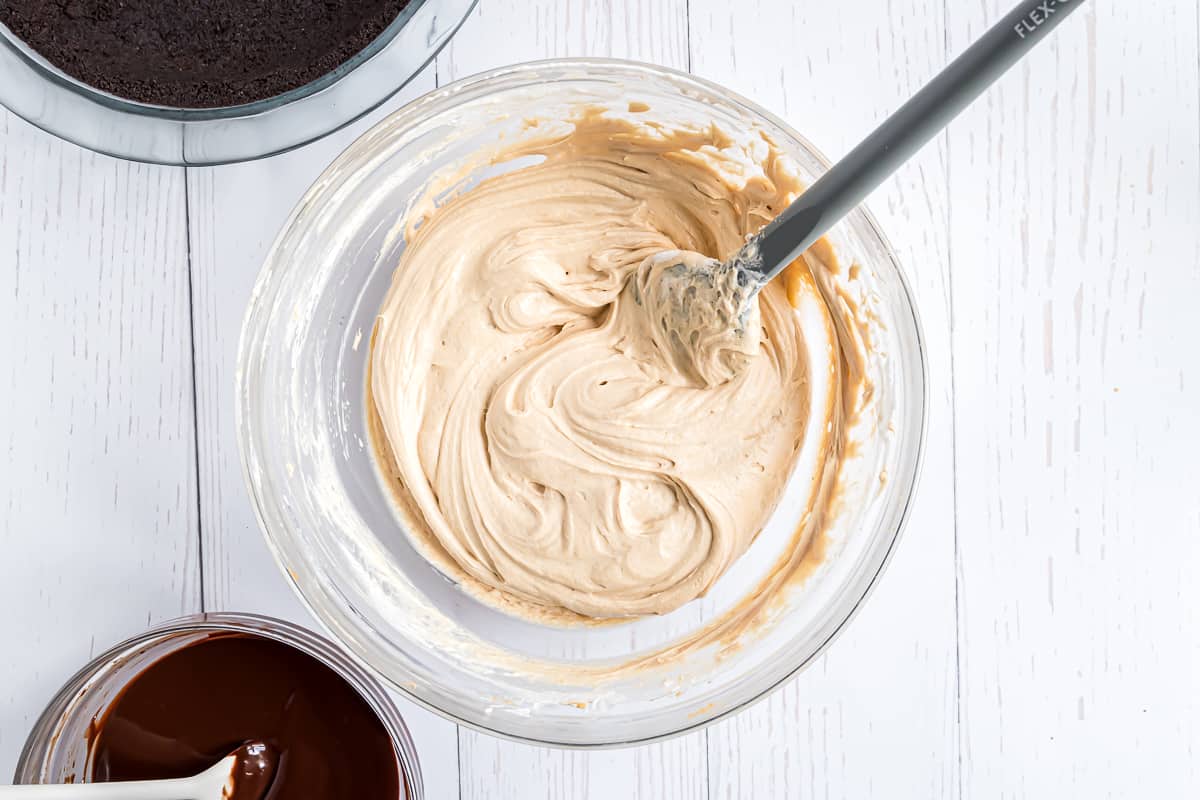
Cream Cheese: Use the full-fat blocks of cream cheese, not the tubs of whipped cream cheese. Creamy Peanut Butter: For this recipe, you’ll want to choose the regular shelf-stable peanut butter, not the natural kind that needs to be stirred before using. Powdered Sugar: Also known as confectioners’ sugar. Be sure to spoon the powdered sugar out of the container into a measuring cup, leveling it off. If you use the measuring cup to scoop the sugar, it compacts and you’ll get too much. Heavy Whipping Cream: Whipping the heavy cream until it’s fluffy gives the pie filling a lighter texture. Vanilla Extract: Vanilla doesn’t just add vanilla flavor; it also enhances the overall taste of a recipe.
Topping
Cocktail (salted) Peanuts: The crunchy texture and salty flavor add the perfect contrast to the sweet, creamy filling. Keep reading for even more topping ideas.
How To Make Chocolate Peanut Butter Pie
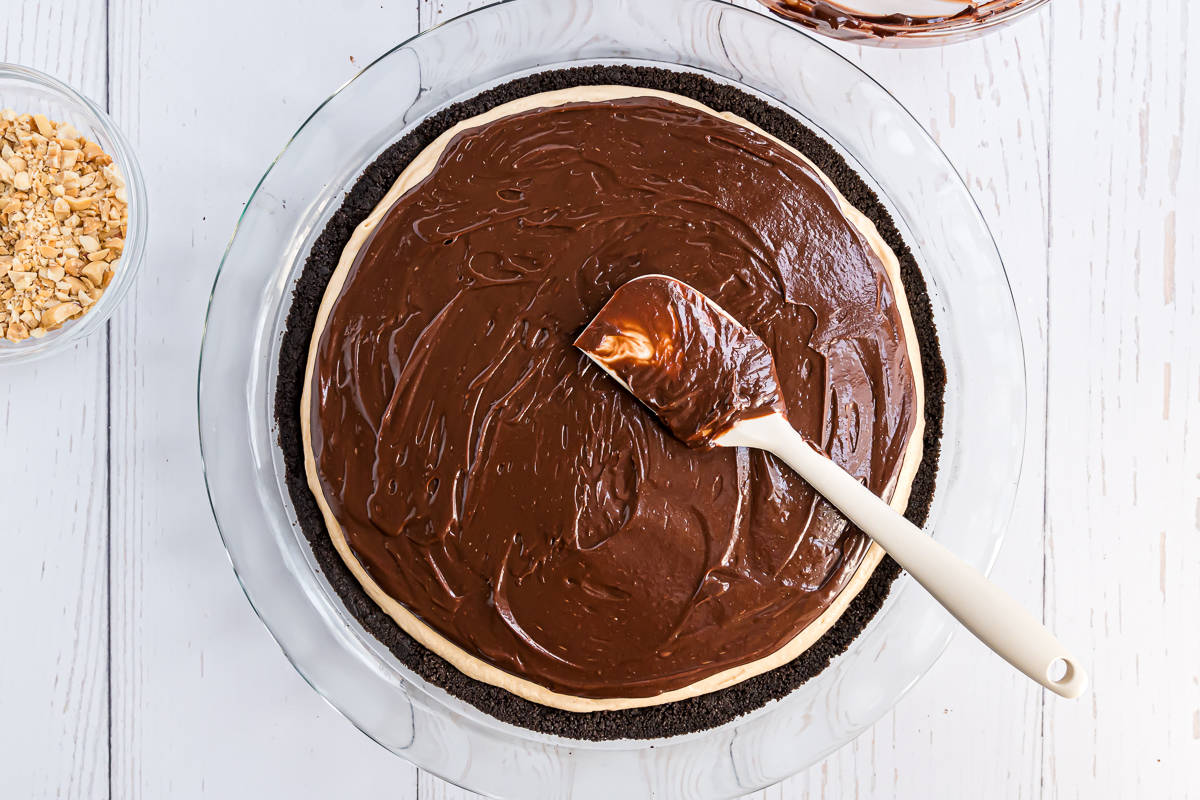
Start with the ganache. Chop the chocolate bar into small pieces. Warm the heavy whipping cream in a small saucepan set over medium heat until it just reaches a simmer, then pour it over the chocolate. Let it set for a few minutes to give the warm cream a chance to melt the chocolate. Stir the butter and cream gently with a spoon or rubber spatula until the mixture is smooth and velvety. Set it aside to cool while you work on the rest of the recipe. Note: Don’t refrigerate the ganache until you spread it on the pie. Make the crust. Using a food processor, crush the Oreo cookies. Add the butter to the processor and continue to pulse until the butter and crumbs come together. Press the crust mixture into the bottom and up the sides of a deep dish pie plate. Refrigerate the Oreo cookie pie crust while you make the filling to give it a chance to firm up. Make the filling. Using an electric mixer, beat the cream cheese until it’s smooth. Add the peanut butter and mix until it’s fully combined. Turn the mixer to low and beat in 1 cup of powdered sugar. Next, in a separate mixing bowl (the bowl that you chilled), whip the heavy cream until it reaches the soft peak stage. Add the vanilla and powdered sugar and continue to beat until stiff peaks form. Fold the whipped cream into the peanut butter mixture just until it’s incorporated. Don’t stir the filling mixture too much; you don’t want to deflate the whipped cream. Assemble the pie. Pour the peanut butter filling into the chilled pie crust. Smooth the top. Next, spread the chocolate ganache over the top of the pie. I like to leave a small border of peanut butter filling exposed for a sneak preview of what lies underneath. Be sure to garnish with the chopped peanuts before the ganache hardens so they stick. As hard as it may be to wait, you need to refrigerate your luscious chocolate peanut butter for 4 hours or overnight so the pie will be firm enough to slice.
Recipe Variations
Make mini chocolate peanut butter pies. Press the crust into the cups of a greased (or lined) muffin tin, then divide the filling into the cups. Switch up the topping. Not a fan of nuts in your desserts? Chopped Butterfingers, Snickers bars, or peanut butter cups is fabulous, as is Reese’s Pieces. For that sweet-and-salty contrast, try broken pieces of pretzels instead. Use a graham cracker crust. Make a graham cracker crust instead of using Oreos. You’ll need 2 ¼ cups of graham cracker crumbs for a deep dish pie pan. Make it nut-free. Use sunflower seed butter instead of peanut butter and skip the peanut topping to make this chocolate peanut butter pie allergy-friendly. Make it gluten-free. Simply swap in gluten-free Oreos and this is a gluten-free chocolate peanut butter pie!
Make Ahead and Storage
Refrigerate: Keep the pie covered in the refrigerator for up to 4 days. Freeze: For longer storage, cover the pie tightly with plastic wrap and place it in an airtight container or freezer bag for up to 1 month.