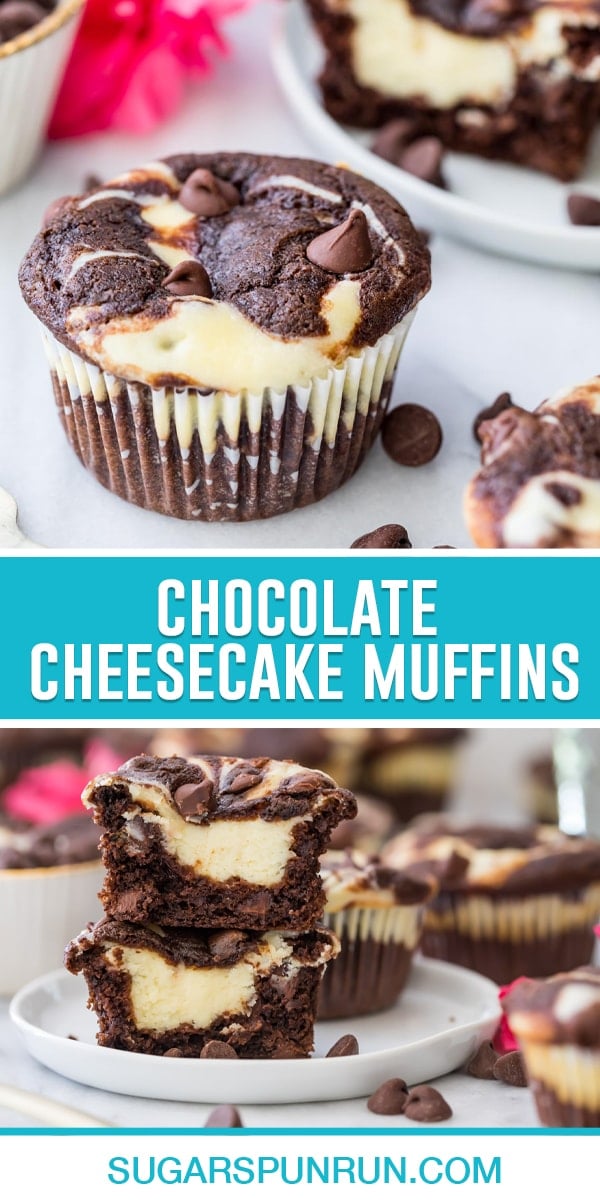
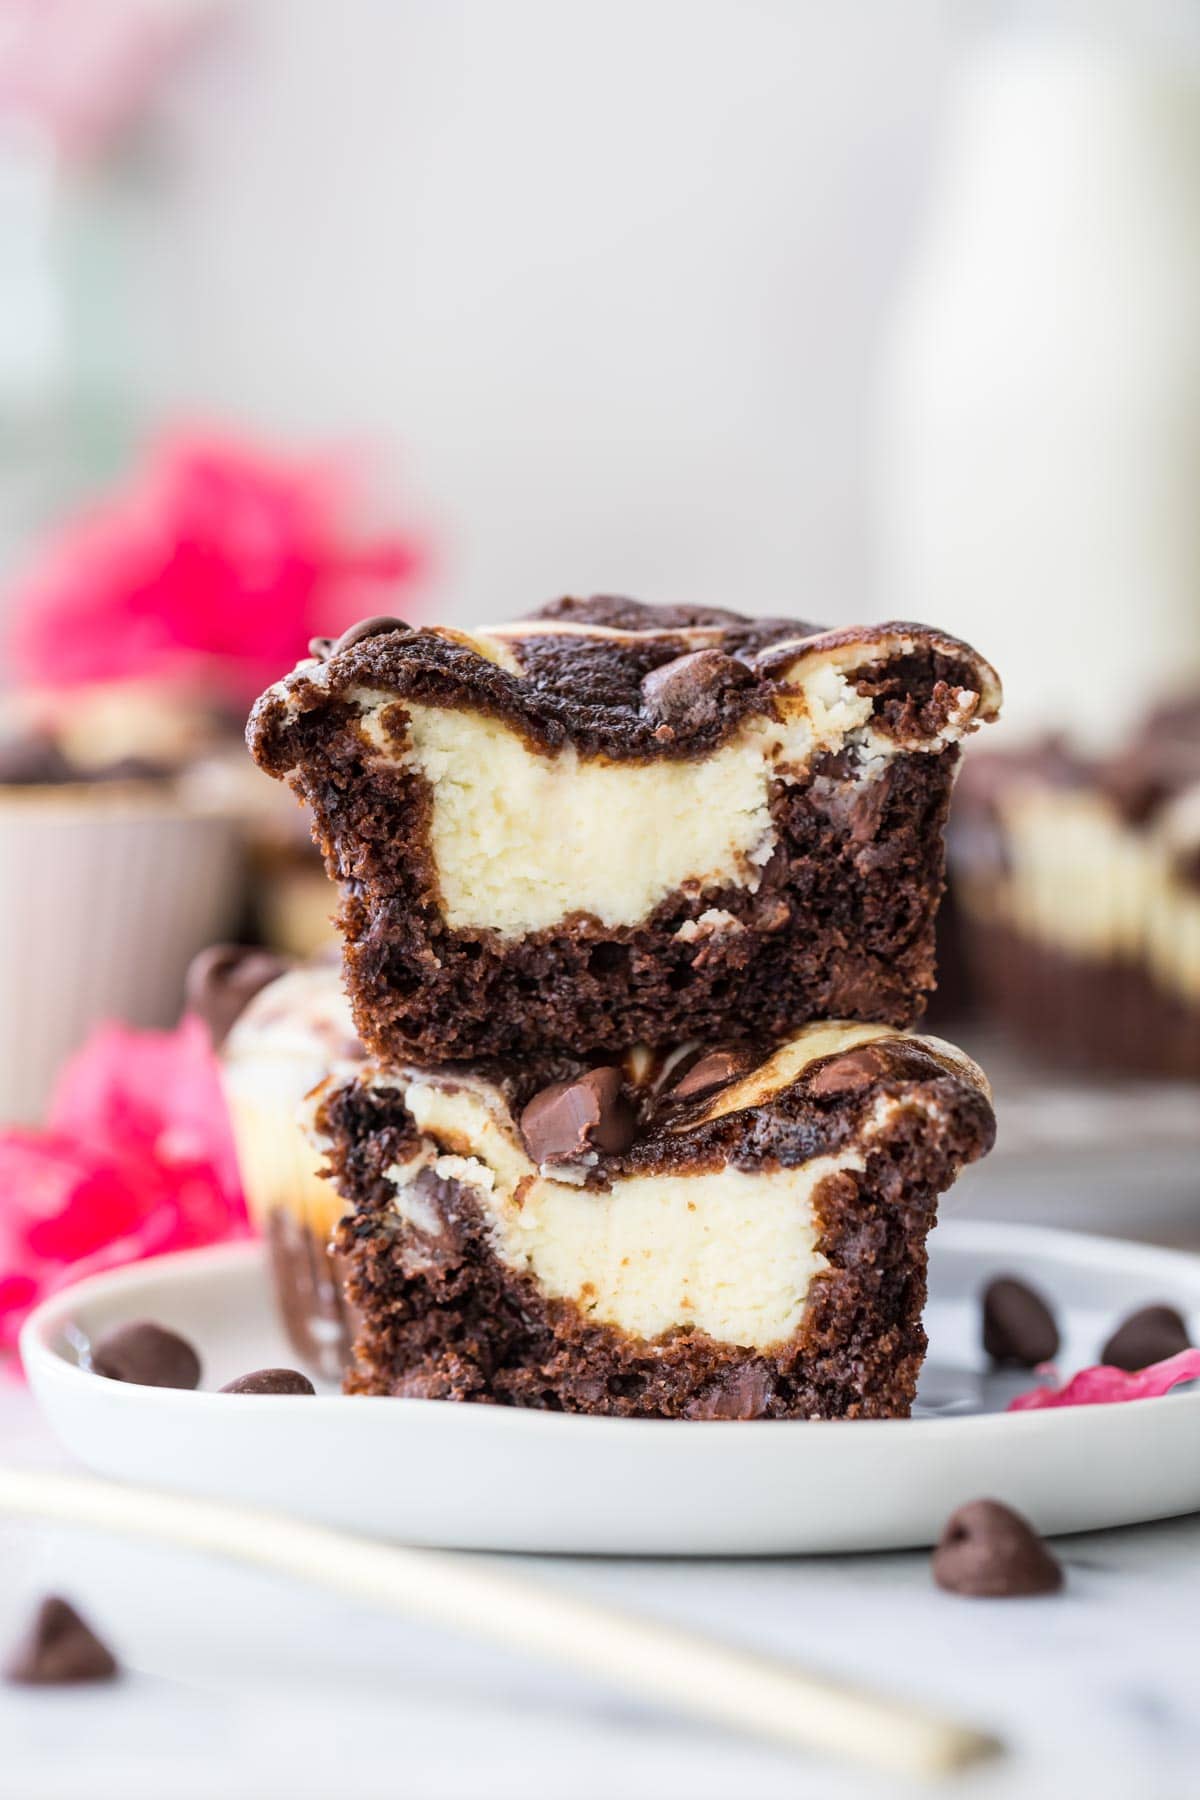
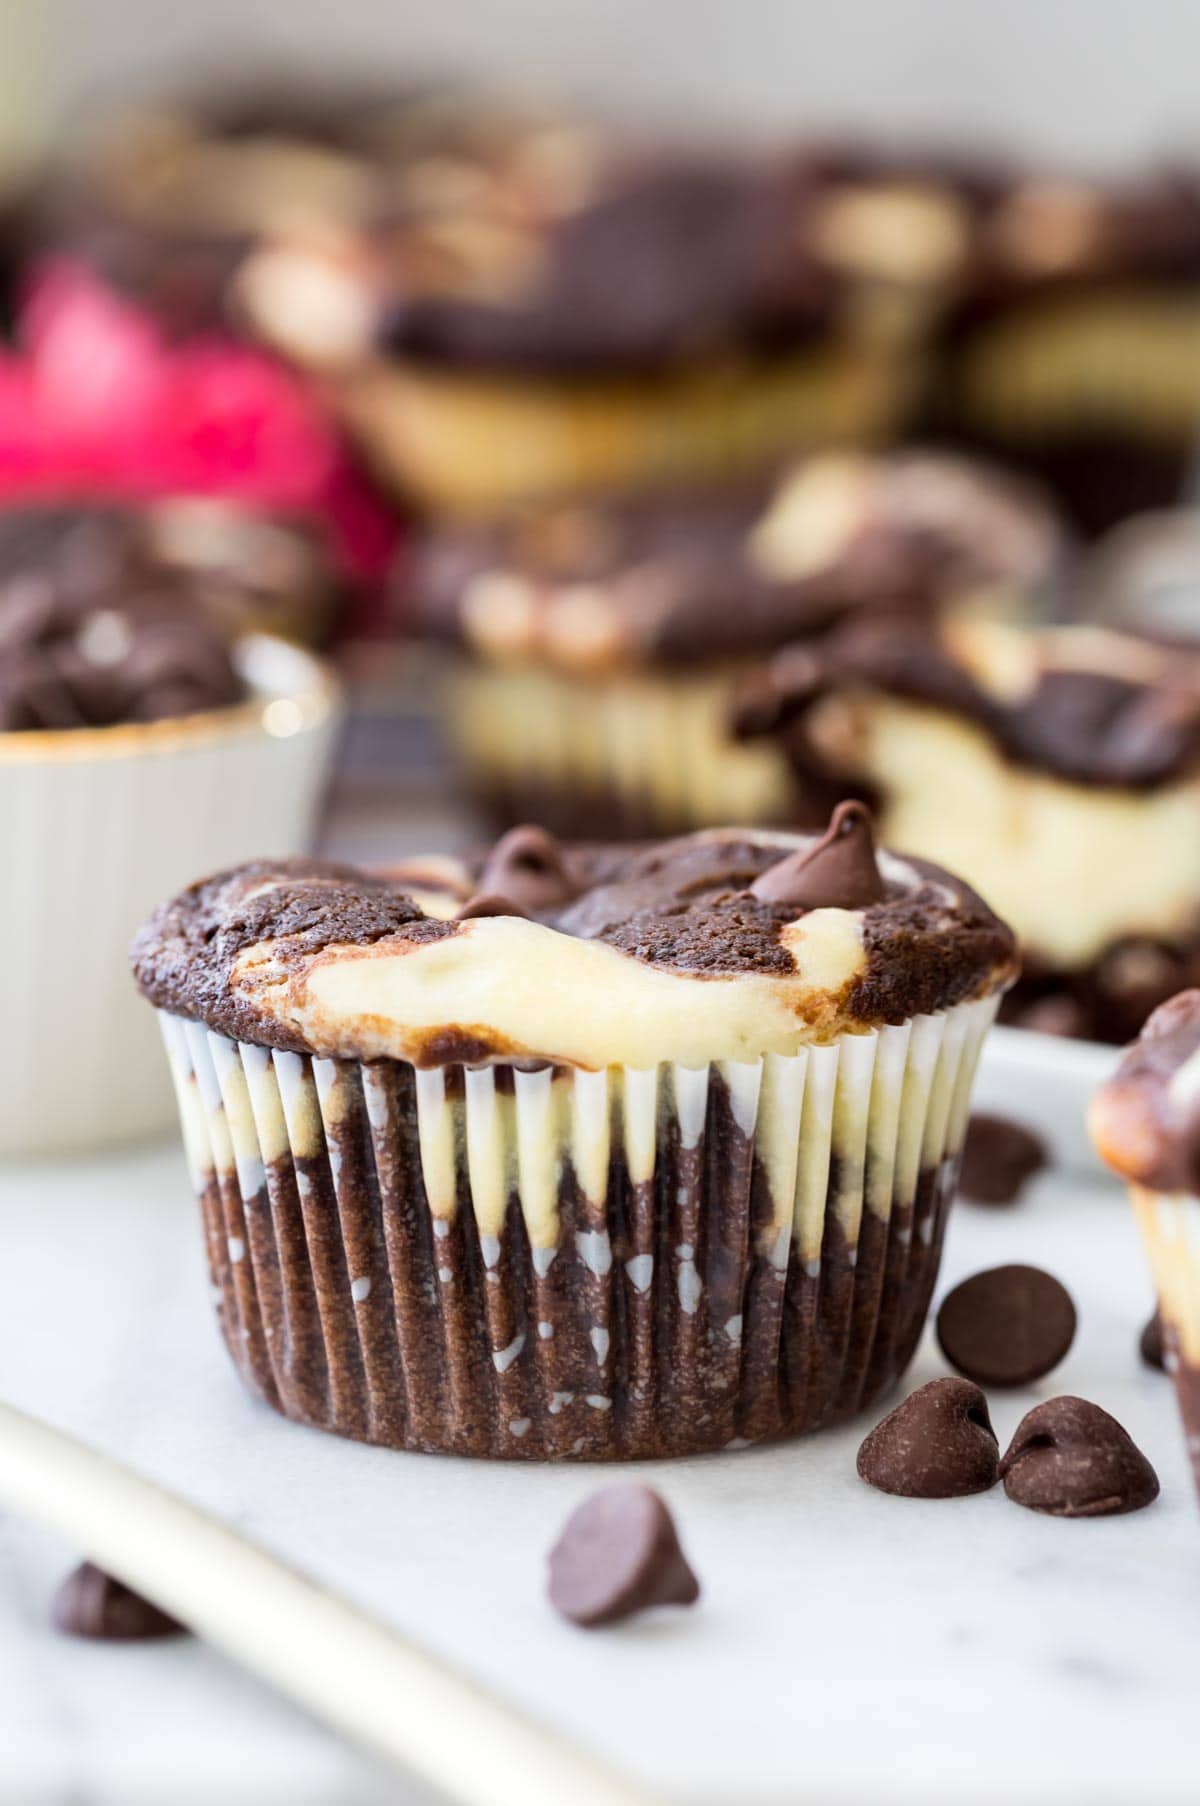
The Most Decadent Muffin
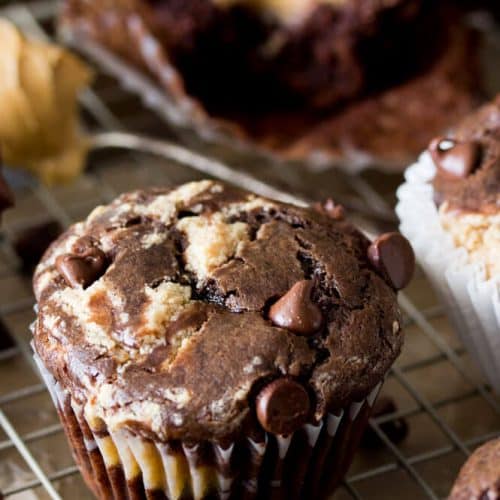
Today’s chocolate cheesecake muffin recipe is not for the faint of heart. Anyone who sees the above picture (or reads the title) and feels the urge to comment “too much sugar” or has a history of leaving scathing review regarding unhealthy breakfast habits… I think they’re going to want to sit this one out. On a level, I get it. This isn’t an everyday breakfast and we honestly usually save muffins for snacks here, this being perhaps the most indulgent of all. After all, it’s essentially a frosting-less chocolate cupcake stuffed with cheesecake! It’s similar to my black bottom cupcakes, only, even richer. For those of you who are here for the chocolate, the cheesecake, and the sugar, this one’s for you. Let’s get to it!
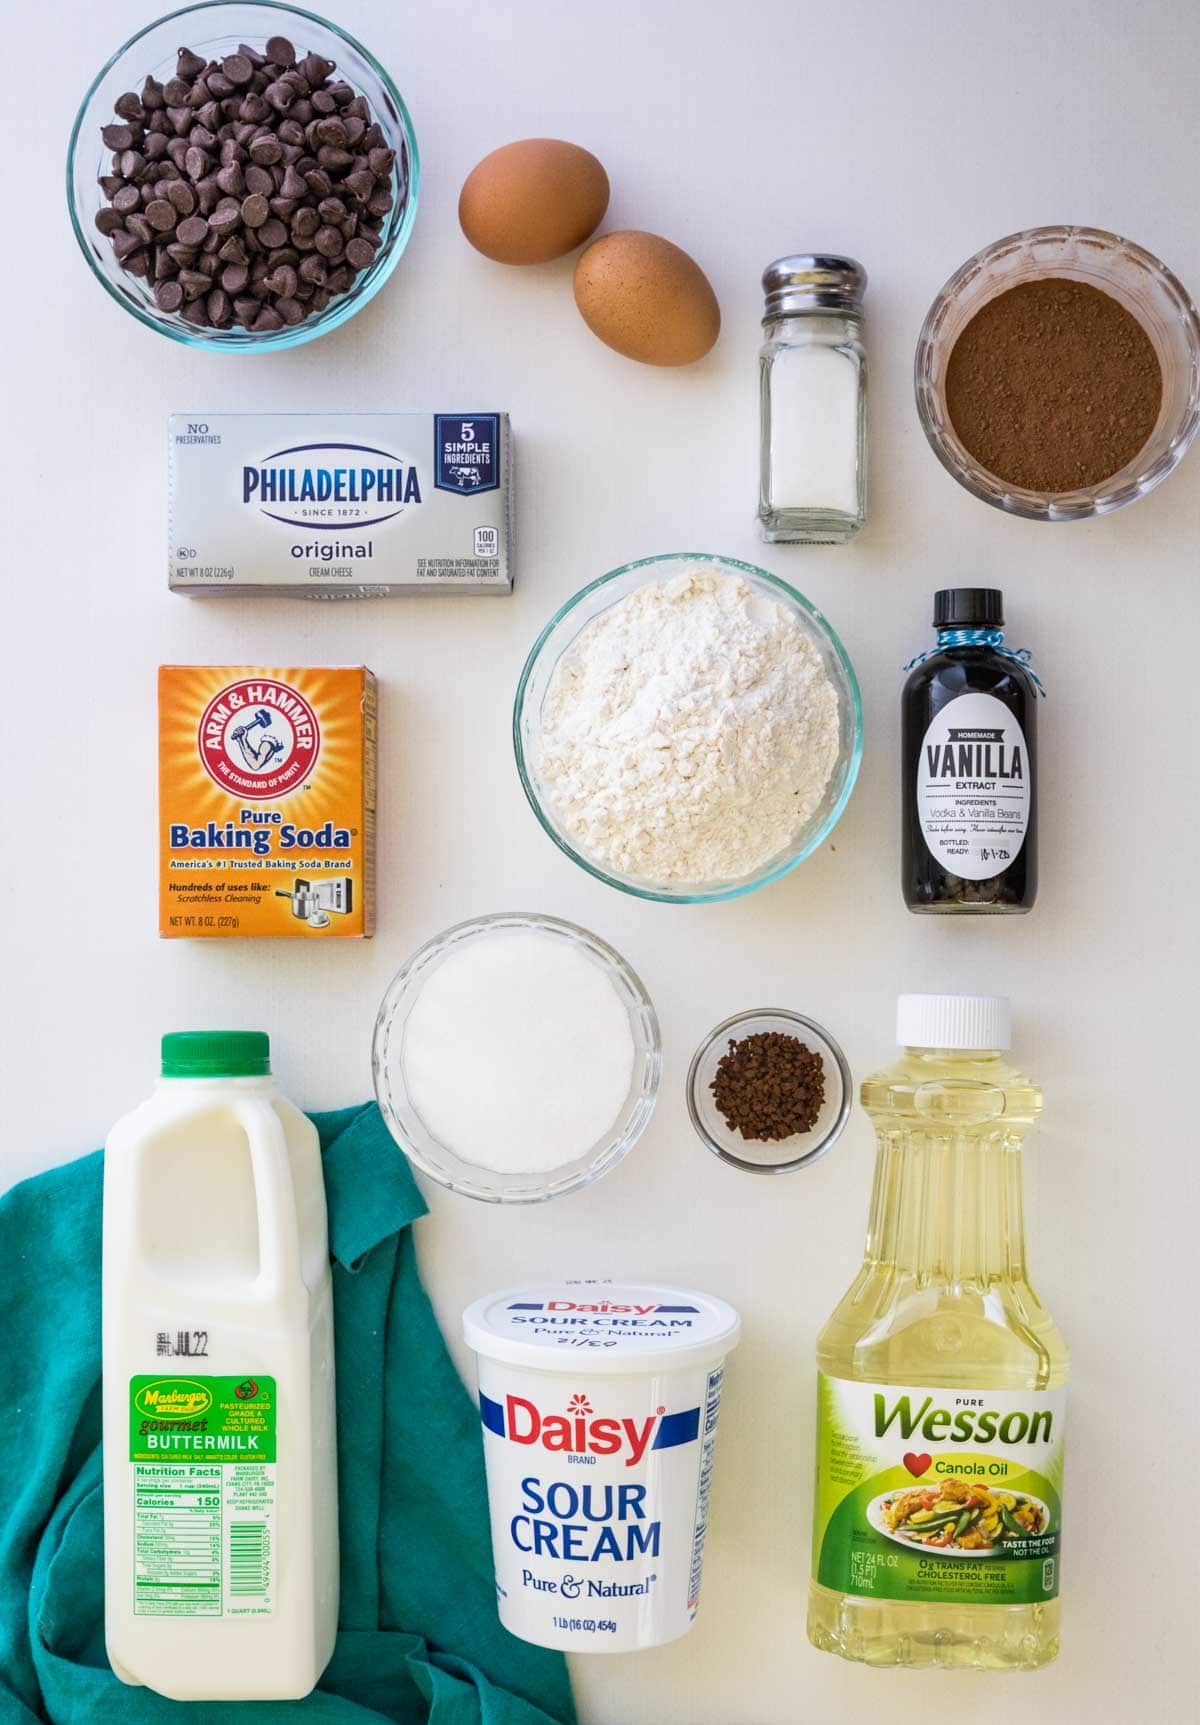
What You Need to Make Chocolate Cheesecake Muffins
Lots of ingredients you’re probably already familiar with, but let’s go over a few of the key players and why they’re so important to this recipe (and a few substitution notes).
Oil. Vegetable oil or canola oil will work. I have not tested this recipe with any other oil, but any neutral cooking oil should be fine. In many of my muffin recipes, I like to use a blend of butter and oil, but was very intentional about not doing that with this recipe. Because these muffins necessitate refrigeration (there is cheesecake in the center, after all!), I opted against butter. While butter adds a lovely flavor, you won’t notice it’s missing thanks to the rich chocolate and cheesecake flavors. Butter also has a tendency to dry out the crumb of cakes/cupcakes/muffins as it re-solidifies at cold temperatures (in the fridge) while oil does not, so by sticking with oil we ensure the crumb stays as tender and soft as is possible, even with refrigeration!Buttermilk. Real buttermilk is best for fullest flavor and the best texture, but in a pinch you can use my easy buttermilk substitute instead! Sour cream. This adds moisture to the muffins and gives them a tender, fluffy crumb. You’ll also need it in the cheesecake filling, where it adds flavor and keeps the cheesecake from being too sweet (otherwise it might taste like you were eating cream cheese frosting instead of cheesecake!).Baking soda. Unlike many of my recipes, this one is leavened with baking soda and no baking powder is needed. The baking soda reacts with the acidity of the buttermilk, sour cream and natural cocoa powder to give the muffins a lighter crumb. For this reason, I do not recommend substituting Dutch process cocoa powder (which is not acidic) for the natural cocoa powder that is called for.Instant coffee. This is optional, but I love using a pinch of instant coffee granules in my chocolate baked goods (in fact, it’s one of the secret ingredients that makes my chocolate cake so incredible!). It won’t make the muffins taste like coffee but it will intensify the rich chocolate flavor.
This is just an overview of some of the ingredients that I use and why I use them. For the full recipe please scroll down to the bottom of the post!
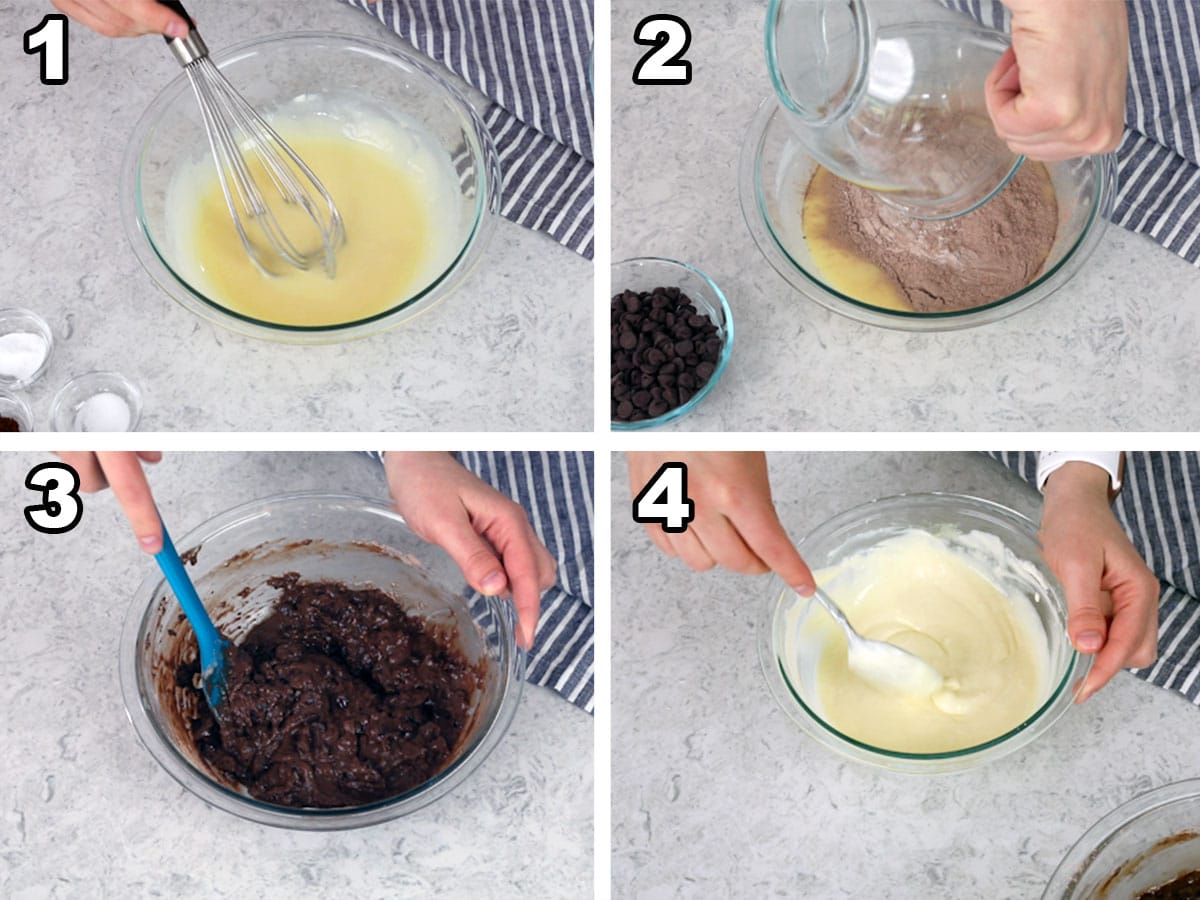
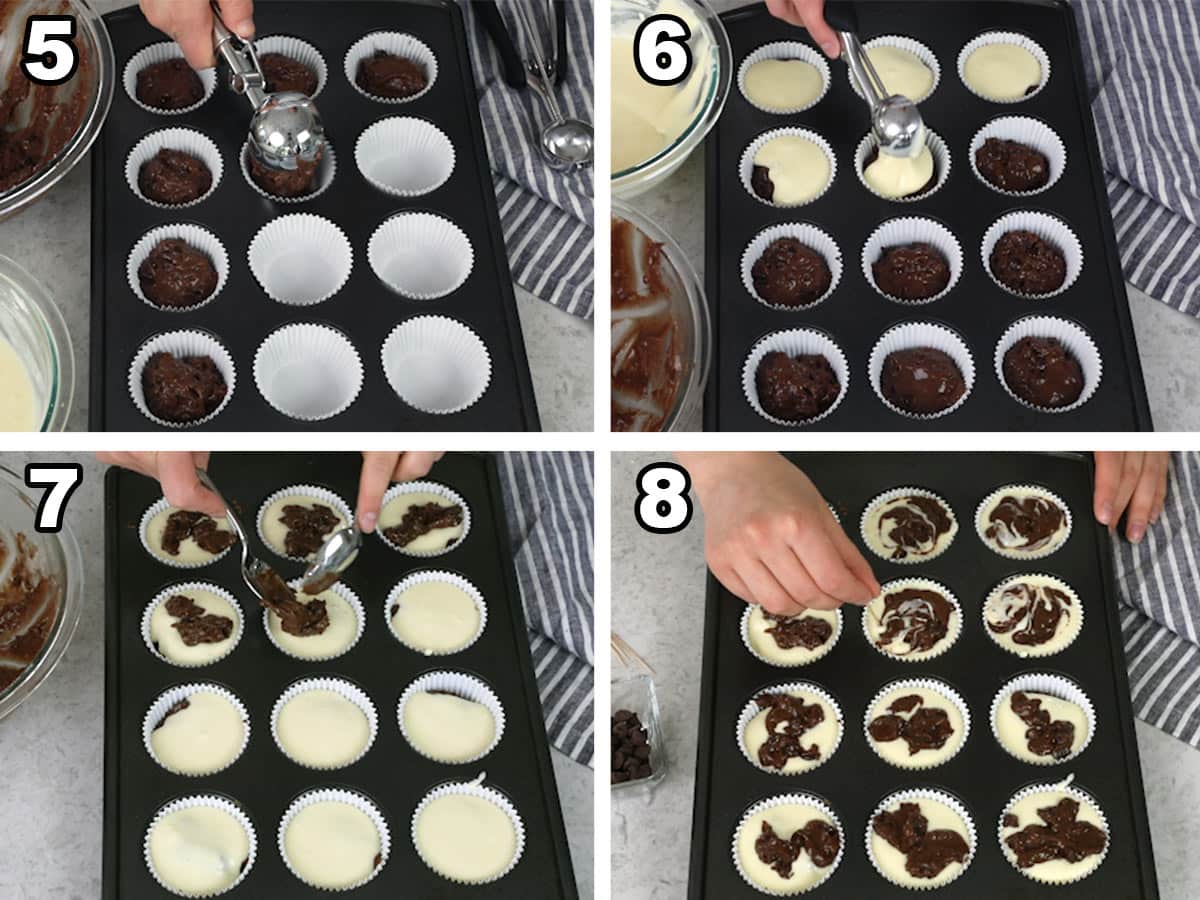
How to Make Chocolate Cheesecake Muffins
Assembling Chocolate Cheesecake Muffins
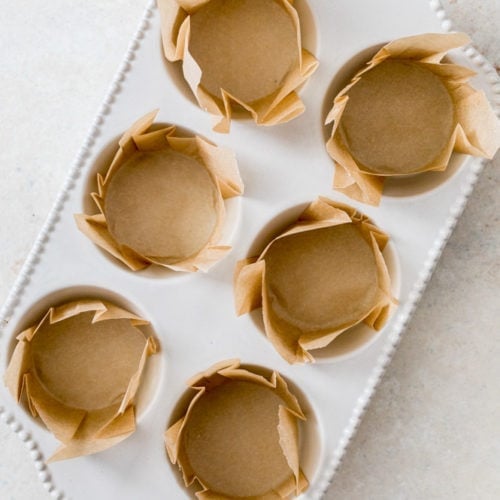
The muffins will need to bake for about 22 minutes. Immediately after baking they may appear puffed and rounded, but as they cool they will deflate and sink in on themselves a bit due to the heavy cheesecake filling. This might not look as pretty as rounded muffins, but it’s totally normal and we’re putting taste over beauty here (you won’t regret it when you bite in!). SAM’S TIP: I recommend using muffin liners rather than baking directly in the pan simply because this makes for easier cleanup, easier handling of the chocolate cheesecake muffins, and it helps hold everything in place better. If you don’t have liners, see my tutorial to make your own muffin liners with parchment paper.
More Recipes You Might Like:
Enjoy! Let’s bake together! I’ll be walking you through all the steps in my written recipe and video below! If you try this recipe, be sure to tag me on Instagram, and you can also find me on YouTube and Facebook! This recipe was originally published in August of 2016. I’ve since updated the photos, recipe (just slightly), and text and added a how-to video!