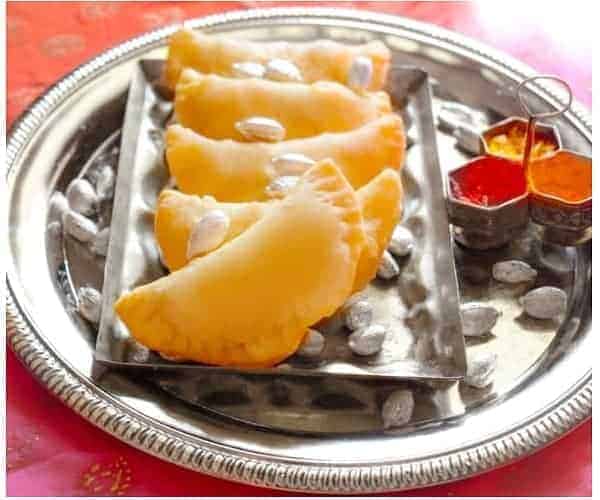
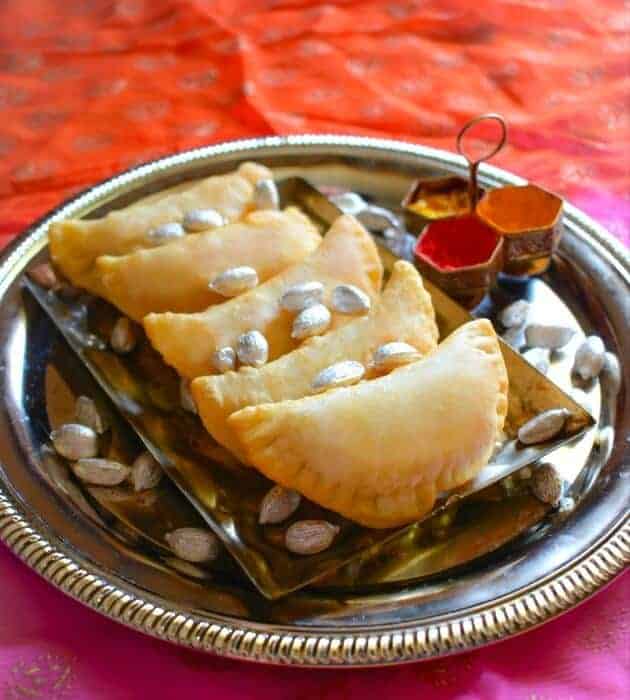
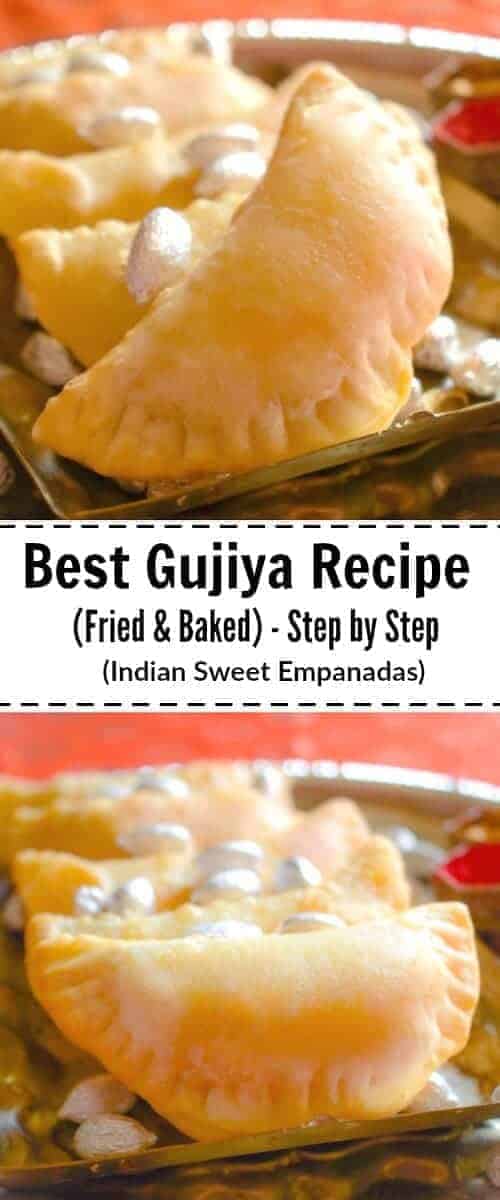
The festival of Holi is incomplete without my Best Gujiya Recipe that’s been passed on from generation to generation and my version talks about making them Fried, Baked or Air Fryer version (as per your choice).
WHAT IS GUJIYA / KARANJI ?
Gujia or Karanji is Indian dessert empanadas that are filled with sweet stuffing made of mawa (cottage cheese mix)/suji, coconut, dry fruit, and cardamom powder. It’s one of those traditional Indian dessert recipes that made with lots of love and patience – Yes, patience is the key factor. We have been making the fried version of this recipe ever since I could remember anything about cooking or making food. But as time changes and so does our health need or other circumstances hence I came up with these baked and now air fryer gujiya versions which to my surprise my parents love and enjoy the most. The baked/fryer version definitely gets done quickly and you can, of course, have more than 2-3 …. seriously you thought I would say 1-2 😉 I still remember when my grandmom used to visit us, we used to have tons of relatives/family friends come to our place and learn traditional Indian dish or two from her. And, if it was Holi (the Festival of Color) then I would see her and mom prepare tons of these fried gujiya atleast a week before the festival….they literally made 100’s of them. Then they were wrapped in cute little jute baskets with colorful clothing and sent over to people’s house for Holi or were given to visitors at our place. I did use to try my best to help them by either filling the stuffing or pinching the ends of the gujiya with a fork to make that cute design.
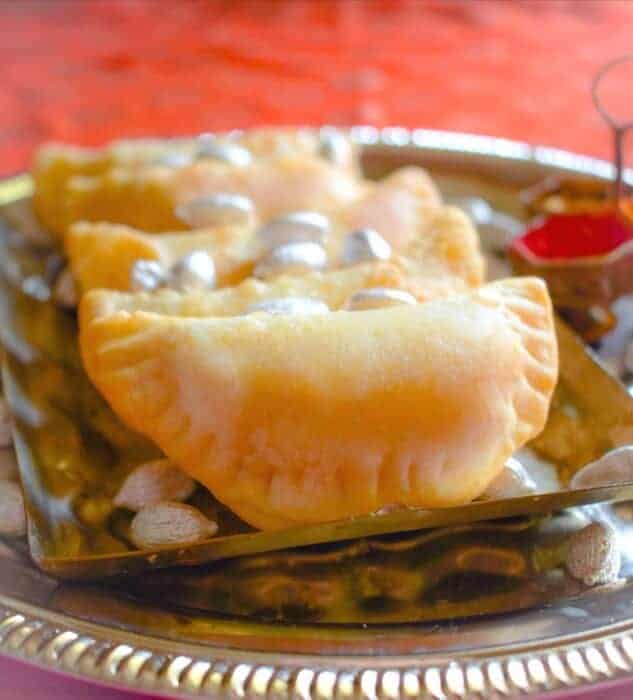
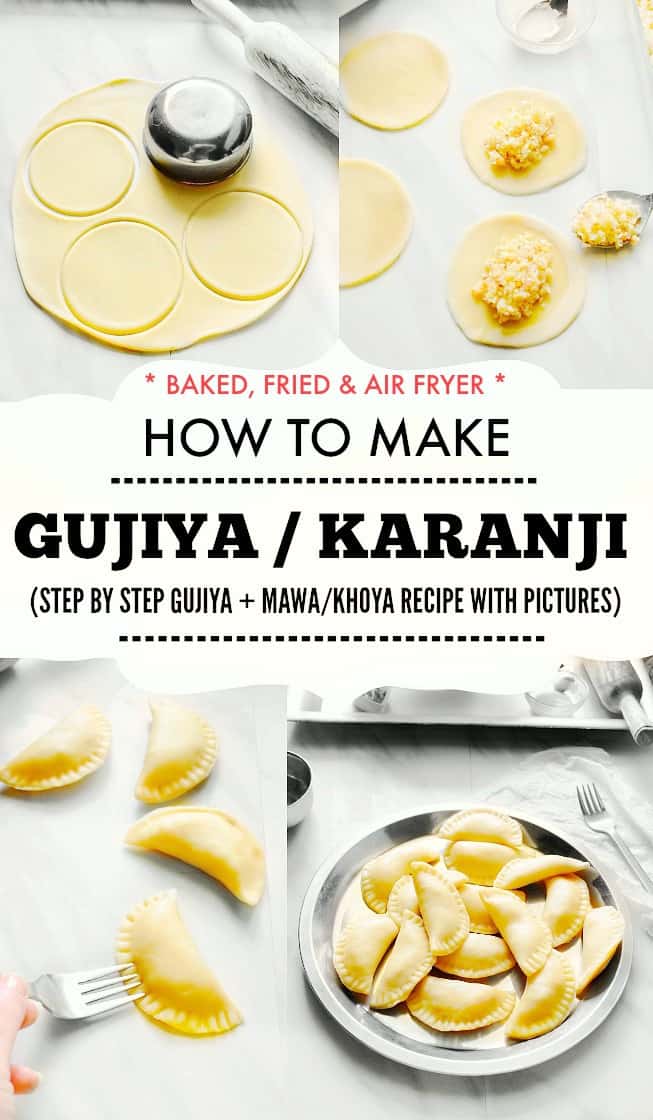
Now, as I mentioned above, this post is all about making that perfectly shaped gujiya or Indian Sweet Empanadas and I would elaborate the process step by step with pictures. Although the recipe is very simple or basic to making any pie crust dough, it still has these few nitty-gritty points. Which when missed results in sometimes undercooked/overcooked, blotchy or weird looking ones. A perfectly made gujiya would be ‘ Smooth, Shiny and Almost flakey to touch’ and the filling needs to be slightly coarse in texture, properly filled, so that the gujiya doesn’t burst while frying. I’m diving the Gujiya Process into 4 Parts: Make the Dough Prepare the Filling Shaping the Gujiya Stuff and Fry/Bake / Air Fry the Gujiya
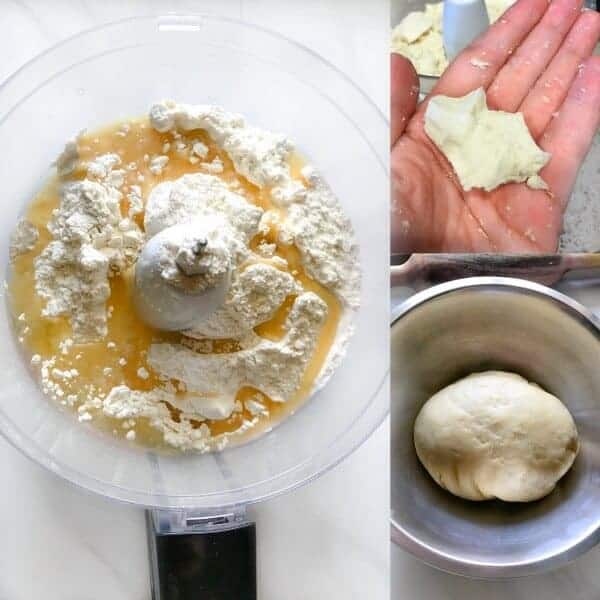
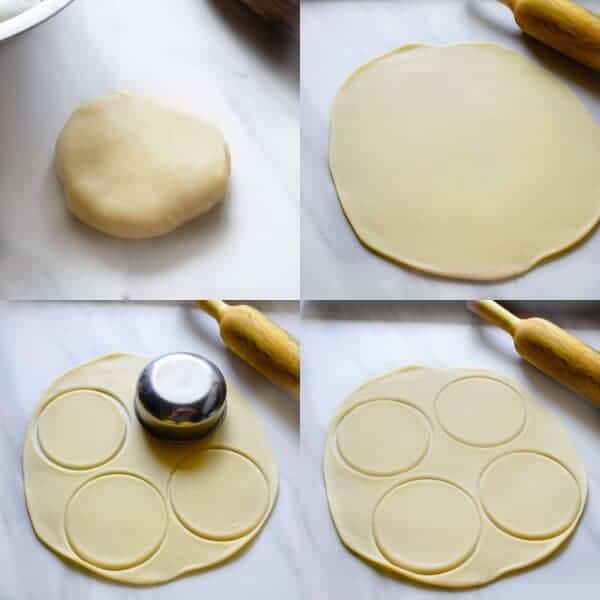
HOW TO MAKE GUJIYA DOUGH
This is the MOST Important step in the whole process cause if your dough is not stiff enough or not kneaded well, you’ll end up with blotchy/moist crust. To make a stiff dough, here’s what we do:
- Add enough oil to the flour mix, so that if you try making a ball in your hand, it binds well. (pic above).
- Add the chilled water.
- Make the dough in a food processor or dough machine as it kneads it to perfection.
- Cover the dough with a slightly moist cloth/kitchen towel to keep it from becoming too stiff.
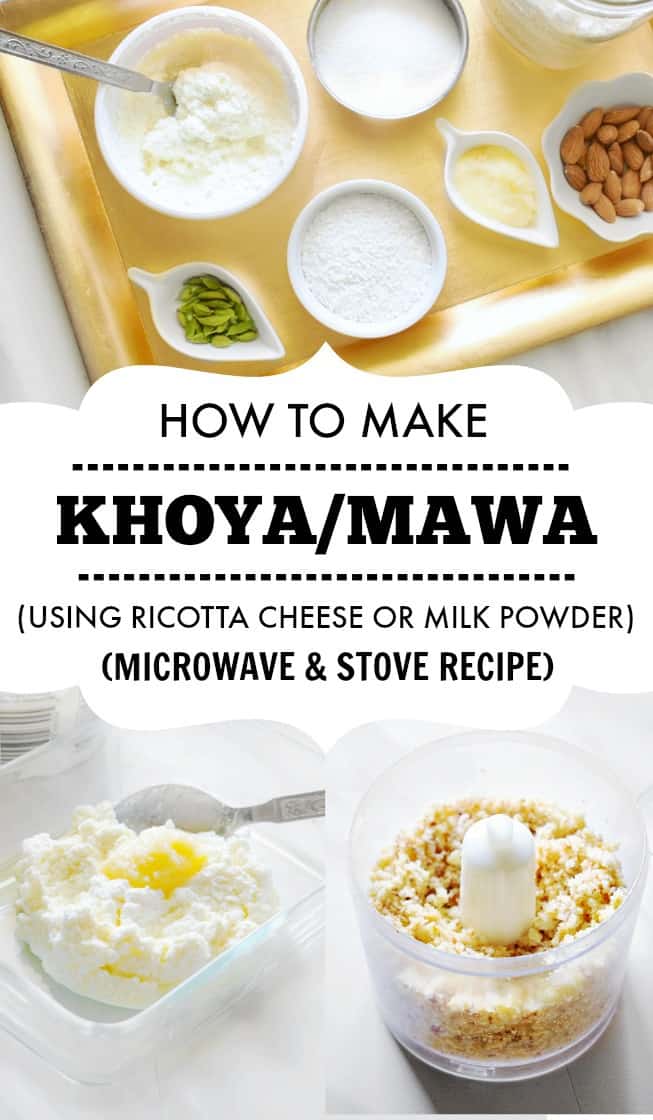
HOW TO MAKE KHOYA /MAWA
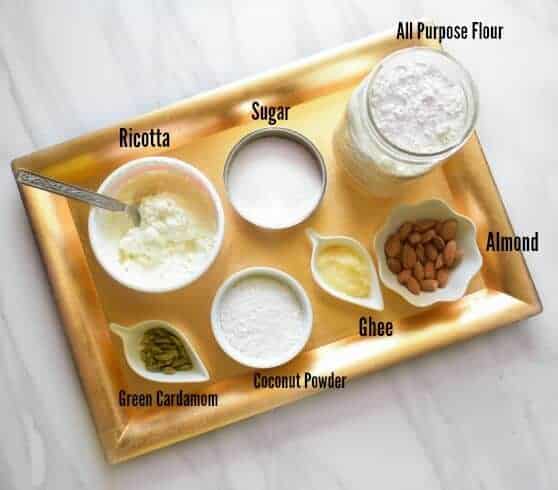
The traditional gujiya or Indian Empanadas are filled using khoya / mawa (thick milk mixture), sugar, dry fruits, green cardamom, and coconut.
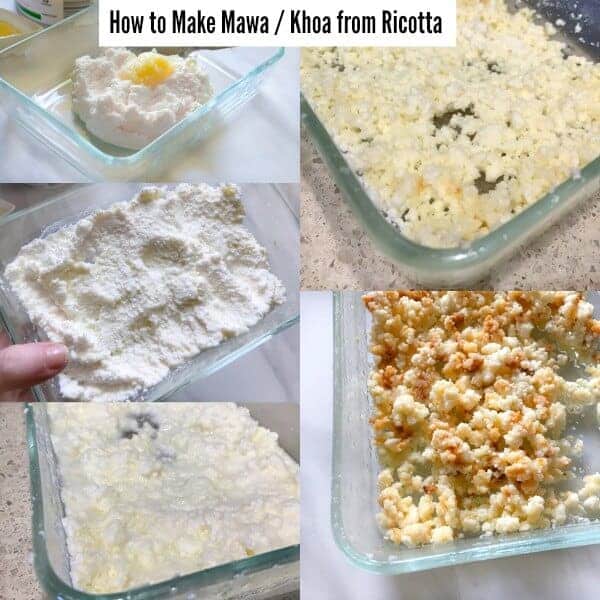
MAKING KHOYA / MAWA USING RICOTTA CHEESE
1 Cup Ricotta Cheese 5 Tbsp Ghee For this particular recipe, I’ve made khoya from ricotta cheese and it is really easy to make in the microwave
Mix ricotta and ghee in a bowl and microwave covered for 1:45 minutes. Remove and stir the mix. Place in the microwave again for 2 minutes. Remove and stir the mix. Place in microwave for 1:20 minutes. Remove and stir (the mix will be golden-medium brown in color and coarse) Cool the khoya. In a small blender, add almonds, green cardamom, and coconut. Blend to form a coarse mixture. Add the cooled khoya and blend to form a thick mix.
MAKING KHOYA / MAWA USING MILK POWDER
1 Cup Milk Powder 1/4 Cup Milk + 2 Tbsp 2 Tbsp Ghee
Heat ghee in a pan. Once the ghee is melted add milk and bring the mixture to a boil. Add milk powder and whisk to mix everything into a smooth thick paste (no lumps) Let this cool for 5-6 minutes (it will solidify after a few minutes). Khoya is ready to use.
Remember these 2 Things and they both are as per taste:
- You can either use a slightly sauteed khoya for the filling.
- You can roast the khoya with some ghee to brown it slightly more.
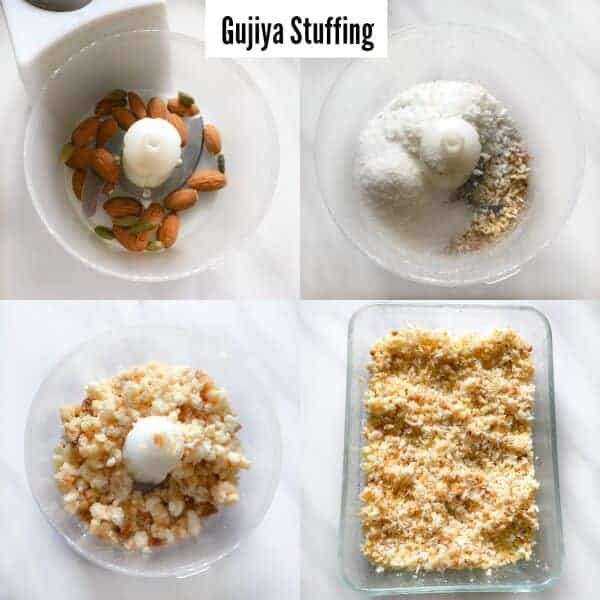
Once your khoya/mawa is ready, you just pulse dry fruits (almonds), sugar, green cardamom, coconut powder and khoya in a blender to crumble everything together. This mixture can be prepared and kept in the fridge for 2-3 days.
SHAPING THE GUJIYA
This is the easiest step in the whole process. All you need is a round cutter or use a medium-size bowl with slightly sharp ends.
Just roll the dough on a slab (slightly thick), then place the bowl upside down (shown in the pic above) and make circular shapes. Remove the shapes and mix the extra cuttings back into the main dough. Similarly, make all the circular shape and place them on a moist towel. If you want to further shorten this process, you can buy any of those gujiya shaped tools.
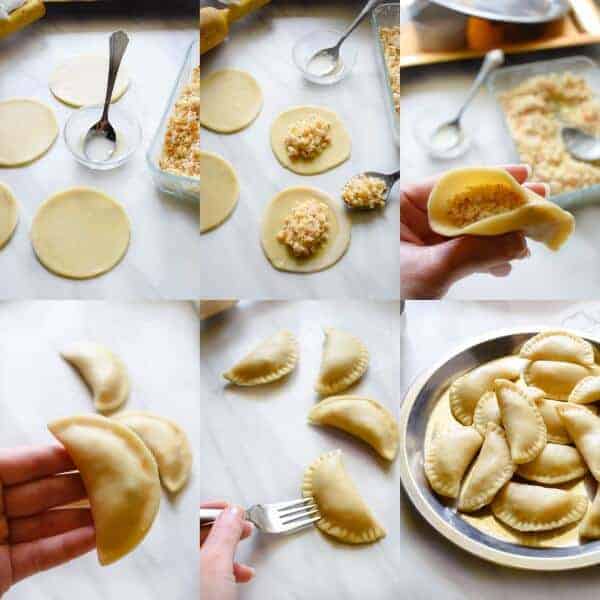
STUFFING THE GUJIYA
You need to make a mix of flour+water to seal the ends of gujiya before you start stuffing them. Then take the disc to fill the stuffing and close the ends properly, seal the edges and crimp the edges using a fork. This step is very very important so that the gujiya don’t open/burst while frying
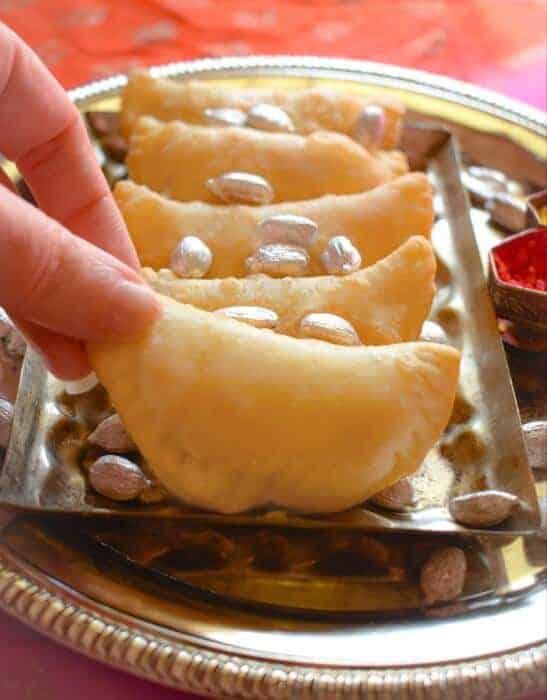
FRIED GUJIYA
This is the last step and fairly easy, all you have to remember are these few points:
Always fry the gujiya in low to medium flame for an evenly fried version. Don’t overcrowd the frying pan, I usually use a big pan and add only 3-4 gujiya at a time. Don’t press the gujiya while frying or they’ll break and the filling will mix in the oil resulting in a splattered mess. Always keep the fried gujiya on a kitchen towel for few seconds to soak up any excess oil and let the gujiya firm up in the air.
BAKED GUJIYA
For this step, you just need to line the baking sheet with some parchment paper. Brush the gujiya with a oil+flour mixture. Bake for 15 minutes.
AIR FRYER GUJIYA
Preheat the Air Fryer for 3 minutes at 180 C Place the uncooked gujiya in the fryer basket and brush with some oil/butter. Close the basket and Ait Fry for 10 minutes. Once air fryed, remove from the basket and serve immediately.
So, here are all the steps to make the Best Gujiya Recipe (Fried and Baked) for your loved ones. Enjoy the Festival of Colors with your friends/family and wish you lots of love. DID YOU TRY MY RECIPE – AWESOME!!! TAG : #easycookingwithmolly + @easycookingwithmolly on Instagram Connect with Me Here: Facebook / Pinterest / Instagram
Instant Coconut Ladoo | 3 Ingredients & Ready in 10 Minutes
How to Make Instant Malpua | Step by Step Recipe
Instant Pot Kheer Recipe (Indian Rice Pudding)
Microwave Besan Ladoo (4 Ingredients) Chickpea Dessert Fudge
Easy Besan Barfi – Step by Step Besan ki Barfi Recipe
Vegetable Oil - you can use any light oil like canola, olive, sunflower, etc