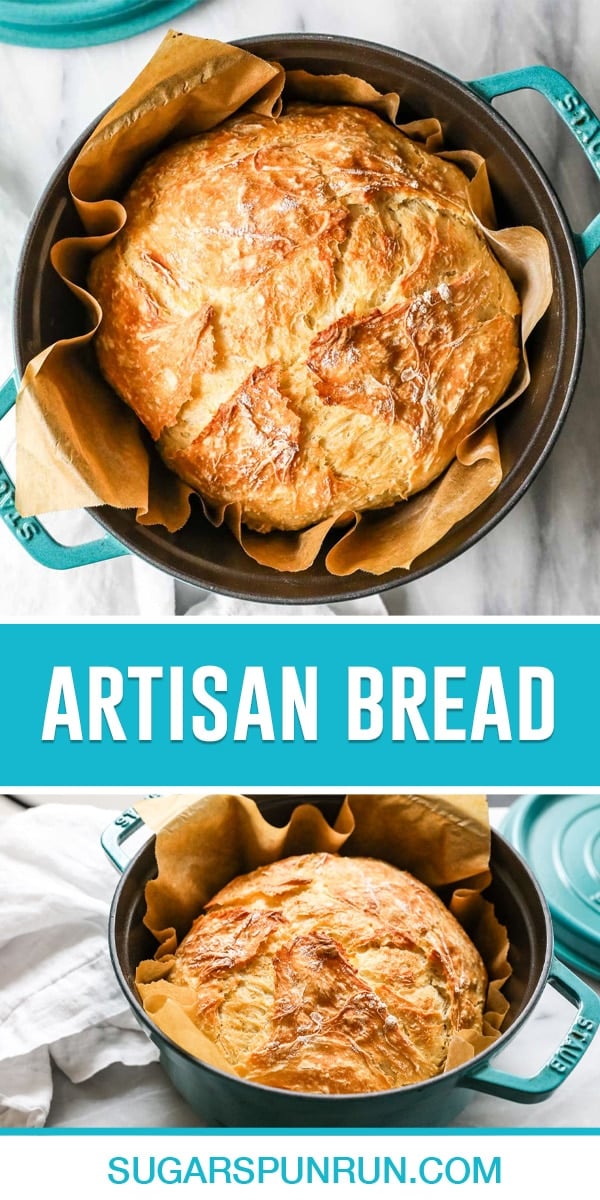
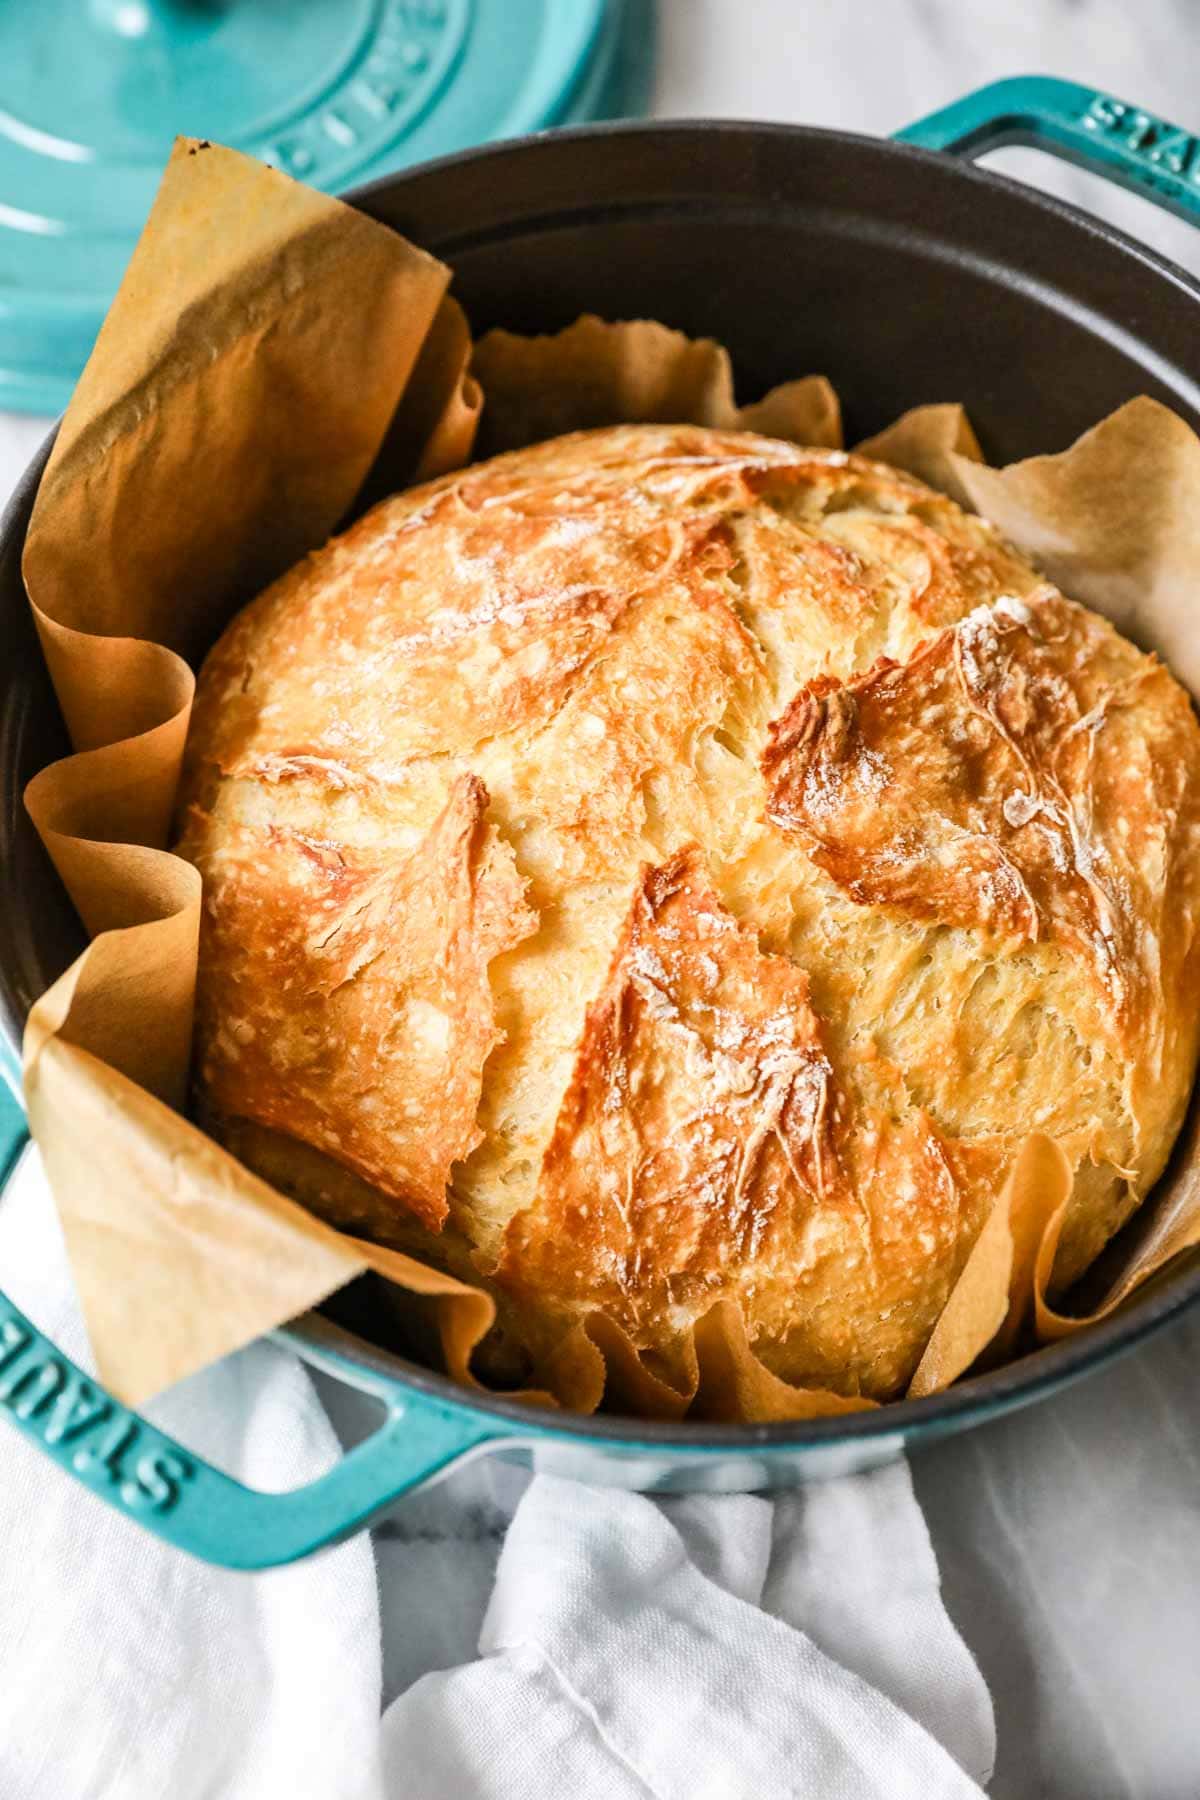
My Favorite Artisan Bread
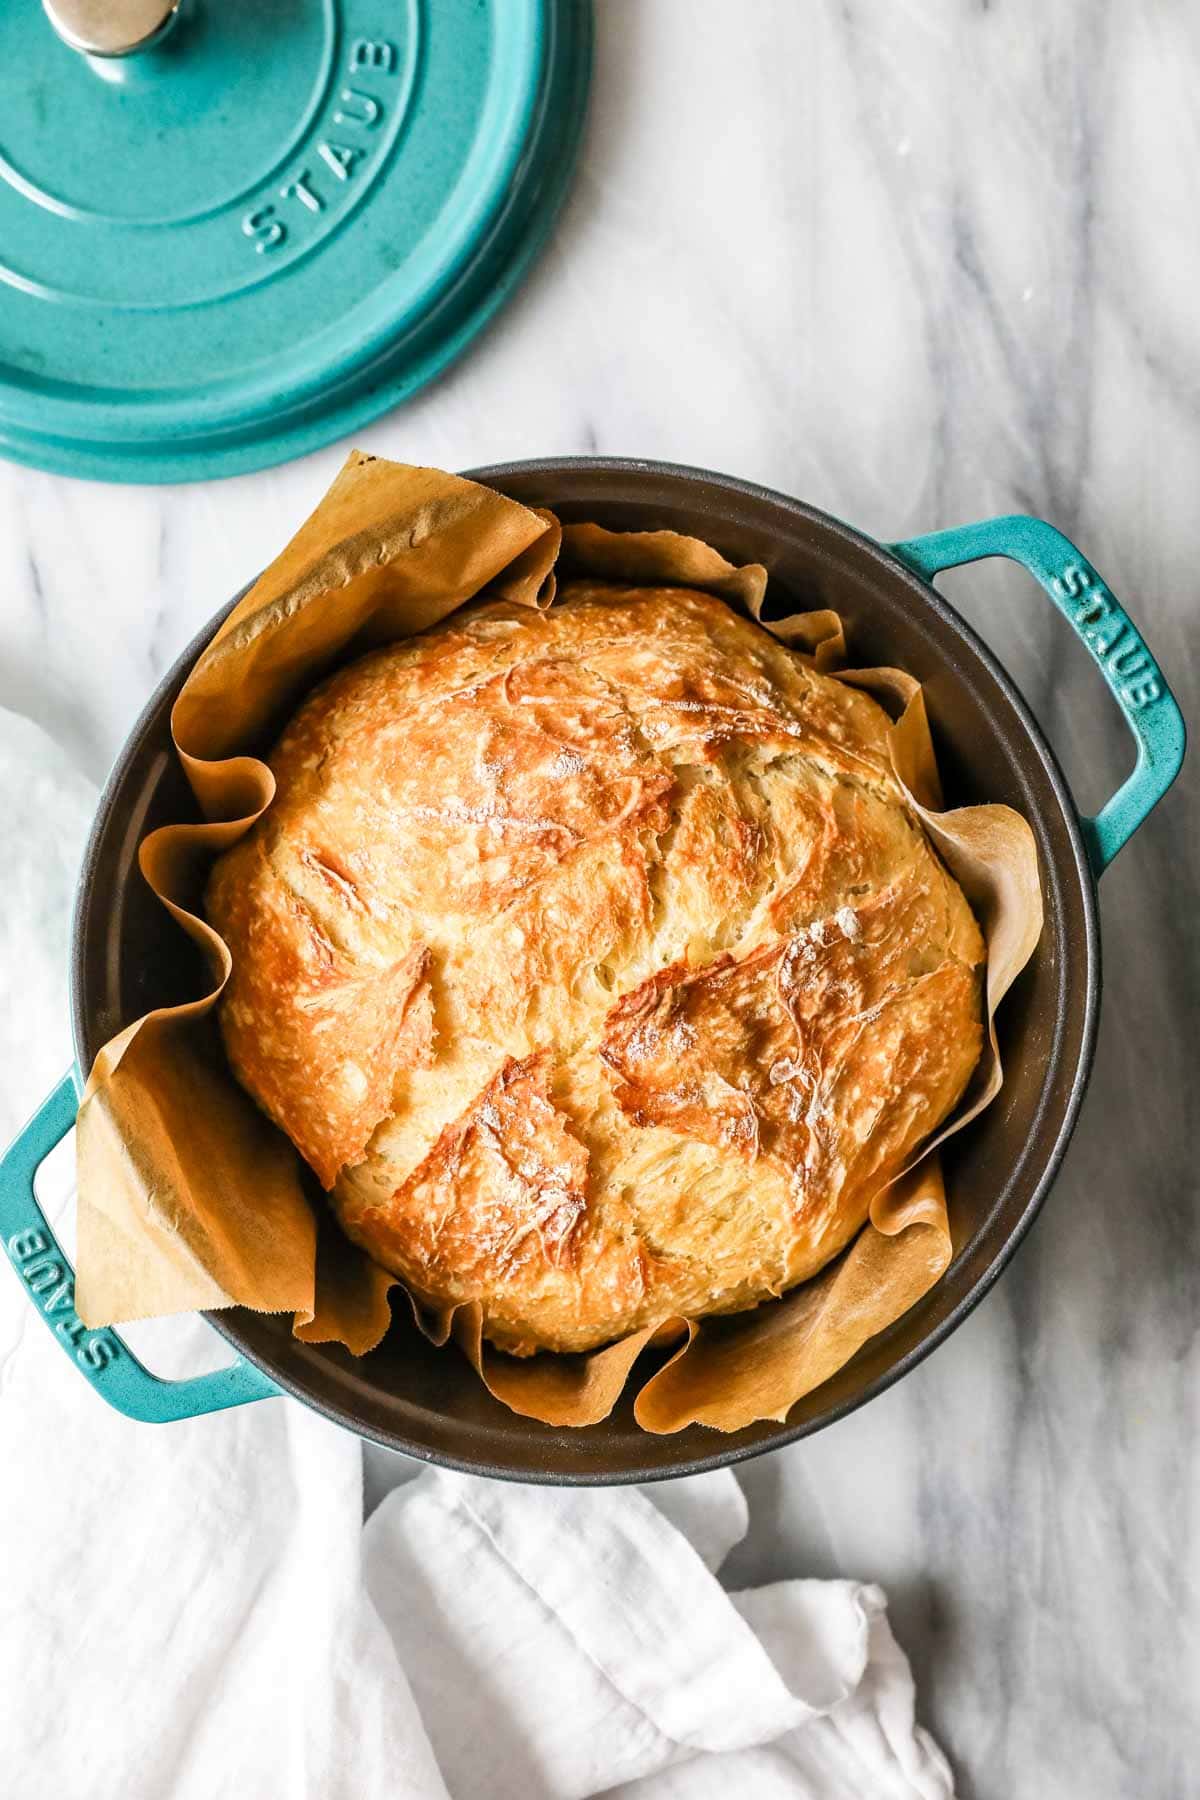
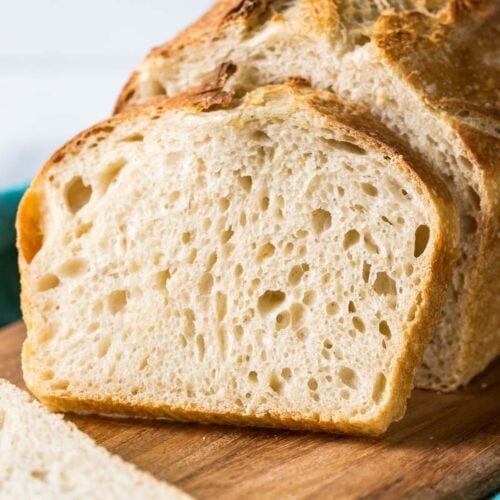
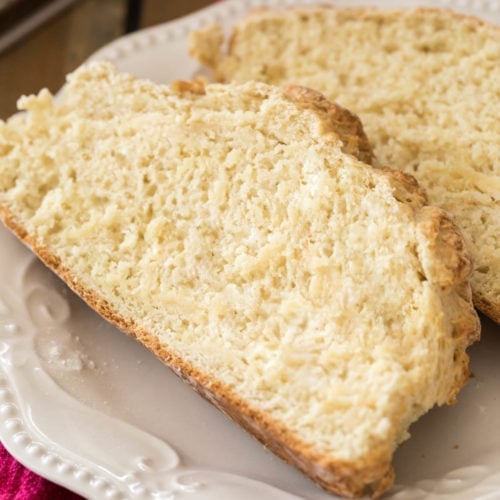
Today I’m sharing an amazingly simple and EASY recipe for artisan bread. It has the same great flavor and texture we all love about this type of bread, but is incredibly simple to make. I’m talking mere minutes of hands-on time! Not to be confused with your average sandwich bread, artisan bread is the rustic and hearty type best saved for dipping in soups (though it tastes great on its own or slathered with honey butter). It has a thick, chewy crust and a soft interior. The crumb is slightly moist and chewy, and it often has large air pockets, especially if you let it ferment overnight in the fridge.
Why You’ll Love This Recipe
Choice of two preparation methods; either let the dough rise at room temperature for a few hours, or let it rise overnight in the fridge (and you can do this right after preparing–no need to let it rise on the counter first). Some people say the bread tastes better after a night in the fridge, and while I find this to be true for my sourdough bread, I personally don’t feel like it makes a huge difference. Pairs well with so many dishes, from beef stew and shepherd’s pie to garlic butter shrimp and broccoli cheddar soup. Naturally egg-free and dairy-free, and you can even make it sugar-free if you choose to omit the sugar. Bake in a variety of vessels! A Dutch oven is best for baking artisan bread, but I know not everyone has one. To make this recipe accessible to everyone, I included options for baking in different pots/pans in the recipe notes.
And don’t forget–this recipe is EASY! While there’s some substantial time required for the bread to rise, that’s all hands-off and there’s less than a half hour of actual hands-on time required.
What You Need
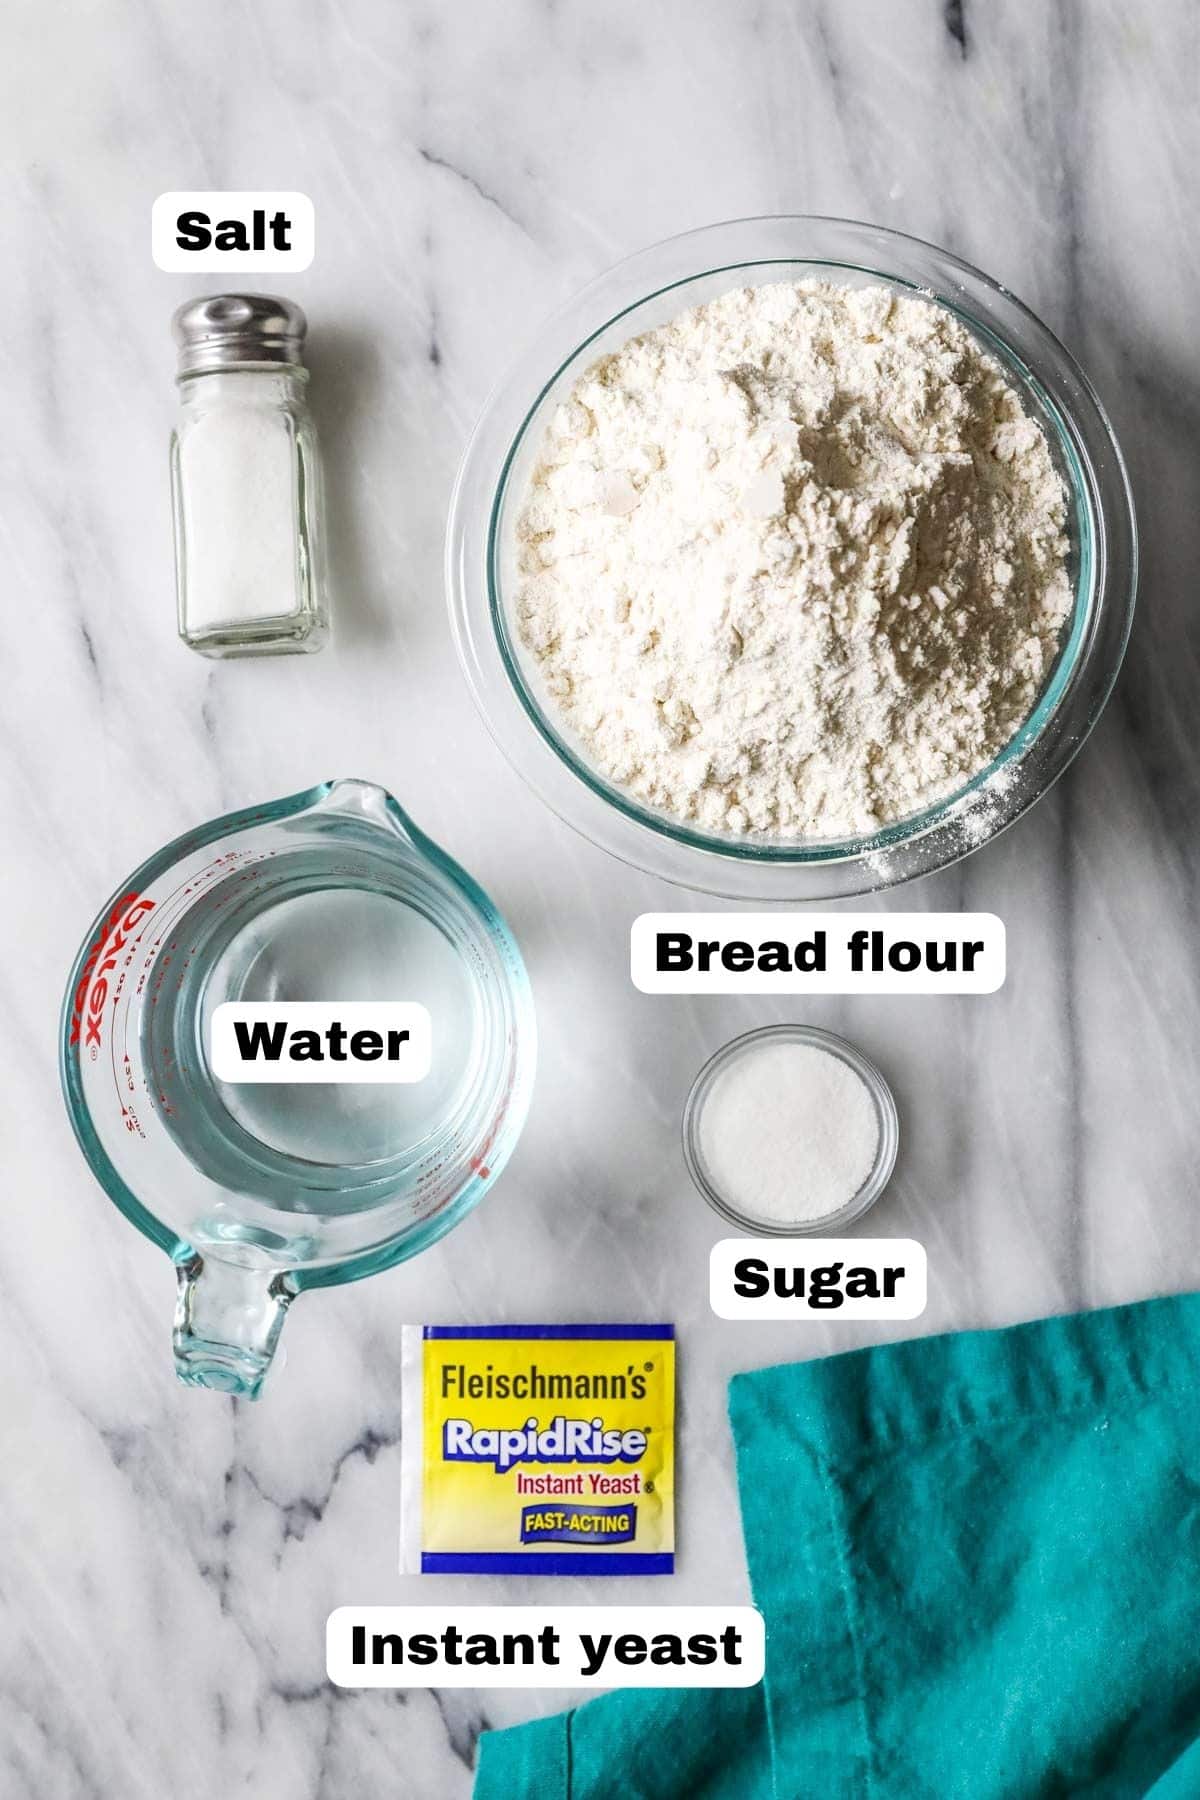
With so few ingredients (only five!), it’s very important that each one you add be high quality. Here’s what you need to make my homemade artisan bread!
Bread flour. Using a bread flour will yield a nicer final result, since bread flour contains more protein than regular all-purpose flour. You will need 3 ½ cups for the bread itself, plus more for dusting your work surface. In a pinch, you could substitute an equal amount of all-purpose flour. Yeast. Use instant or rapid rise yeast and make sure it’s fresh and not expired before you get started. Warm water. Make sure your water is 115F; if it’s too hot, it could kill your yeast, and if it’s too cold, your yeast might not activate. Sugar. This is optional and your bread will be fine without it, but I like to add the sugar because it helps the yeast and also adds a slight subtle depth of flavor (but not sweetness) to the bread. Salt. For flavor, of course! Regular table salt works just fine here.
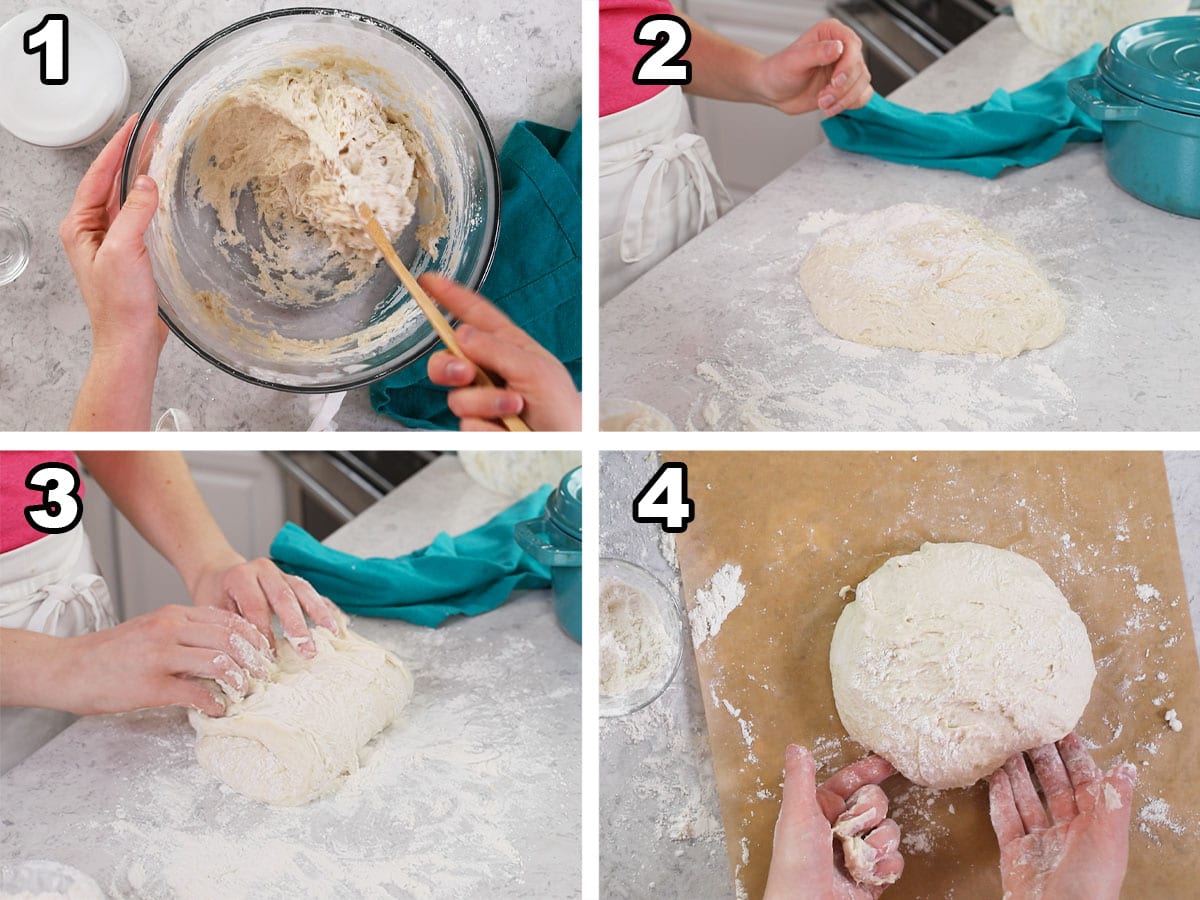
SAM’S TIP: It’s very normal if your dough is sticky, as this is a high hydration dough. Don’t be afraid to be generous with the flour on your work surface and on your hands to make the dough easier to handle. This is just an overview of the ingredients I used and why. For the full recipe please scroll down to the bottom of the post!
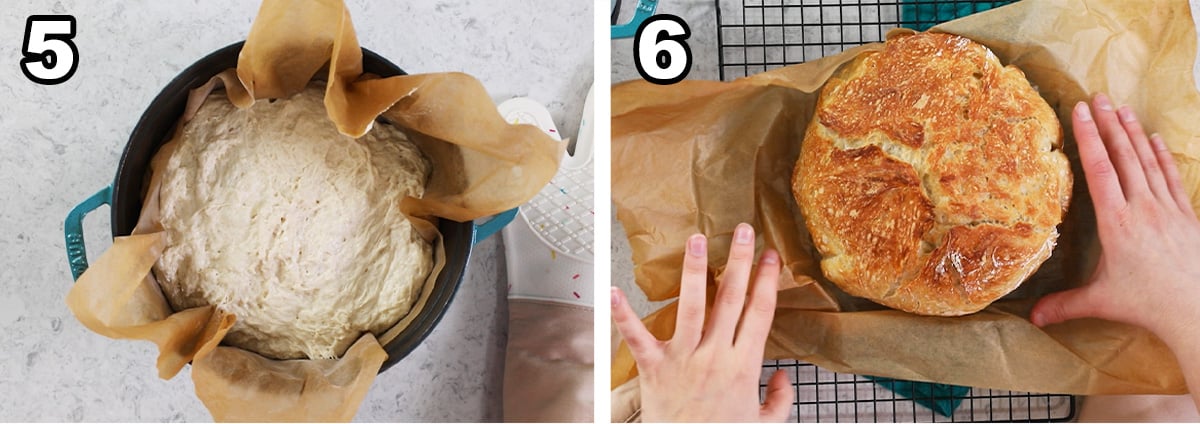
How to Make Artisan Bread
SAM’S TIP: If you are using one, place your dutch oven in your oven while it preheats. This will create an ideal baking environment for your bread. Note that you need to be careful handling the pot and lid after it comes out of the oven–it will be very hot! What other bread recipes would you like to see this year? Let me know in the comments below! Enjoy! Let’s bake together! Subscribe to my newsletter to be notified of all the newest recipes, and find my free recipe tutorials on YouTube 💜
Related Recipes